Managing your sales pipeline is important because it allows you to have a clear view of the current status of potential deals and prioritize your efforts effectively. Keeping track of customer interactions with the Activity Manager will help ensure no potential sales slip through the crack and that your team is focusing on the most promising opportunities.
What is an Activity?
An activity can be a variety of different things
| Task | A task in the sales process that needs to be assigned to any member of the team. |
| Meeting | An future upcoming meeting schedule with a client |
| Call | A follow-up phone call to a client |
| Email/SMS | Reminder to send a client an email or text in the future |
| Other | Any item of importance that needs to be followed up by any member of the team |
The first activity in any Sales Folder is automatically generated by the system and will have the subject line of Sales Folder Created.

Marking an Activity as Done
The first step to managing activities is to make any outstanding activity as Done. This is the best way to keep track of whether an activity has been completed or not.
An activity displayed in red writing indicates that it has not been completed.
Hovering over the Activity line will display the Mark as Done button. This button is helpful if there are multiple activities displayed in red and need to be marked as done.

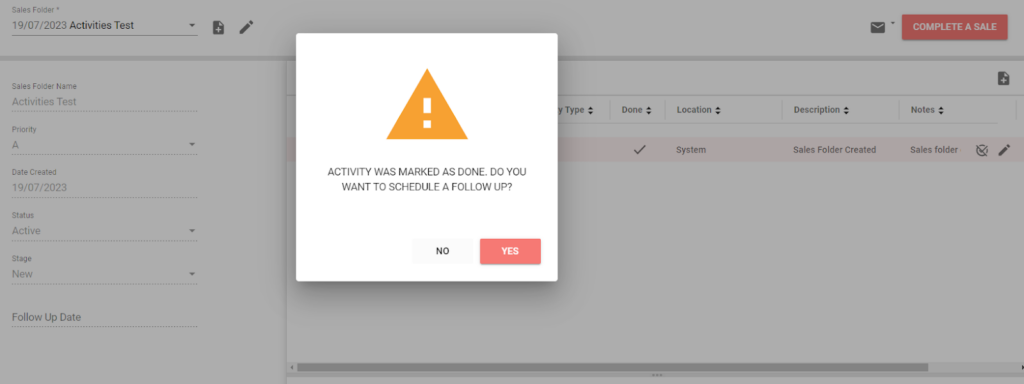
Clicking on the Mark as Done button will prompt the user to schedule the next follow up. Clicking Yes will open a new Activity.
Create an Activity
Activities can be created or edited from various areas of the software.
These include:
- Sales Folder
- Details & Communications Tab
- Leads Board Card
- Leads List
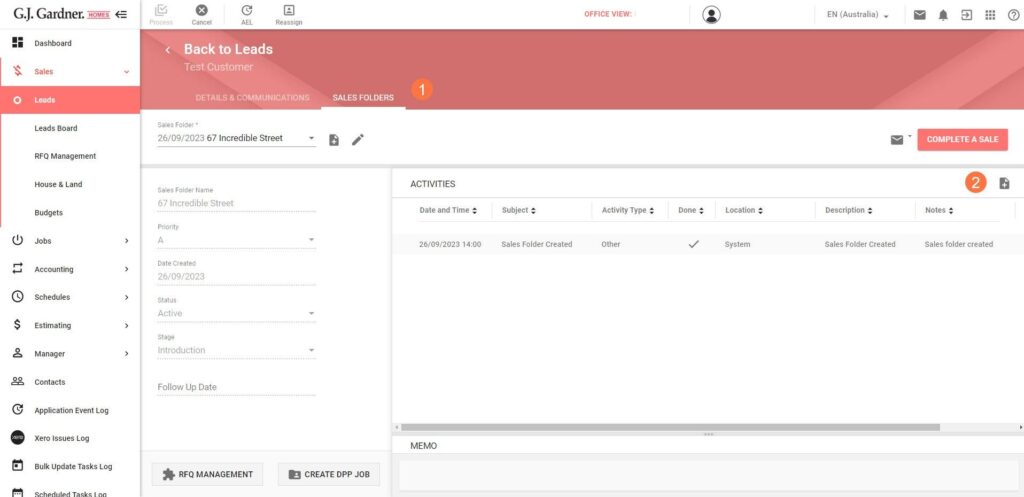
Create an Activity from the Sales Folder
- Navigate to the Sales Folder
- Click on the Create button.
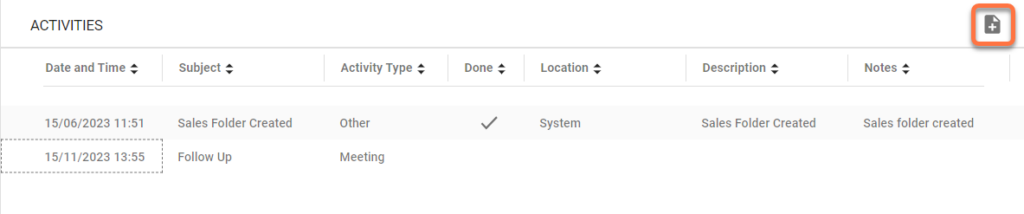
The information entered into the Create New Activity window be transfer directly to the Activity line.
Information contained in the activity includes:
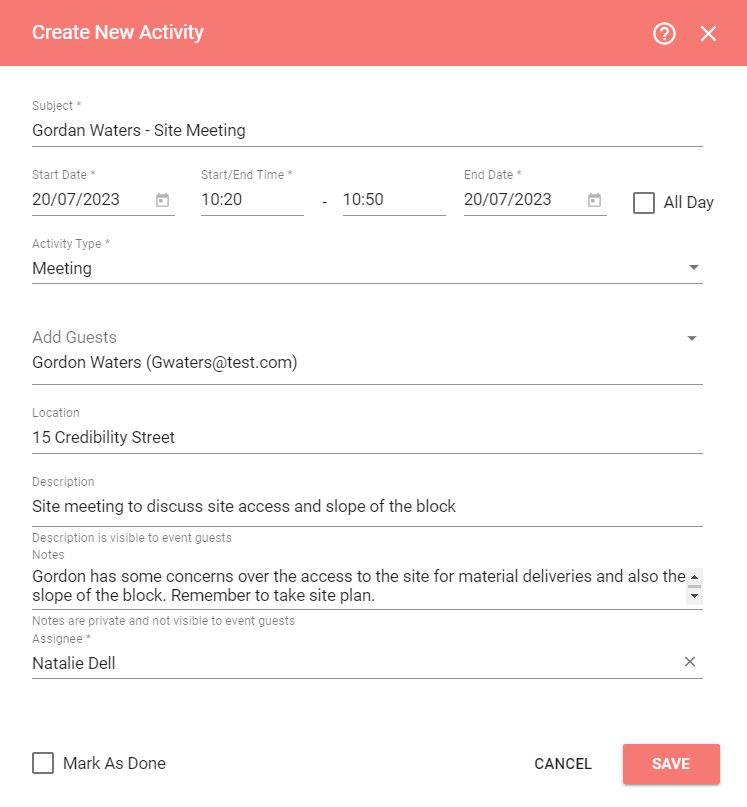
| Subject * | The subject text is created from the subject line of a new activity |
| Date and Time * | The date and time that the activity is scheduled for. |
| Activity Type * | Activity type is selected from the drop down menu. Only options visible are available to select. |
| Add Guests | Adding guests to the activity will send them a email and calendar notification. It is possible to add multiple guests by clicking on the drop down arrow and selecting. |
| Location | The location or address of the meeting (if applicable) |
| Description | Description is available to any guests. 160 characters are available in this field. |
| Notes | Notes are private and not visible to any guests. 1,000 characters are available in this field. |
| Assignee * | Is the team member the Activity is assigned to |
| Mark As Done | Check this box when the Activity has been completed. |

View Activities
Every Activity that is created can be viewed or have edits made from various areas of the software including
- Sales Folder
- Communications
- Leads Card (Access only to last Activity)
Activities – Meetings
Record Meetings to track interactions with clients and subcontractors. When a Meeting is scheduled a Google Calendar invitation is sent to the recipient. Meetings can be scheduled from the Communications tab of a Sales Folder, Job, or Contact. In the example below we walk through how to schedule a meeting from a Sales Folder.
- Navigate to the Sales Folder for the customer.
- Click the Create button.
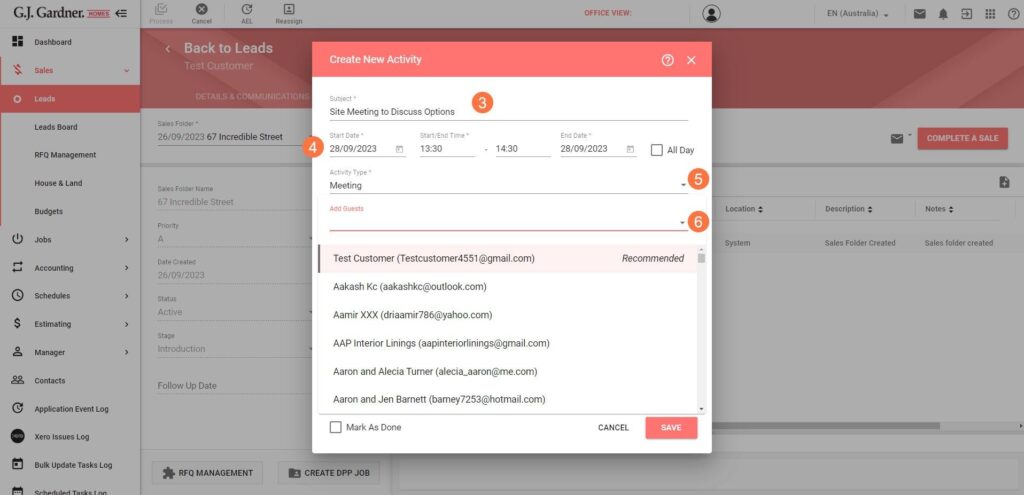
- Enter a summary into the Subject field. This will be visible to the meeting recipient as a subject of the calendar invite.
- Adjust the Start Date and End Date as needed and if required add the Start/End Time for the meeting duration. The times selected will be added to the email notification sent to all meeting guests.
Note: A calendar invitation will not be sent for meetings scheduled before the current time. - In the Activity Type field select Meeting.
- In the Add Guests field select all people who should receive a calendar invite. The first recommended option is the contact associated with the Sales Folder.
Note: Further guests can be invited by clicking on the drop-down arrow again and selecting additional contacts.
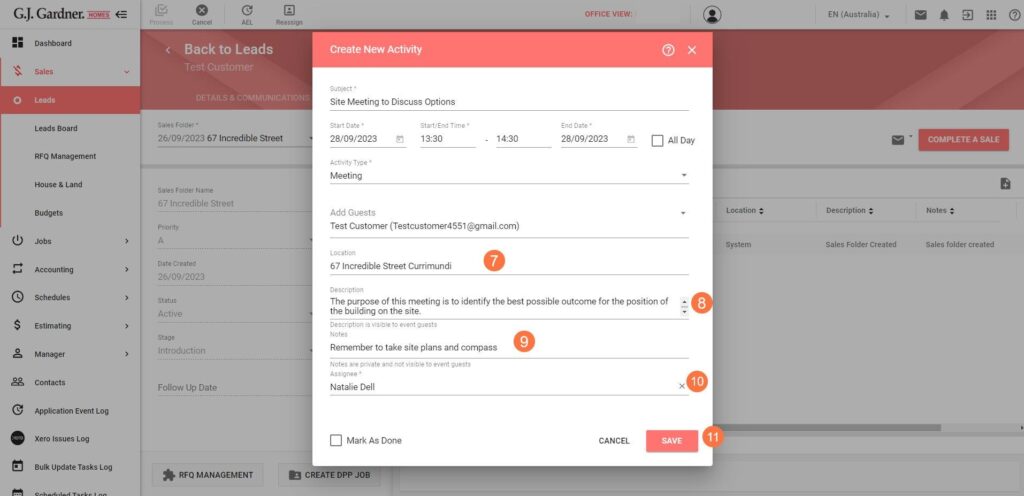
- For the Location field of the meeting enter the full address. Otherwise, use clear language as this field will be visible in the calendar invitation.
- Enter any relevant details about the meeting in the Description field. This will be visible in the calendar invitation and is limited to 1,000 characters.
- Enter any private details that you do not want seen by the recipients into the Notes field. These details are only visible in G.J. Software and is limited to 1,000 characters.
- Select the Assignee from the drop-down menu. By default this is the user creating the event.
- Click Save.
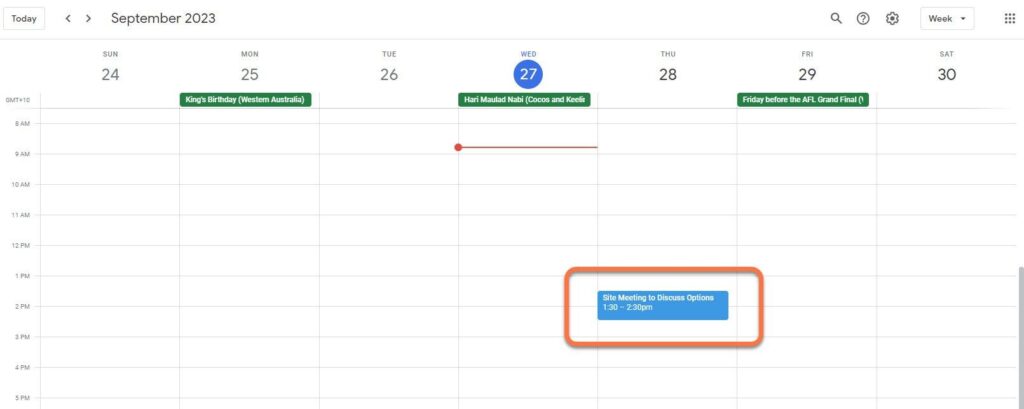
The Guest will receive a notification via email. The information added to the Activities screen will transfer through to the meeting invite.
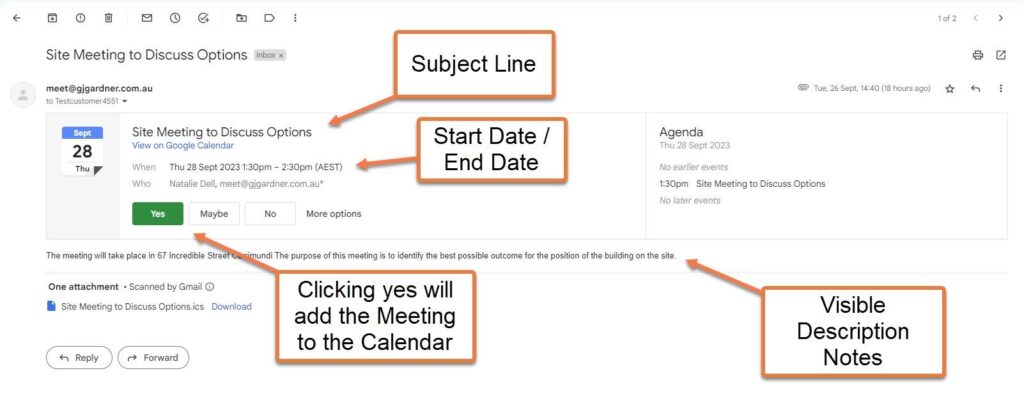
The meeting is accepted and added to the guests calendar.