
Contacts are people, companies, and locations which your business has relationships with. Contacts may fall into the following types:
- creditors/suppliers
- debtors
- customers
- employees
- finance companies
- cities/counties
- other type
You can manage all these contacts and their relationships in the Contacts section.
List of Contacts
To manage contacts, on the navigational sidebar, select Contacts.
The Contacts section opens, as follows:
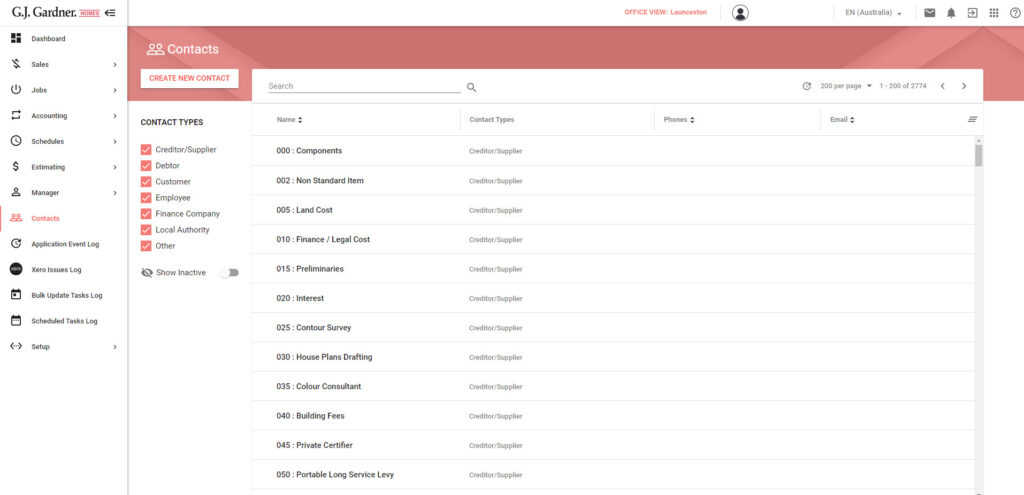
Here you can see the list of contacts. For each contact, the following information is available:
| Name | Name of the contact. By default, the system shows contacts in the alphabetical order. |
| Contact Types | Type of the contact. A single contact may have multiple types assigned. |
| Phones | Phone number of the contact. |
| Email address of the contact. |
To sort contacts:
You can sort contacts by name, email, and phone number.
- Click the header of the column which you want to sort by.
- You can also click the down or up arrow icons, to sort items in the descending or ascending order.
Creating New Contacts
You can create new contacts of different types and manage their relationships with your company.
- Click Create New Contact.
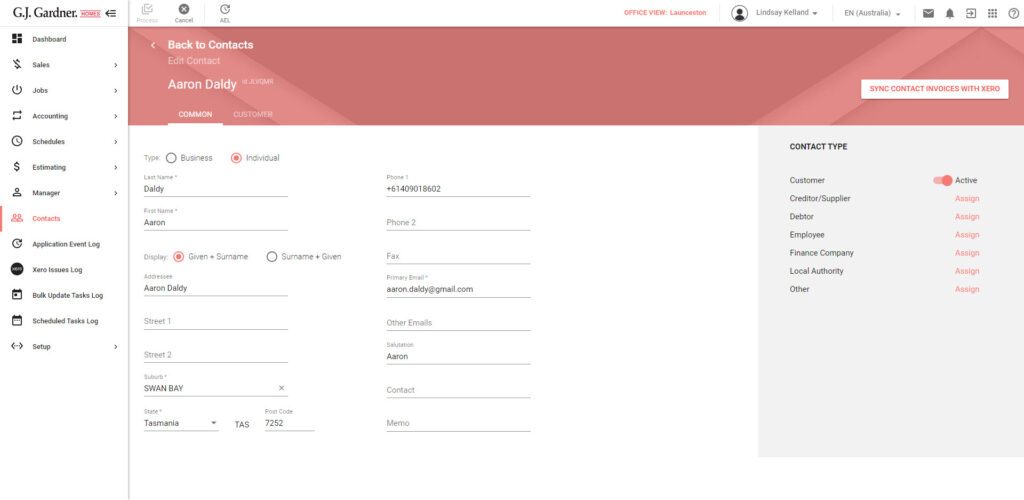
- On the Create New Contact page, specify the following information about a new contact, as follows:
Type Select the contact type between ‘Business’ or ‘Individual’. This option alters display of the Name (for the Business) or the First Name and Last Name fields (for the Individual). For the contact of the Employee type, the required First and Last Name fields will be displayed. The specified full name will be used for creation of a new Google account.
Name Enter the business name of a contact, First Name Enter the first name of a new contact. If you choose ‘Business’, you are prompted to enter the company name only. Last Name Enter the last name of a contact. Display Select the preferred option to display the first and last names of a contact. Addressee This field is automatically populated after entry of the first and last names of an individual contact. If needed, you can update it. For business contacts, you can specify the name of an addressee from scratch. Street 1 Enter the primary street address of a contact. Street 2 Enter the subsidiary street address of a contact. Suburb/City Enter the city where the contact locates. The system may automatically suggest possible matches while you type. State Enter the state where the contact locates. The system may automatically pre-populate the state if the specified city maps to the specific state. Postcode Enter the ZIP code of the location where the contact operates. Phone 1 Enter the primary phone number of a contact. Phone 2 Enter the subsidiary phone number of a contact. Fax Enter the fax number of a contact. Email Enter the email address of a contact. Salutation Enter the appropriate salutation for a contact. Contact Enter the contact for a business type. Memo Enter the memo about a contact. - In the right part of the page, locate the list of contact types.
- Locate the contact type you want to assign to the contact and click Assign.
- Continue specifying details for the contact according to the selected type.
- Once complete, click Process.
Note
When you enter the phone number in the Phone 1 or Phone 2, the system checks whether other Contacts with the same phone number exist in the system. If any exist, the system will show the inline warning about probable contact duplication.
Note
When you create a business Contacts of the Employee type, you need to specify the first and last names of the Contact.
Editing the Contacts
- Open the list of contacts.
- On the list with contacts, locate the contact you want to edit.
- Hover over the contact until the action icons appear.
- Click the Edit
 icon.
icon. - Make the appropriate modifications in the contact.
- When complete, click Process..
Searching for Contacts
You can search for contacts by their names, phone numbers and emails.
- Open the list of contacts.
- Above the list, locate the search field.
- Enter your search query and click the Find
 icon. Alternatively, you can press Enter.
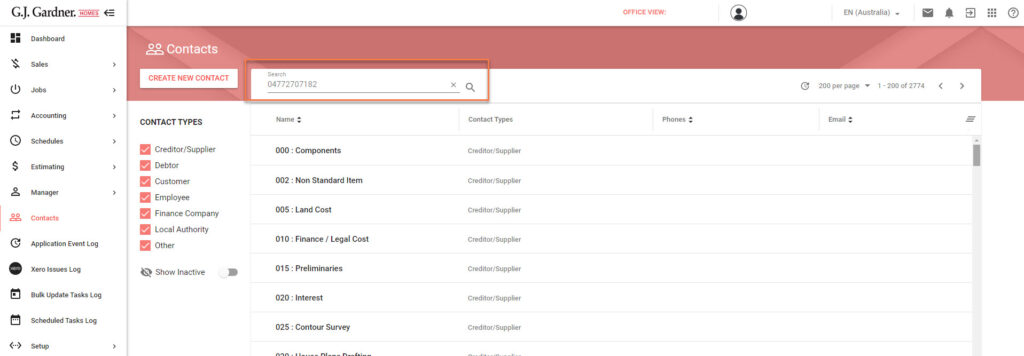
To clear the search query, click the Clear ![]() icon.
icon.
Filtering Contacts
You can filter contacts against their types and enable display of inactive contacts.
To filter contacts against their types:
- To the left side of the list with contacts, locate the Contact Types block.
- Clear the boxes for the account types that you want to hide.
To show inactive contacts:
- Below the Contact Types block, locate the Show Inactive toggle.
- To enable display of inactive contacts, move the toggle right.
To hide inactive contacts:
- Below the Contact Types block, locate the Show Inactive toggle.
- To disable display of inactive contacts, move the toggle left.