Here you can manage Master Offices in the Master Zone and specify their data.
- To manage Offices, on the navigational sidebar, select Setup.
- Once the section expands, select Offices.
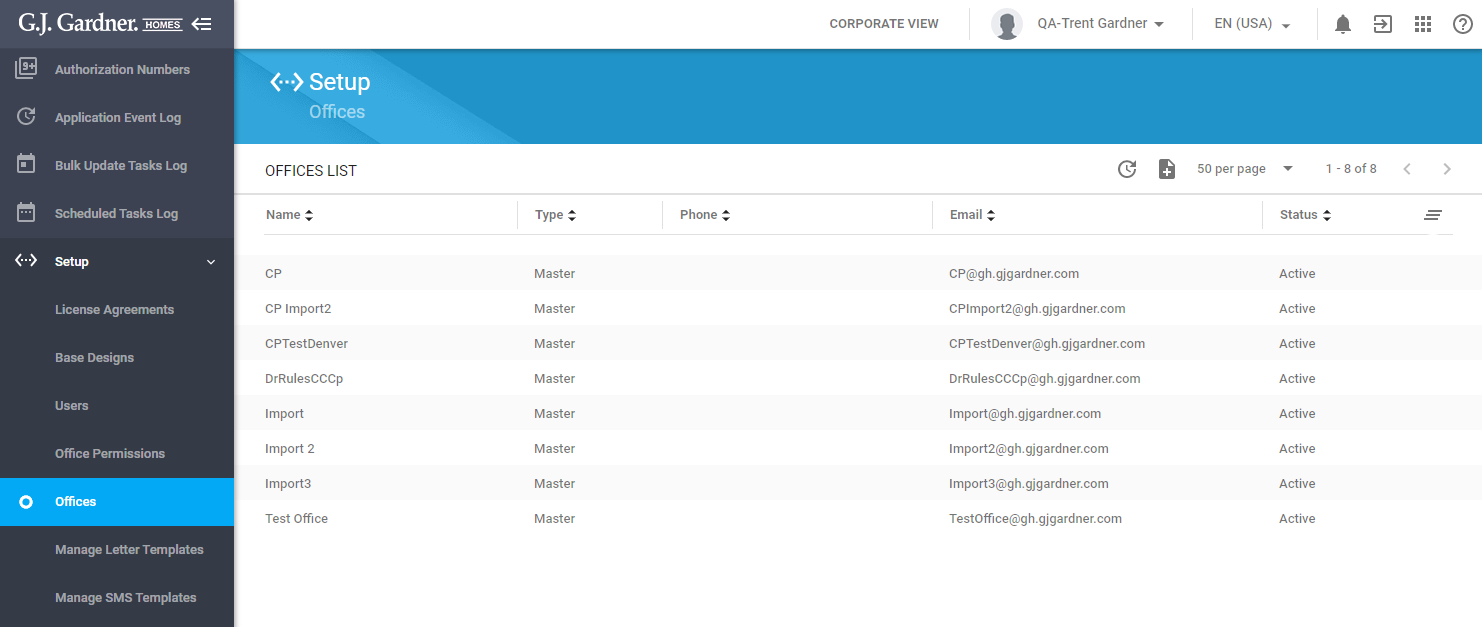
The Offices page opens, as follows:

Here you can see the list of Offices. For each Office, the following information is available:
| Name | Name of the Office. |
| Type | Type of the Office. |
| Phone | Phone number of the Office. |
| Email address of the Office. | |
| Status | Status of the Office. |
You can perform the following actions on Offices:
- create new Offices
- edit the existing Offices
- deactivate the no longer needed Offices
Creating a New Office
- Above the list with Master Offices, click the Add
 icon.
icon.
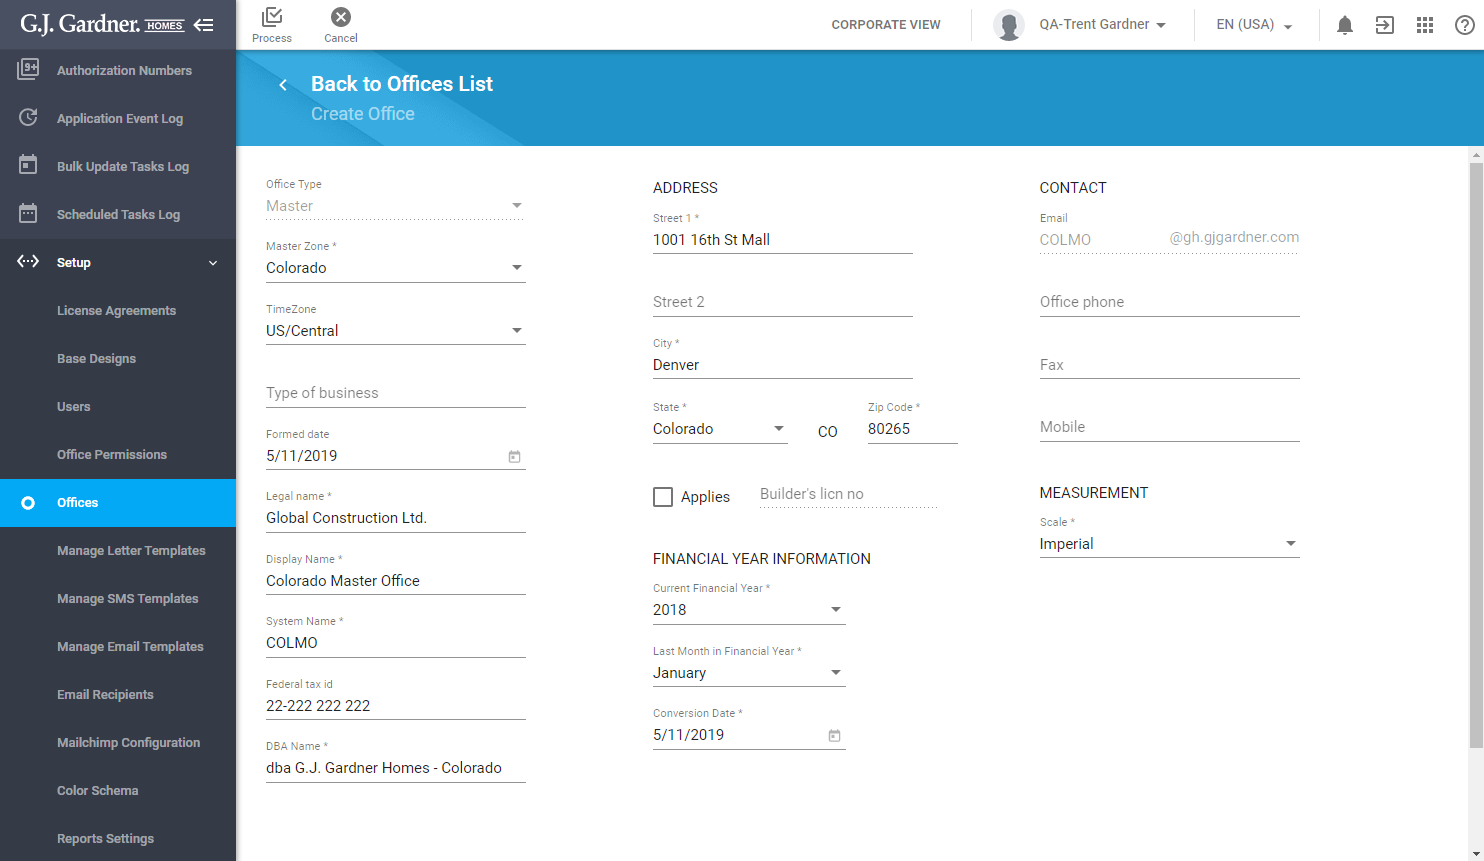
- On the opened page, specify information about the Office, as follows:
GENERAL
Office Type The Office type will be automatically pre-defined as Master. Master Zone Select the Master Zone which a Master Office is created in. Time Zone Select the time zone which the Office operates in. By default, the system will set the time zone of the Master Zone. Type of business Specify the type of business of the Office. Formed date Select the date of forming the Office. Company name Enter the legal name of the company which operates as the Office. Display Name Enter the Office name which will be displayed on the Master portal. System Name Enter the system name of the Office (name code). Federal tax id Enter the federal tax ID of the Office. Trading As Enter the DBA name for the Office. ADDRESS
Street 1 Enter the primary address of the Office. Street 2 Enter the subsidiary address of the Office. Suburb/City Enter the city where the Office locates. State Select the state where the Office locates. Postcode Enter the zip code of the state where the Office locates. Applies Check the box whether the Office has the builder’s license. Builder’s licn no Enter the builder’s license number for the Office. FINANCIAL YEAR INFORMATION
Current Financial Year Select the current financial year for the Office. Last Month in Financial Year Select the last month in the financial year. Conversion Date Select the conversion date. CONTACT
Email Email address of the Office. It is generated automatically on the basis of the system name you specify. You cannot modify it. Office phone Enter the phone number of the Office. Fax Enter the fax number of the Office. Mobile Enter the mobile number of the Office. MEASUREMENT
Scale Select the measurement scale for the Office. You can choose between the imperial and metric. - When complete, click Process.
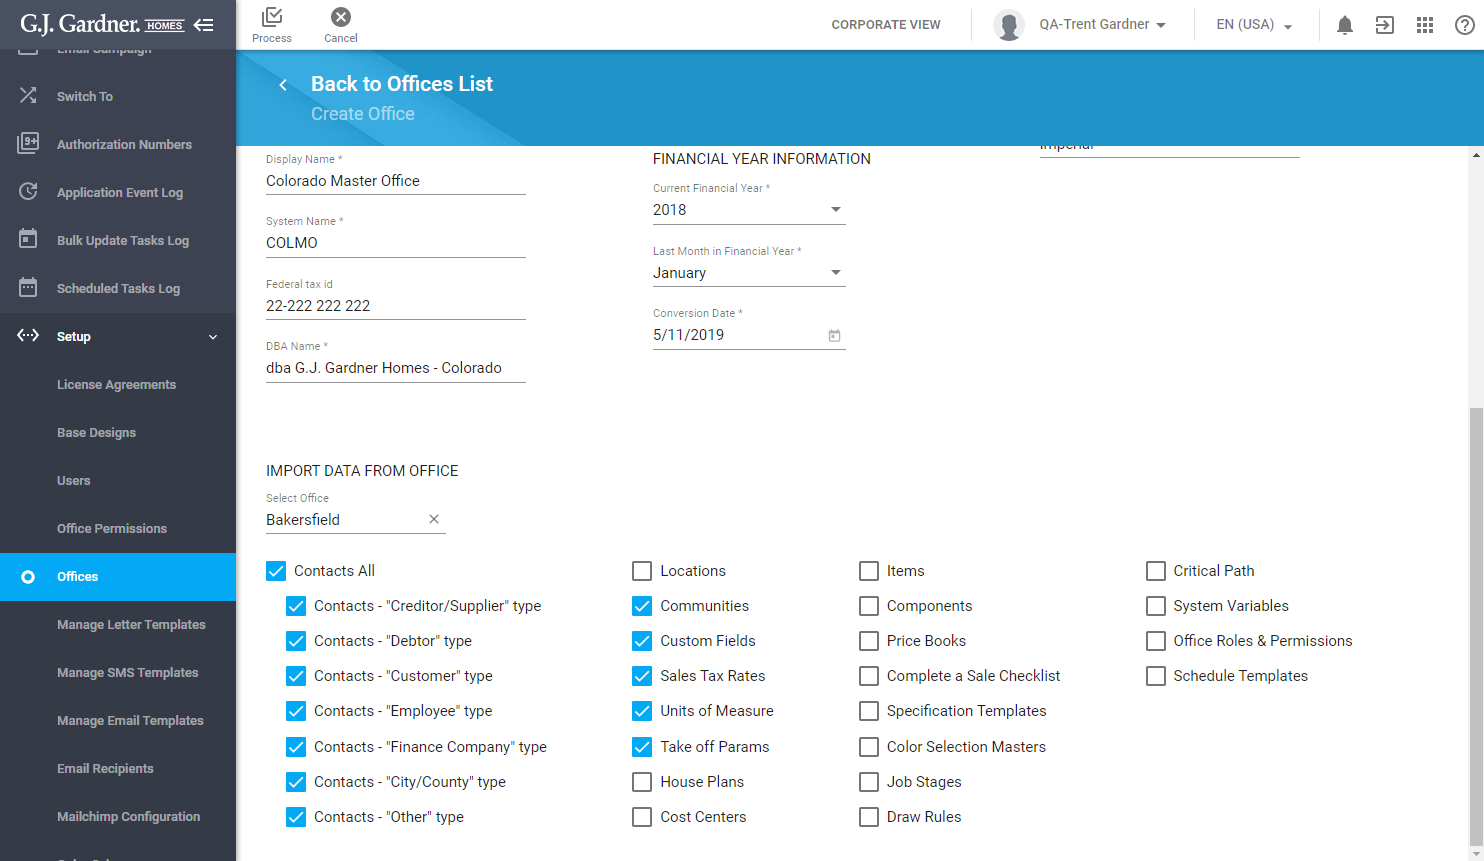
When you create a new Master Office, you can import data from the existing Master or Franchise Office.
To import data from the existing Office:
- Below the list with parameters of the Office, locate the Import Data from Office block.
- Select the Office which you want to import data from. Once you have selected the Office, the entities for importing will appear.

- Select the entities you want to import into a new Master Office from the existing Master or Franchise Office.
- When complete, click Process.
Editing the Office
- On the list with Master Offices, locate the one you want to edit.
- Hover over the Office until the action icons appear.
- Click the Edit
 icon.
icon. - On the Edit Office page, make the appropriate modifications.
- To modify settings in the Financial Year Information block, click Modify. Confirm your decision, and then make modifications.
- When complete, click Process.
Note
Modifying settings in the Financial Year Information block may require the recalculation of data and reports in the target Office.
Deactivating the Office
You can deactivate the Master Office if it is no longer needed. To deactivate the Master Office you need to ensure that there is only one active User registered in the Office. Deactivation of the Office cannot be performed if there are more than two active Users registered in the Office or when there are only inactive Users registered in the Office.
- On the list with Master Offices, locate the one you want to deactivate .
- Hover over the Master Office until the action icons appear.
- Click the Deactivate
 icon.
icon. - Confirm deactivation of the Office by clicking Yes.
After confirmation, the Office will be deactivated. The red Deactivated label will be shown for the Office.
The last active User in the Office will be automatically deactivated. Access to the Google services and the Builder Portal of the Office will be blocked too.
After 30 days, the Google account of the Office will be automatically deleted.

