You can configure integration of GJ Gardner system with the following systems:
- Nexmo – service for the automated sending of SMS.
- Xero – accounting service.
- MailChimp – service for running automated email campaigns.
- Intranet – connection to company intranet.
Nexmo Integration
- To configure integration with Nexmo, on the navigational sidebar, select Setup.
- Once the Setup section expands, select System Variables.
- On the tabbed menu, select Integration Accounts.
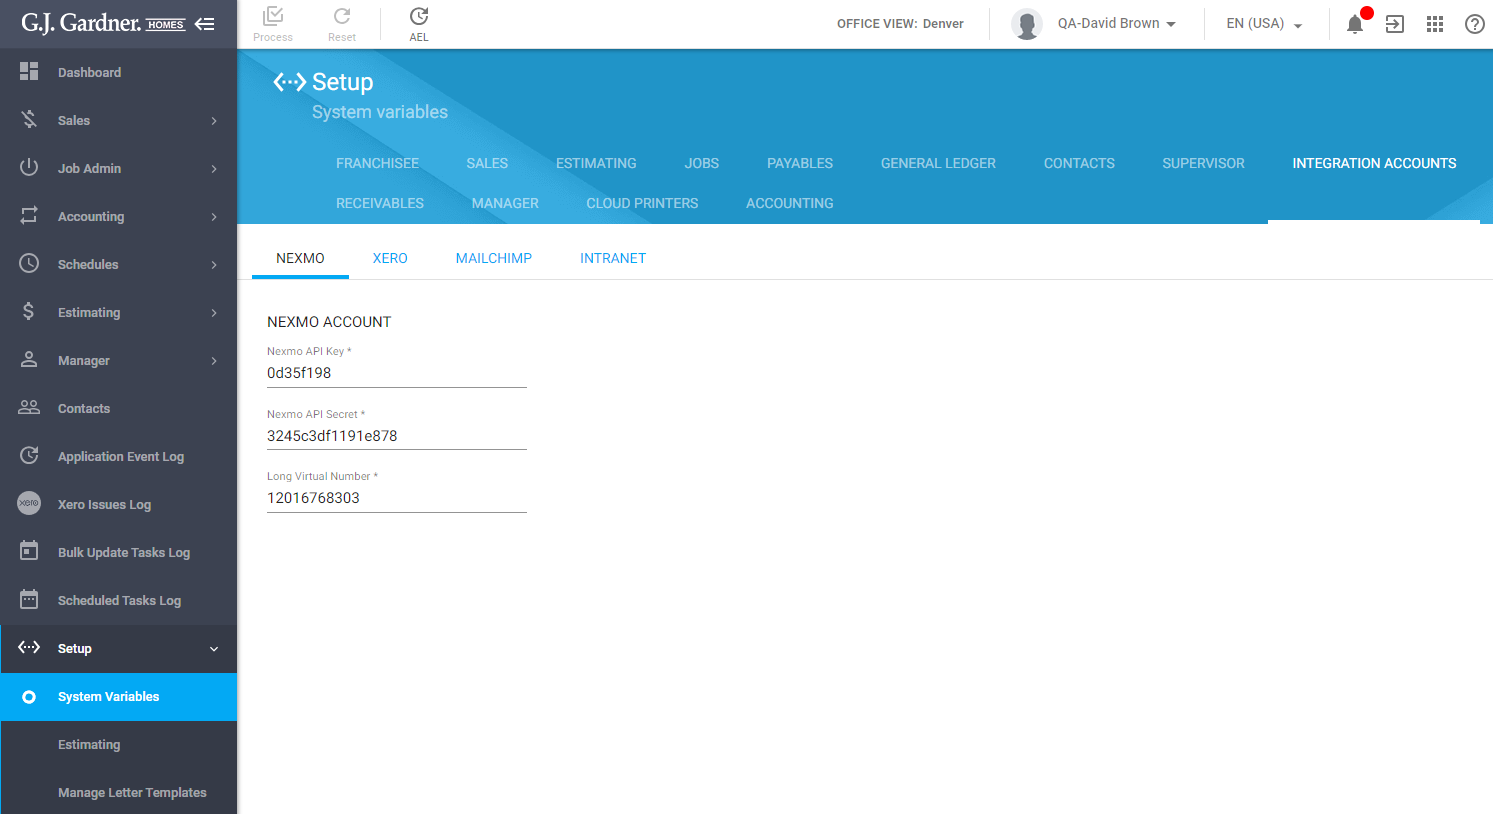
The page opens as follows:

The Nexmo integration parameters include the following:
| Nexmo API Key | Enter the Nexmo API key for integration. |
| Nexmo API Secret | Enter the Nexmo API secret key for integration. |
| Long Virtual Number | Enter the long virtual number (in Nexmo) which SMSs will be sent from. |
When complete, click Process.
Note
While sending SMS to phone numbers, the system will require entry of mobile phone numbers with the the addition of ‘+1’ before the main phone number.
Xero Integration
- To configure integration with Xero, on the navigational sidebar, select Setup.
- Once the Setup section expands, select System Variables.
- On the tabbed menu, select Integration Accounts.
- Switch to the Xero tab.
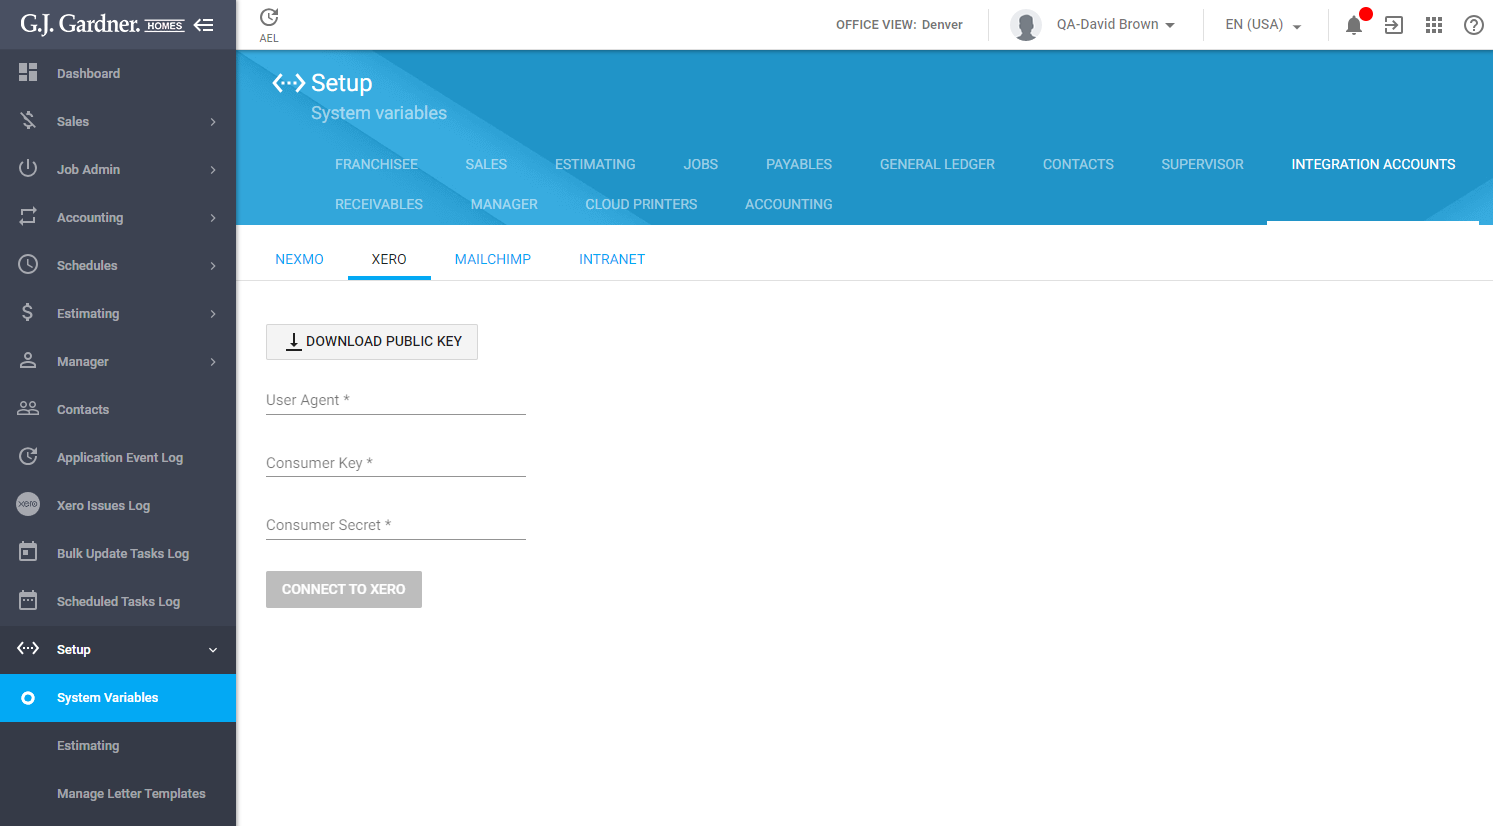
The page opens, as follows:

The Xero integration parameters include the following:
| Download Public Key | Click the button to download the public key for setting integration. |
| User Agent | Enter the user agent string for integration. |
| Consumer Key | Enter the consumer key for integration. |
| Consumer Secret | Enter the consumer secret key for integration. |
When complete, click Process.
Mailchimp Integration
- To configure integration with MailChimp, on the navigational sidebar, select Setup.
- Once the Setup section expands, select System Variables.
- On the tabbed menu, select Integration Accounts.
- Switch to the MailChimp tab.
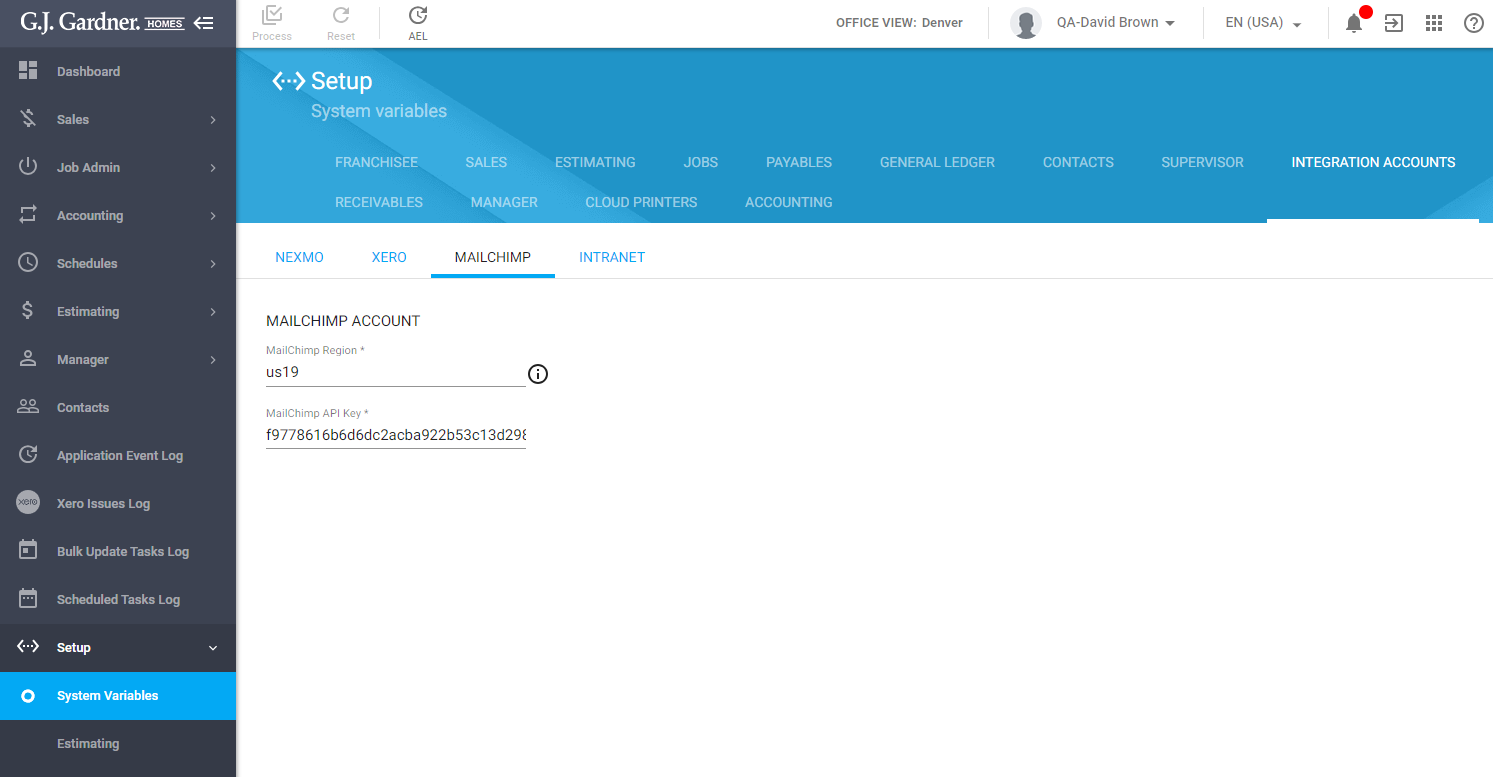
The page opens, as follows:

The MailChimp integration parameters include the following:
| MailChimp Region | Enter the region of the MailChimp. |
| MailChimp API Key | Enter the MailChimp API Key for integration setup. |
When complete, click Process.
Intranet Integration
- To configure integration with Intranet, on the navigational sidebar, select Setup.
- Once the Setup section expands, select System Variables.
- On the tabbed menu, select Integration Accounts.
- Switch to the Intranet tab.
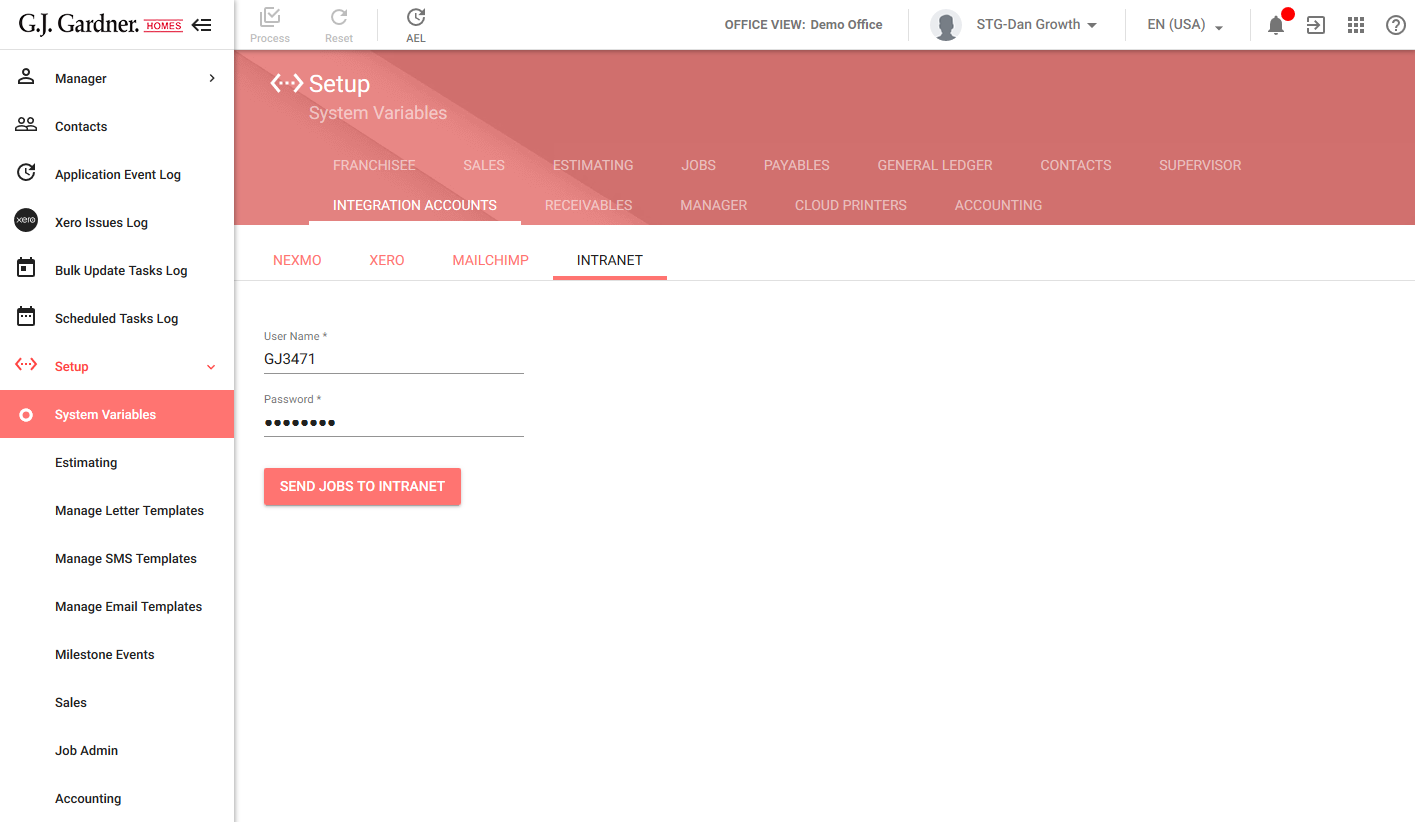
The page opens, as follows:

The Intranet integration parameters include the following:
| User Name | Enter the Office username to connect to Intranet. |
| Password | Enter the Office password to connect to Intranet. |
When complete, click Process.
You can also transfer Jobs in the XML format to the Intranet.
- Click Send Jobs to Intranet.
This operation creates a Bulk Update Task which generates an XML file with information about Jobs. Additionally, the system sends an email with the relevant information to email recipients that should be notified of this operation.

