
To view Job Orders
There are two ways to open the list of Job Orders.
Way #1
- To view the list of Job Orders, on the navigational sidebar select Jobs.
- In the expanded Sales section, select Job Orders.
- The empty page opens.

- You need to search for a Job. To do that, click the search
 button.
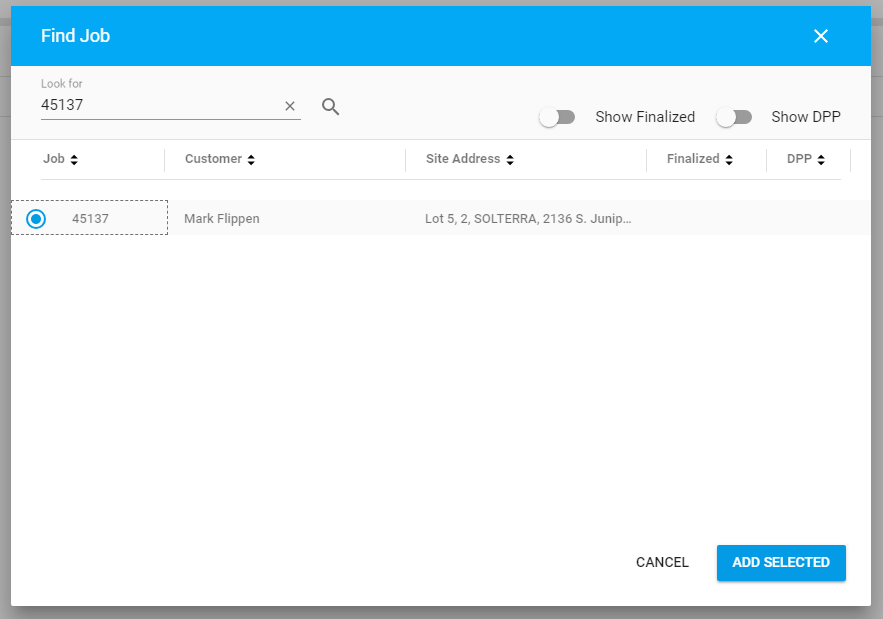
 - The Find Job form opens. It contains the following information:
Show Finalized toggle Move the toggle right to see all finalized Jobs. Show DPP toggle Move the toggle right to see DPP Job. Job Job ID. Customer Customer name. Site Address Customer address. Finalised If Show Finalized toggle is switched to right, all finalized Jobs are marked with the  icon.
icon.DPP If Show DPP toggle is switched to right, all DPP Jobs are marked with the icon. - In the search field type the customer name or Job ID and press the Enter button. The table is filtered accordingly.
- Tick the radio button next to the needed Job.
- Click Add Selected.
Way #2
- To view the list of Job Orders, on the navigational sidebar select Job.
- In the expanded Sales section, select Jobs List.
- On the opened page search for a needed job.
- Hover over the job and click the Job Variations
 icon.
icon.
Note
If the Job is in Finalized and/or Not Proceeding status, the Job Orders List could be opened in VIEW mode only.
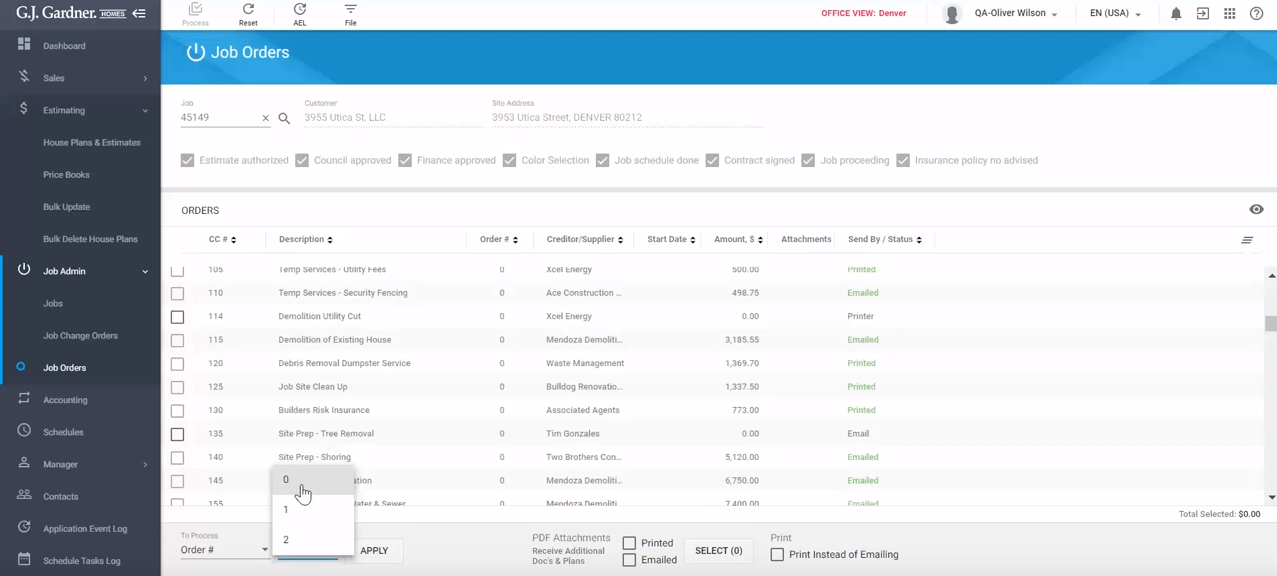
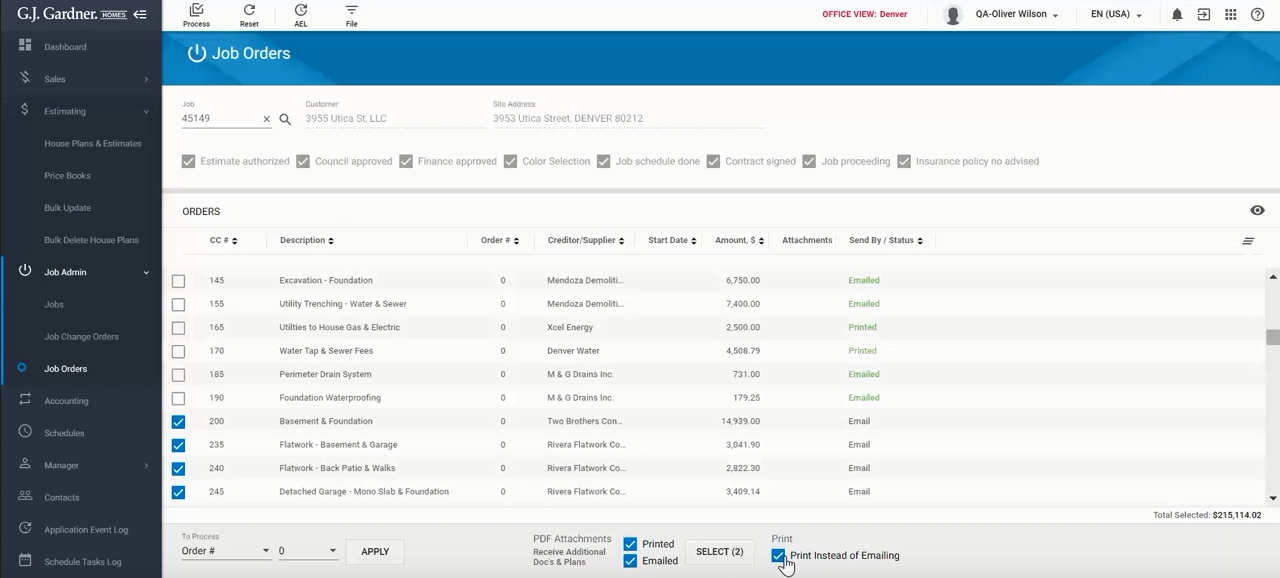
In both cases the Job Orders page opens:
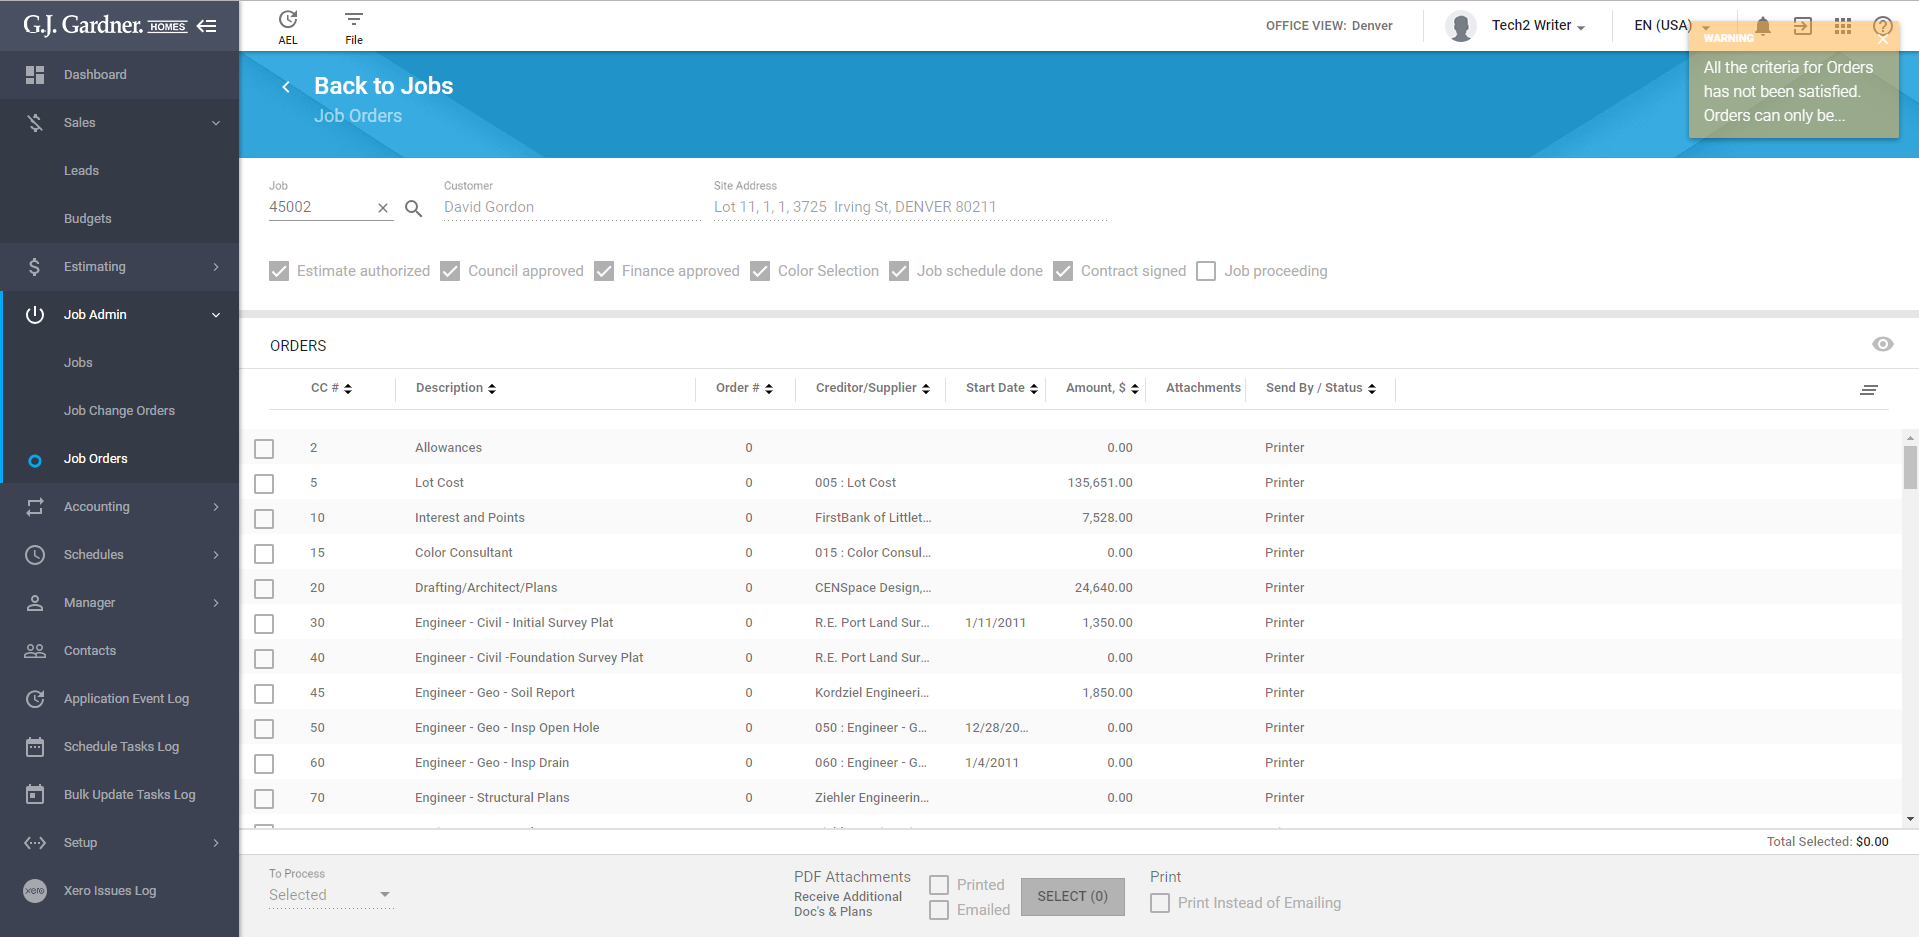
First of all, the system checks the criteria from the System Variables Job tab. They should be satisfied to produce all the Job Orders.
If not all the criteria are satisfied, the system will show a warning message in the upper right corner (as it is shown on the screenshot above): “All the criteria for orders has not been satisfied. Orders can only be produced up to cost center “35“. The number 35 is replaced with the number of cost centers specified the System Variables Job tab.
On the opened page the following information is available:
| Job field | The predefined job number. |
| Customer | Customer name. |
| Site Address | Customer address. |
| Criteria checkboxes | Criteria from the System Variables Job tab. |
| Orders table | The grid with all Orders created for a particular Job. |
| СС# | Cost Center number. |
| Description | Cost Center name. |
| Order # | Number of order. |
| Creditor/Supplier | Creditor or Supplier name. |
| Start Date | Contract start date if specified. |
| Amount, $ | Amount of money. |
| Attachments | Attachments if some was added. |
| Send by/Status | Send by method or a status of produced Job Orders.
If a Job Order wasn’t produced, there is email or printer method. If a Job Order was produced, there is emailed or printed status. |
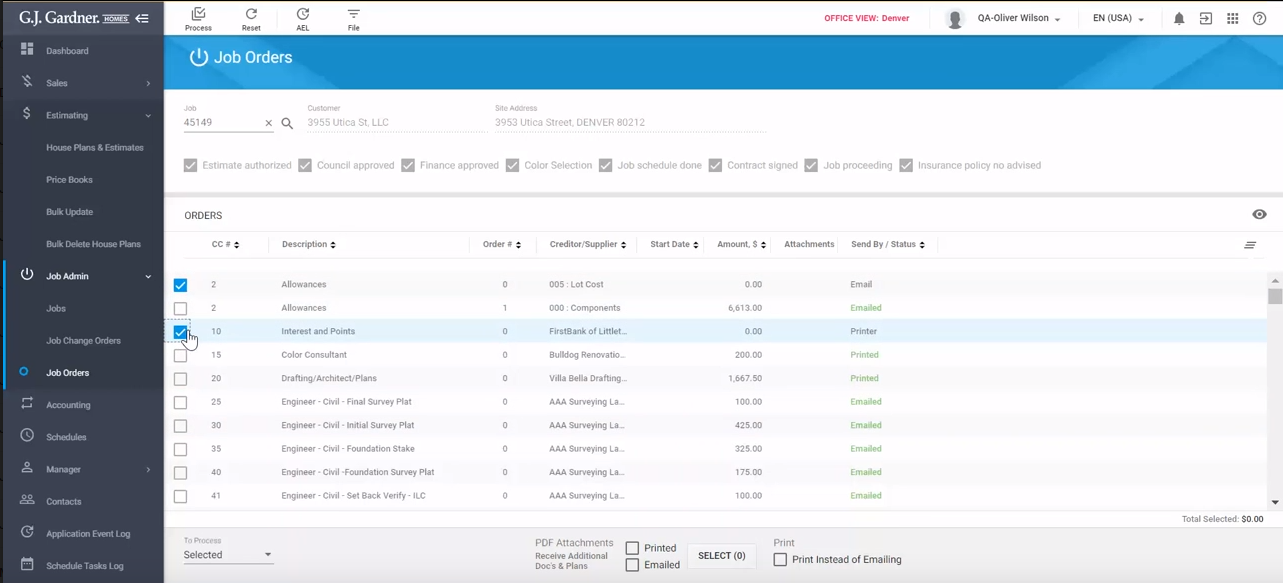
To select Job Orders
Before produce Job Orders, you need to select them. There several ways to select several Job Orders.
Way #1
Check the boxes for appropriate Job Orders.
Way #2
- Expand the To Process list at the bottom of the page.
- Select All from the list.
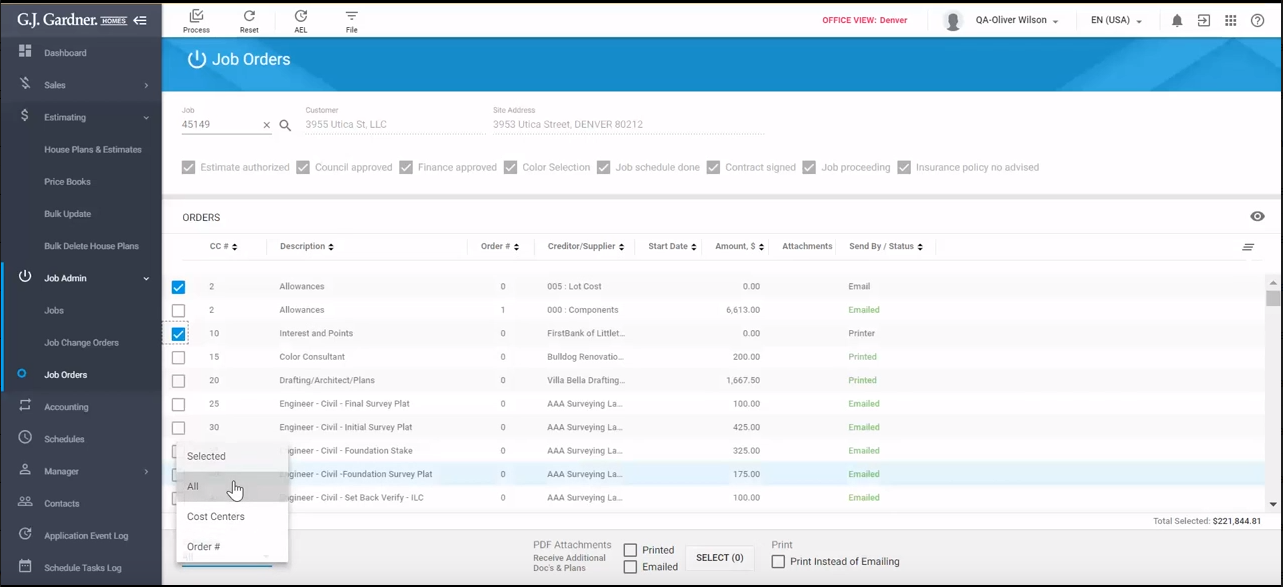
- All available Job Orders are selected.
- If you selected Cost Center at the previous step, you need to specify the range from selection. The system selects all Job Orders from the list within the specified range:

- You can select Order# at the step 2. Then you need to select Order # from the list. As result, all available Job Orders with specified Order# are selected.
To add attachments to selected Job Orders
Note
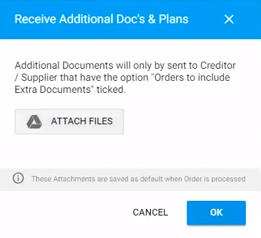
All additional documents are sent to Creditor/Supplier that have the option “Orders to include Extra Documents” ticked.
To add an attachment to selected Job Orders:
- Click the Select
 button at the bottom of the page.
 - In the opened form, click the Attach files button.
- Once clicked, Select a file from opens. Here you should select file(s) from Google Drive folders:
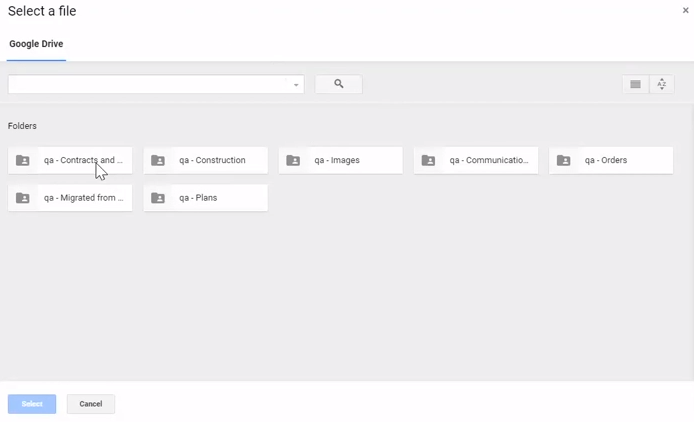
- When a file is selected, the Select button becomes active. Click it.
- When all needed files are selected, click OK:
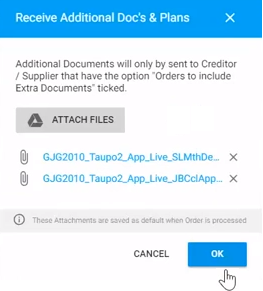
- NOTE: all the selected attachments are saved as default for all the selected Job Orders during the next selection.You can add the selected attachments to all printed and/or emailed Job Orders. Tick the appropriate checkboxes at the bottom of the page:

- To print all Job Orders with Email method tick the Print Instead of Emailing checkbox at the bottom of the page:
To preview selected Job Orders
- In the upper right part of the screen, click the Preview
 icon. The system generates Job Orders one by one. It may require some time to generate preview files.
 - Once a file is generated, a form with the link to the preview file opens. Click the link to the preview file. The Job Order file opens in a new tab.
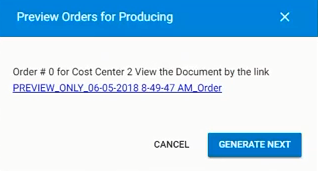
- To view the next file, click the Generate next button. The system generates the next file from the queue. Thus you are able to preview all Job Orders.
- When complete, click the Cancel button.
To produce Job Orders
Note
The system do not produce Job Orders in the following cases:
- Job Orders with empty supplier filed;
- Amount of Job Orders is null,
- When a contract start date is not specified (for New Zealand only).
- Click Process at the top of the page. Once clicked, the system creates a bulk update task in the queue.
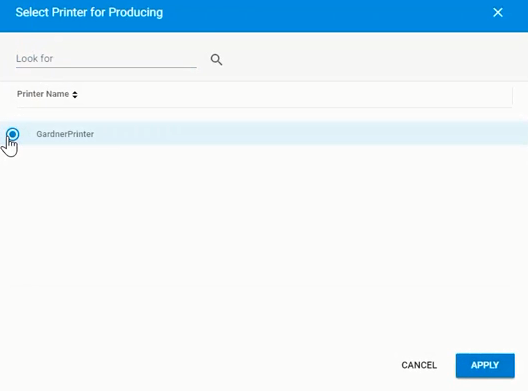
- In the opened form select the printer for producing files.
- Click Apply.
- In the opened pop up window you need to log in to your Gmail.
- After login, the system starts producing files. The appropriate notification is displayed at the top of the page:

- Once the producing is over, the notification disappears, the status is changed to Sent or Printed.
Note
If any other user opens this Job for Job Orders producing, they will need to wait until the process finishes. However they are able to producing all the other Job Orders.
To check the Job Orders producing status:
- On the navigational sidebar select Bulk Update Tasks Log.
- You see that Produce Job Orders task in processing.
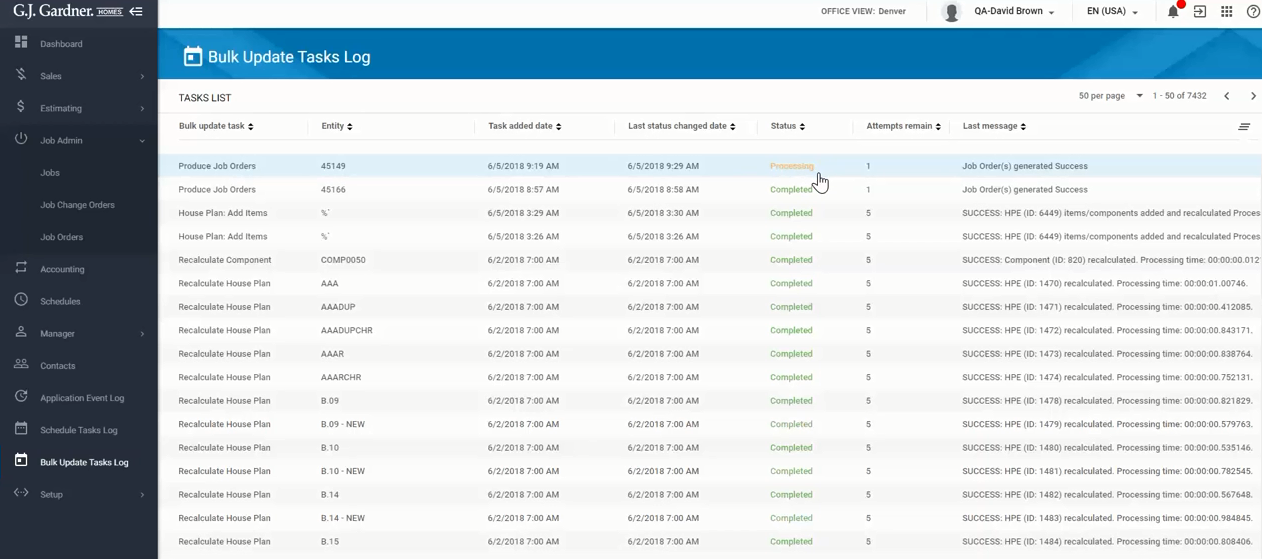
- Once the producing is over, the status is changed to Completed.
- Upon clicking the rule, the Result Message form opens. It contains the information on all Job Orders and their statuses.
To create a new Job Order
- On the navigational sidebar select Jobs.
- In the expanded Sales section, select Jobs List.
- Search for the needed Job.
- Hover over the Job and click the Job Estimate
 icon.
icon. - Click the item you need to add a new order.
- Click the Add
 icon in the Orders tab.
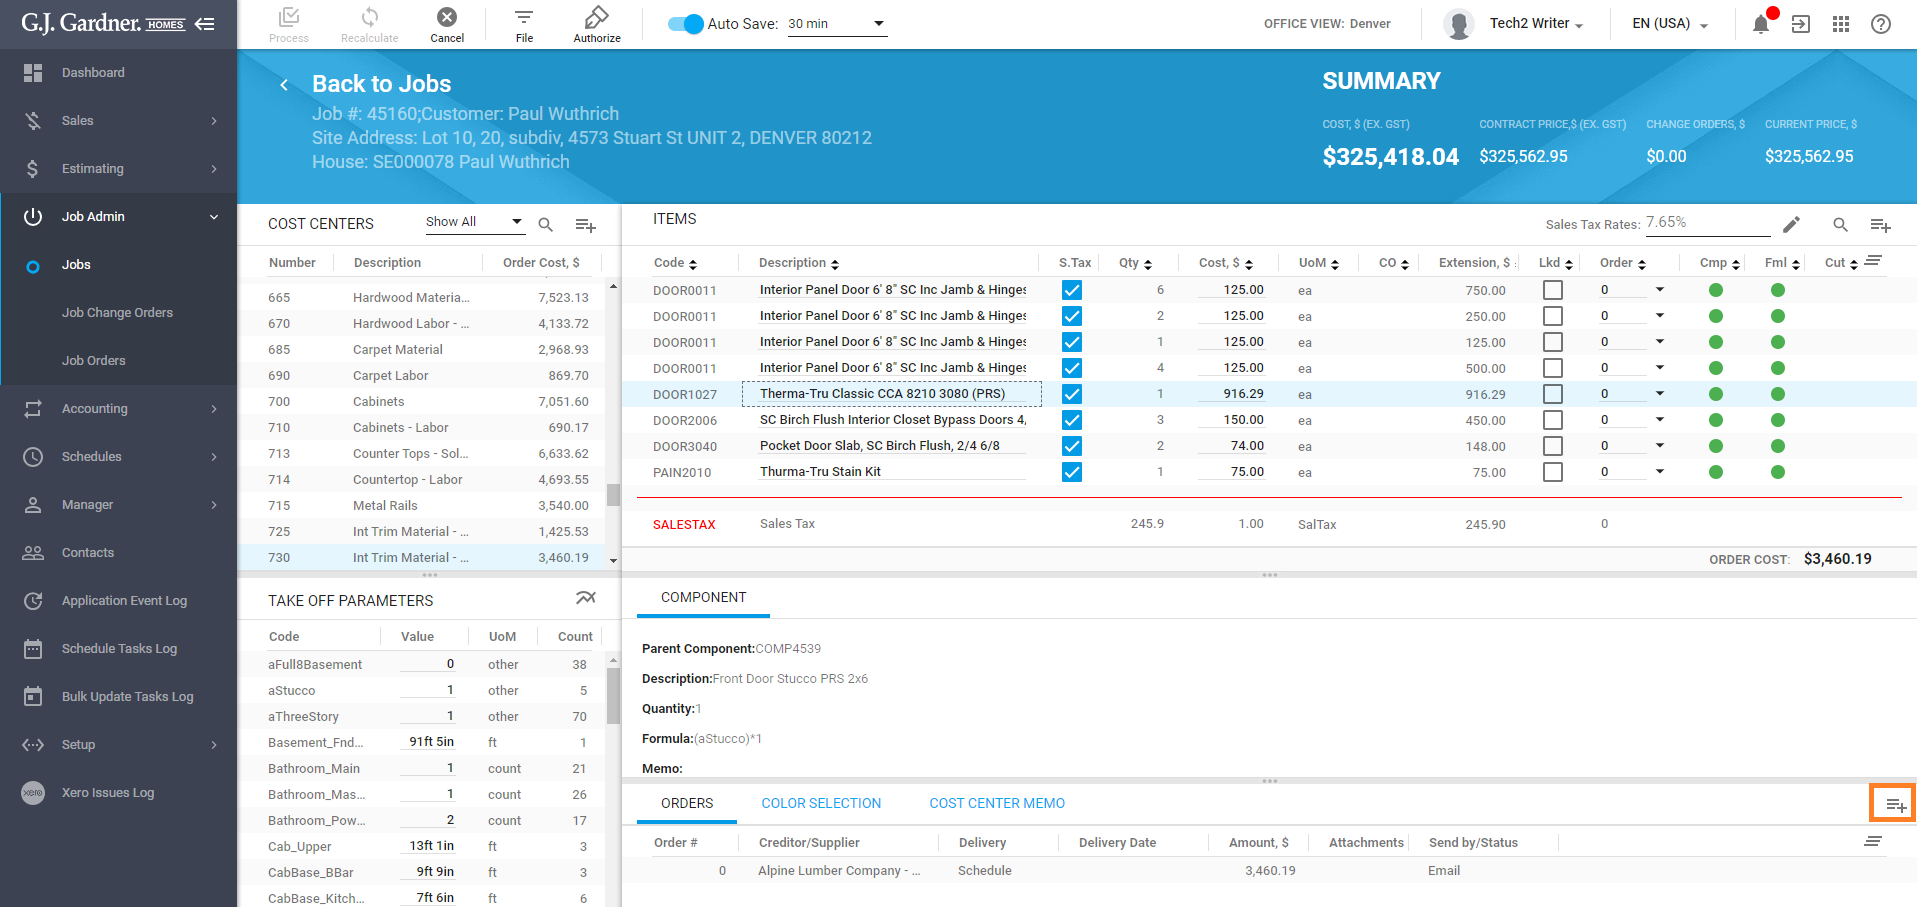
- The Create Order form opens. It contains the following information:
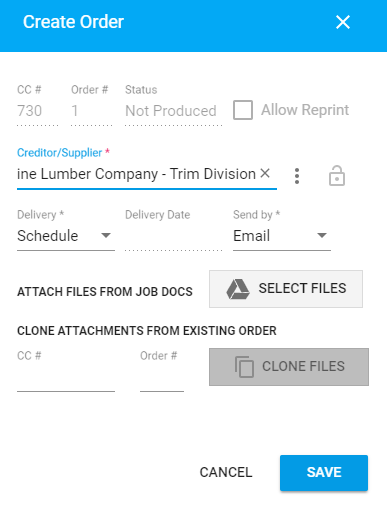
СС# The number of the Cost Center. Order# The next number of the Order. Status The order status. Allow Reprint The checkbox becomes available after producing. Creditor/Supplier The default Creditor/Supplier for the Cost Center. You can change it by clicking the Clear icon and selecting a new one from the dropdown list. The default Creditor/Supplier is in bold at the top of the list. You can create a new Creditor/Supplier by clicking the icon.
Delivery Click the field and select Schedule or Entered value. Delivery Date Available if Entered is selected at the previous step. Click the field and select the delivery date form the date picker.
Send by By default the delivery method is defined by the Creditor/Supplier. To change it, click the field and select Email or Printer value.
Attach files from Job Docs To attach files from Google Drive, click the Select files button. By default Job Docs folder of the particular opens. CC# If you want to copy attachments from an existing order, enter the number of the Cost Center from which attachments have to be copied. Order# Enter the number of the Order from which attachments have to be copied. Clone files Available if CC# and Order# field are filled in. Click the button to clone files from entered Cost Center and Order.
- When complete, click the Save button.
- The Job Order is created and highlighted in light-orange and marked with the asterisk.
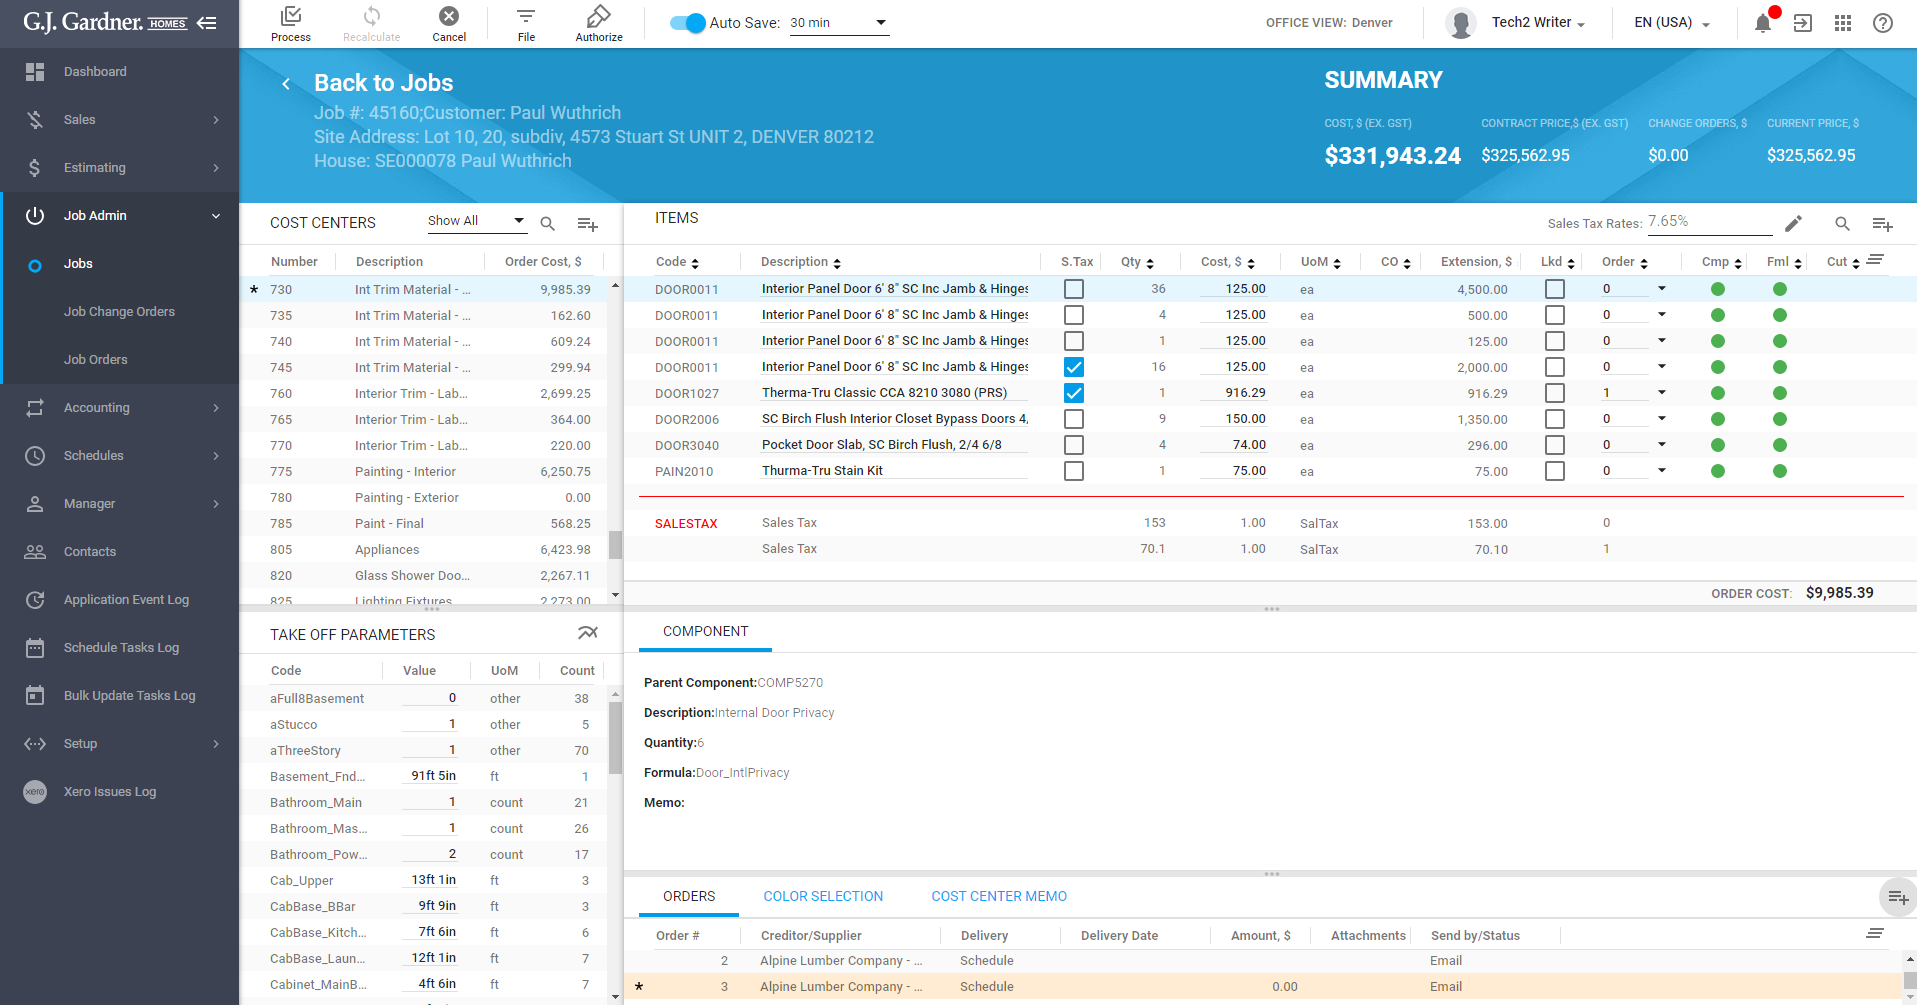
- To save changes, click Process.
To edit a Job Order
- On the navigational sidebar select Jobs.
- In the expanded Sales section, select Jobs List.
- Search for the needed Job.
- Hover over the Job and click the Job Estimate icon.
- Click the item you need to edit an order.
- At the bottom of the page, hover over an order you want to edit and click the Edit
 icon. The Edit Order form opens.
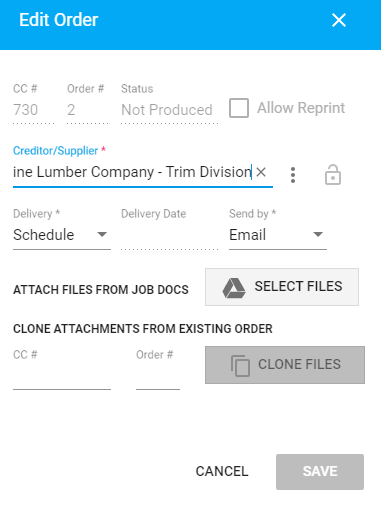
- Make the appropriate modifications:
- When complete, click Save.
- The Job Order is updated. It is highlighted in light-orange and marked with the asterisk.
- To get the up-to-date data, click Process.
Note
If the Job Order already contains attachments, the systems will remove all existing attachments and replace them with clone files.
To delete a Job Order
You can delete a Job Order in the following cases:
- A selected Job Order is not set as a default Order for a Cost Center.
- A selected Job Order is not used for any item in the Oed column of the Items table.
To delete a Job Order:
- On the navigational sidebar select Jobs.
- In the expanded Sales section, select Jobs List.
- Search for the needed Job.
- Hover over the Job and click the Job Estimate icon.
- Click the item you need to delete an order.
- At the bottom of the page, hover over an order you want to delete and click the Delete
 icon.
icon. - The system displays the dialog window to confirm the action.
- Click Yes.
- To get the up-to-date data, click Process.