
Once you have created the pre-construction schedule, you can proceed to managing and tracking completion of specific tasks. By default, the system loads tasks from the Schedule Template, but you can customize it to your needs.
All the tasks within the pre-construction schedule are listed in the table, as follows:
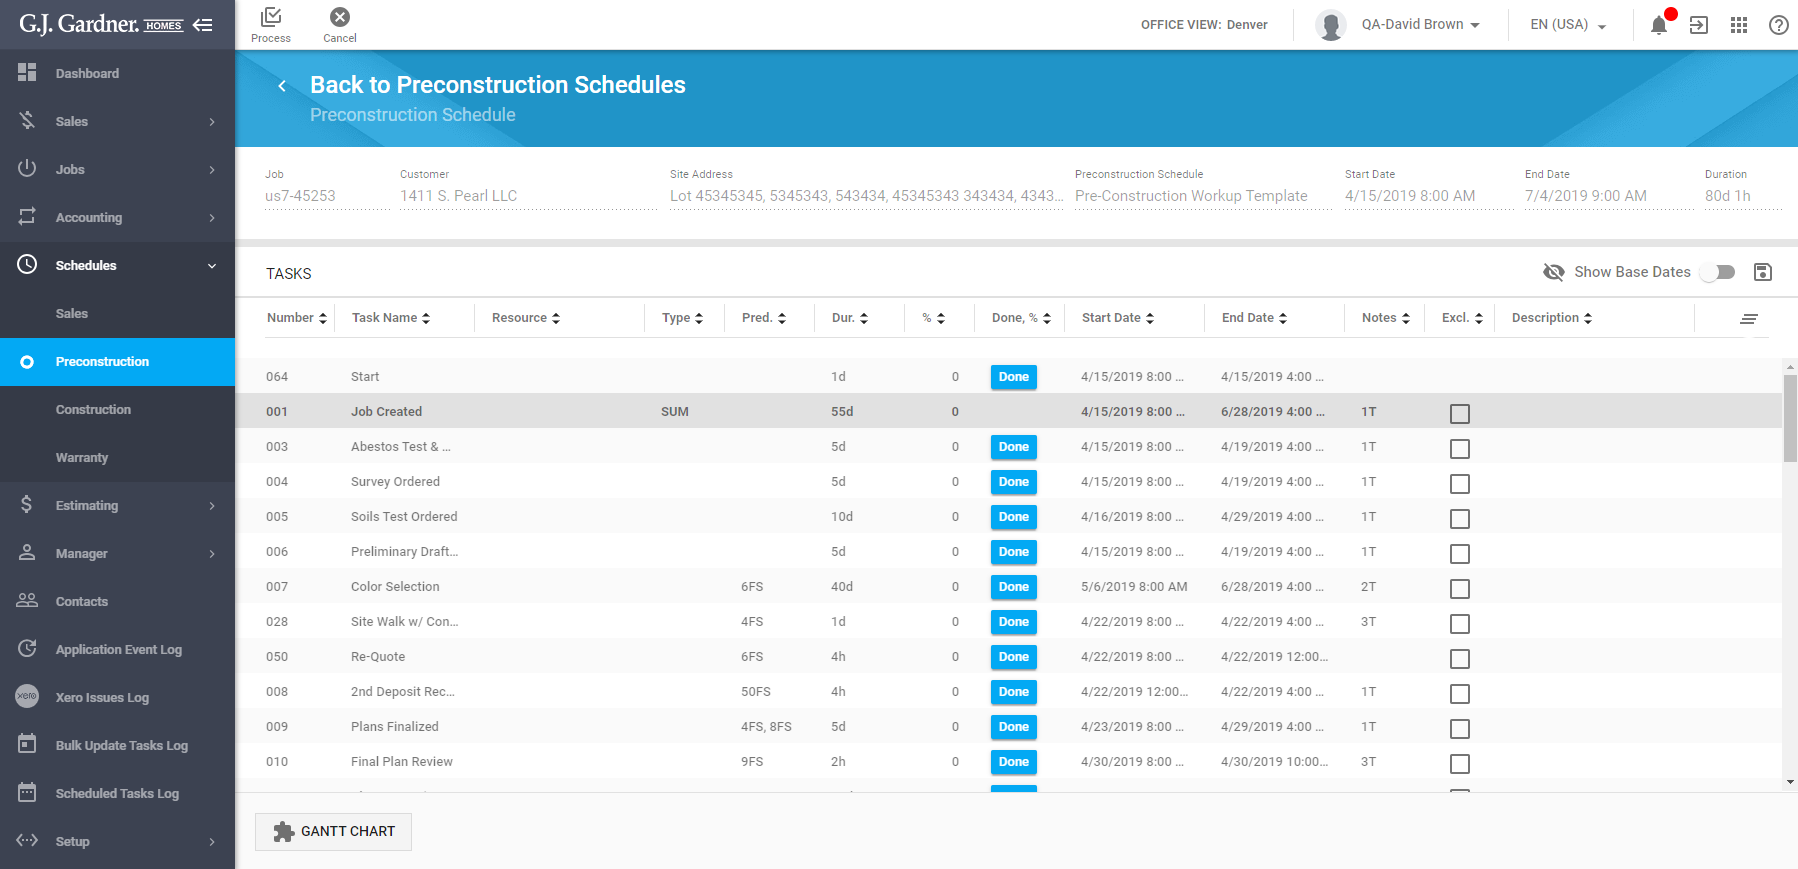
For each task listed in the table, the following information is displayed:
| Number | Ordinal number of the task in the Pre-Construction Schedule. |
| Task Name | Name of the task. |
| Resource | Supplier or subcontractor that can provide the service or supplies for the task. |
| Type | Type of the task. It can take the following values:
|
| Pred. | Number of the predecessor task which the current task relates to. |
| Dur. | Duration of the task in days. |
| % | Percentage of task completion. It can take the following values:
|
| Done, % | Button to track the progress on the task. When you click this button, it cycles through increments of 50% to the current task percentage. |
| Start Date | Planned date to start work on the task.
For the tasks of the SUM type, the Start Date is shown as the earliest date of its sub-tasks. |
| End Date | Planned date to end work on the task.
For the tasks of the SUM type, the End Date is shown as the latest date of its sub-tasks. |
| Notes | Number and letter combination indicating presence of ToDo tasks and notes, like:
|
| Excl. | Flag that the task is excluded from the Gantt chart and will not be displayed there. |
| Description | Optional description of the task. |
In situations when you need to increase or decrease duration of the task (which was taken from the schedule template), you can show the base start and end dates. Then you can compare your current task start and end dates against the base start and end dates.
To show base dates:
- Above the top-right corner of the table with tasks, locate the Show Base Dates toggle.
- Move the toggle right.
Two additional columns will appear in the table with pre-construction tasks.
If you have modified the base dates of some tasks, you can save them as base dates. This way you can see the difference between the saved base dates and updated start and end dates.
To save new base dates:
Click the Save as Base Dates ![]() icon.
icon.
You can perform the following operations on tasks in the pre-construction schedule:
- add new tasks
- edit the existing tasks
- delete the no longer needed tasks
You can add new tasks only on the Gantt chart.
Editing the Task
- In the table with tasks, locate the one you want to edit.
- Hover over the task until the action icons appear.
- Click the Edit
 icon. The Pre-Construction Schedule Task page opens, as follows:
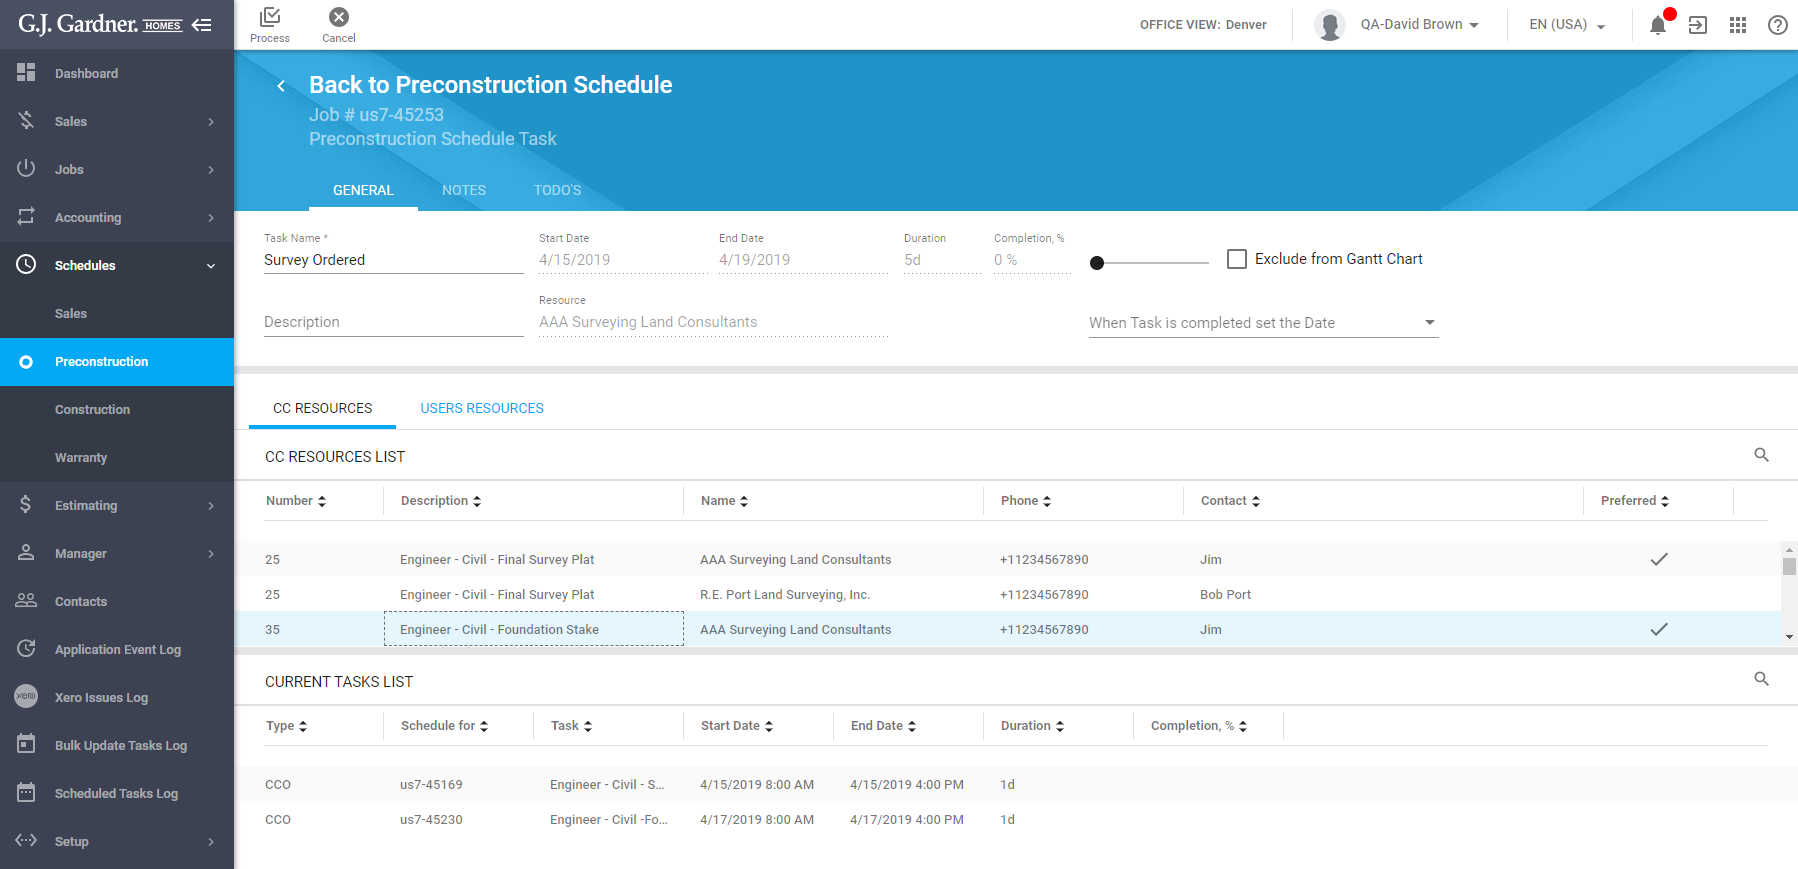
This page is comprised of the three tabs, as follows:
| General | Shows the block with general information about the task and two lists with resources:
|
| Notes | Shows the list of optional notes about the task. |
| ToDo’s | Shows the list of smaller ToDo tasks that attribute to this parent task. |
The general information about the task shows the following:
| Task Name | Name of the task. You can update the name of the task if needed. |
| Start Date | Start date of the task. It is calculated automatically by the system. You cannot edit it. |
| End Date | End date of the task. It is calculated automatically by the system. |
| Duration | Duration of the task in days. You can update it on the Gantt Chart only. |
| Completion, % | Percentage of task completion. |
| Exclude from Gantt Chart | Check the box to exclude the task from the Gantt Chart. |
| Description | Description of the task. |
| Resource | Resource (supplier or user) who can complete the task. |
| When the Task is completed set the Date | Select the date type which should be set upon completion of the task.
You can select any of the following dates:
You can leave this field empty. |
The CC Resources List shows the list of Cost Centers that relate to Suppliers that provide a specific service. For each entry, the following information is displayed:
| Number | Number of the Cost Center which the Supplier relates to. |
| Description | Description of the Cost Center. |
| Name | Name of the Supplier who will execute the task. |
| Phone | Phone number of the Supplier. |
| Contact | Name of the contact on the Supplier’s side. |
| Preferred | Flag that the Supplier is marked as preferred. |
To locate the Supplier by a specific Cost Center number, click the Go To ![]() icon, then enter or select the appropriate Cost Center number from the list.
icon, then enter or select the appropriate Cost Center number from the list.
The Users Resources list shows the list of users who you can view the list of tasks that relate to the current Schedule Task. To locate the user by his or her name, click the Go To ![]() icon, then enter or select the appropriate user from the list.
icon, then enter or select the appropriate user from the list.
The Current Tasks List shows the list of current tasks of the selected Supplier or user. For each task, the following information is displayed:
| Type | Type of the task. It can take any of the following values:
|
| Schedule For | Number of the Job which the current task is scheduled for, |
| Task | Description of the task. |
| Start Date | Start date of the task. |
| End Date | End date of the task. |
| Duration | Duration of the task. |
| Completion, % | Completion percentage of the task. |
To locate the task by the Job number, click the Go To ![]() icon, then enter or select the appropriate Job from the list.
icon, then enter or select the appropriate Job from the list.
Selecting Resources for Task Execution
To select a supplier/sub-contractor:
- Select the CC Resources tab.
- On the list with suppliers and sub-contractors, select the appropriate one that can execute the current task.
- The selected supplier or sub-contractor will appear in the Resource box.
Once you have selected a specific supplier or sub-contractor, you can also see the list of tasks which this supplier or sub-contractor has been scheduled to execute.
To locate the appropriate supplier or sub-contractor, click the Go to ![]() icon. Select the Cost Center which the supplier or sub-contractor attributes to.
icon. Select the Cost Center which the supplier or sub-contractor attributes to.
To select a user:
- Select the User Resources tab.
- On the list with users, select the appropriate one that can execute the current task.
- The selected user will appear in the Resource box.
- When complete, click Process.
Managing Notes for the Task
Start editing the task which you want to add notes into.
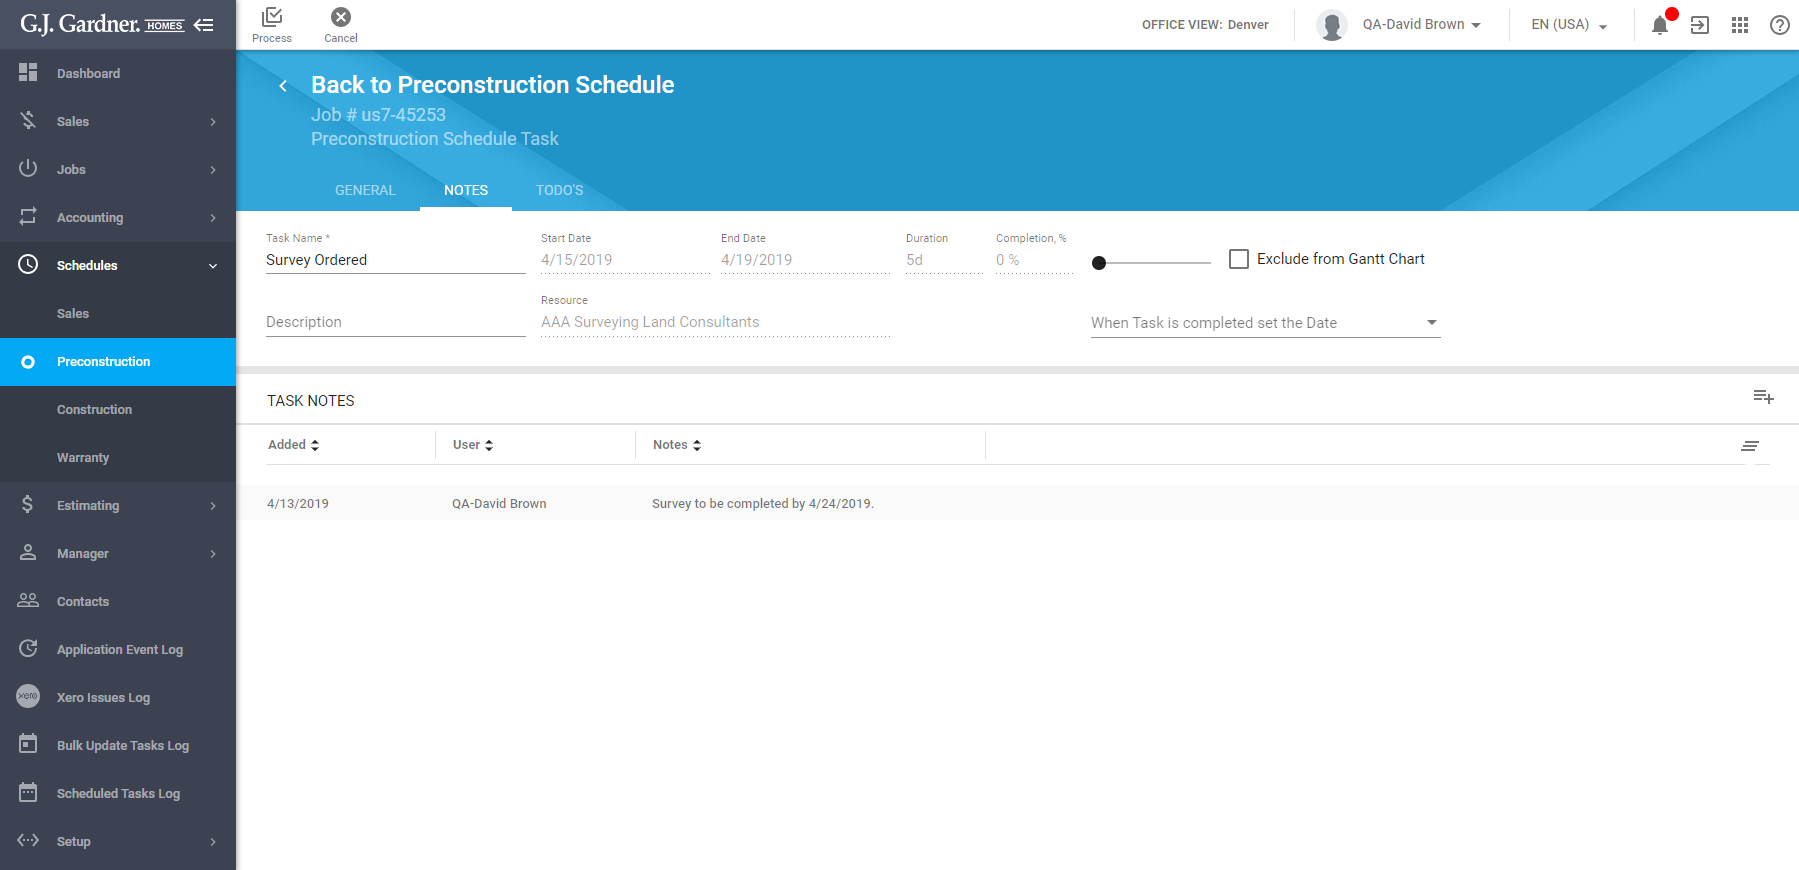
Switch to the Notes tab.
Under the block with general information about the task, locate the list with task notes.
For each task, the following information is displayed:
| Added | Date when the note was added. |
| User | User who added the note to the task. |
| Notes | Text of the added note. |
You can perform the following operations on notes:
- add new notes
- edit the existing notes
- delete the no longer needed notes
Adding a new note
- In the top right part of the list with task notes, locate the Add
 icon and click it.
 - In the Add note form, enter the note for the task.
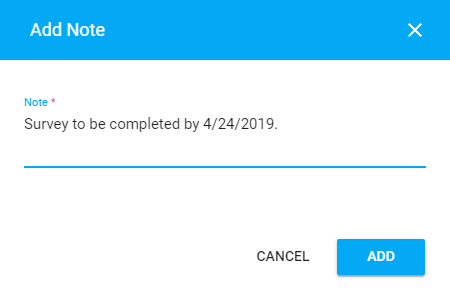
- When complete, click Add.
- Click Process.
Editing the note
- On the list with task notes, locate the one you want to edit.
- Hover over the note until the action icons appear.
- Click the Edit icon.
- In the Edit Note form, make the appropriate modifications.
- When complete, click Save.
- Click Process.
Deleting the note
- On the list with task notes, locate the one you want to delete.
- Hover over the note until the action icons appear.
- Click the Delete
 icon.
icon. - Confirm the removal of the note.
- Click Process.
Managing ToDo Items of the Task
Start editing the task which you want to add ToDo items into.
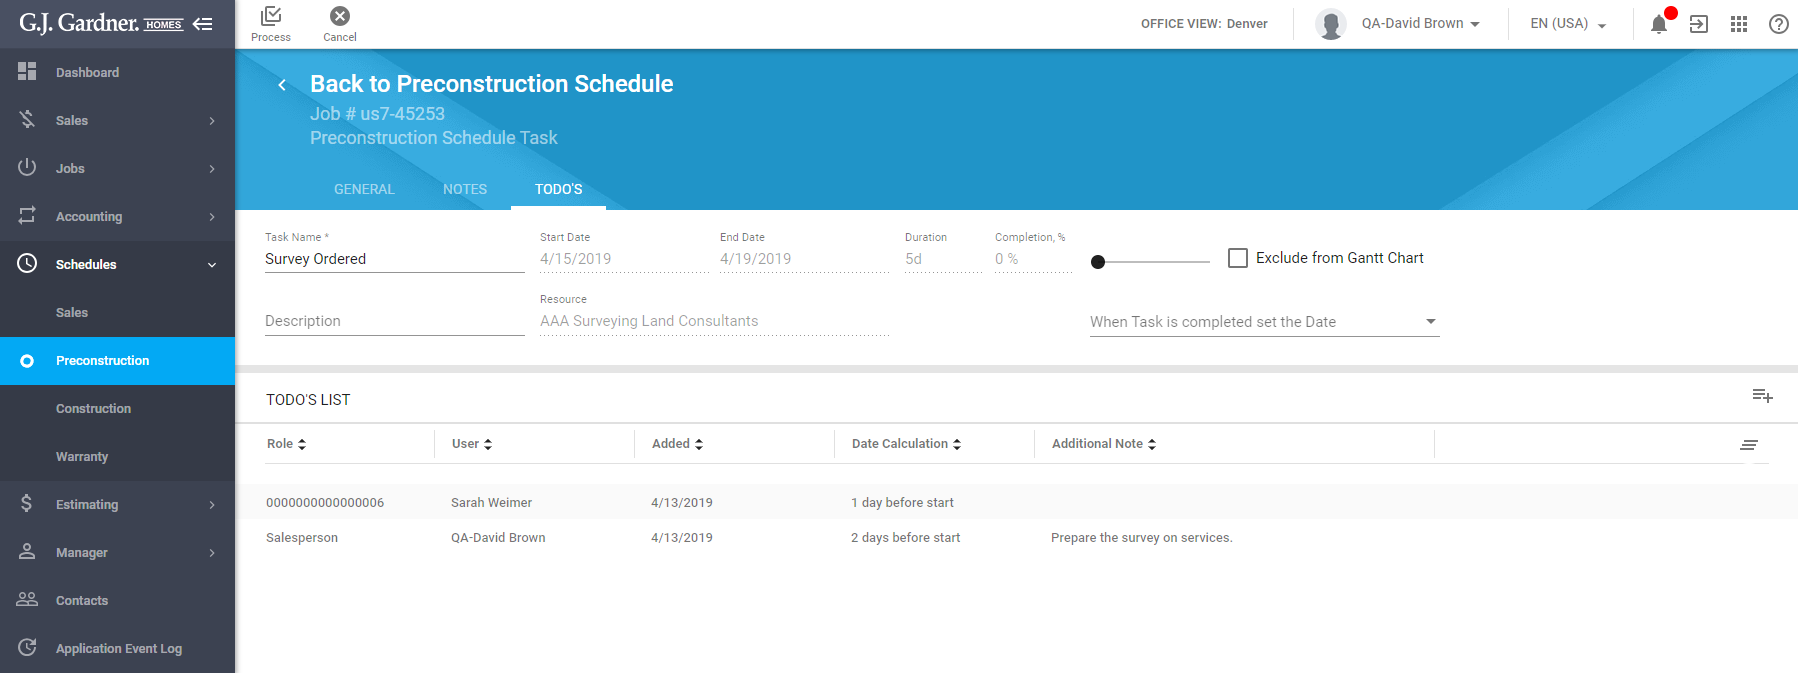
Switch to the ToDo’s tab.
Under the block with general information about the task, locate the list with ToDo items.
For each ToDo item, the following information is displayed:
| Role | Role of the user which a ToDo item was created for. |
| User | User who a ToDo item is assigned to. |
| Added | Date when a ToDo item was added. |
| Date Calculation | Due date of a ToDo item. It is calculated on the basis of the Task’s Start Date and the time condition. |
| Additional Note | Note for a ToDo item. |
You can perform the following operations on ToDo items:
- add new ToDo items
- edit the existing ToDo items
- delete the no longer needed ToDo items
Adding a ToDo item
- In the top right part of the list with ToDo items, locate the Add icon and click it.

- In the Add ToDo form, enter the following information:
Role Select the role of the user who you want to assign the ToDo for. User Select the user who you want to assign the ToDoto. Days Enter the number of days. Event Select the event which triggers execution of a ToDo item, as follows: - Before Start – due date of a ToDo item is set as X days before start of the main Task.
- After Start – due date of a ToDo item is set as X days after start of the main Task.
- Before End – due date of a ToDo item is set as X days before end of the main Task.
- After End – due date of a ToDo item is set as X days after start of the main Task.
- After Complete – due date of a ToDo item is set as X days after completion of the main Task.
Note Enter a note for a ToDo item. - When complete, click Add.
- Click Process.
Editing the ToDo item
- On the list with task ToDo items, locate the one you want to edit.
- Hover over the ToDo item until the action icons appear.
- Click the Edit icon.
- In the Edit ToDo form, make the appropriate modifications.
- When complete, click Save.
- Click Process.
Deleting the ToDo item
- On the list with ToDo items, locate the one you want to delete.
- Hover over the ToDo item until the action icons appear.
- Click the Delete icon.
- Confirm the removal of the ToDo item.
- Click Process.