
Corporate
You can configure the settings of the Regional Office House Cost report. You can create Areas that will unite several Master Zones from your Corporate Zone. Additionally, you can create Master Cost Centers that will unite different Cost Centers from these Franchise Offices of the selected Master Zones.
- On the navigational sidebar, select Setup.
- Once the menu expands, select Reports Settings.
- Select the Regional Office House Cost tab. The page opens, as follows:
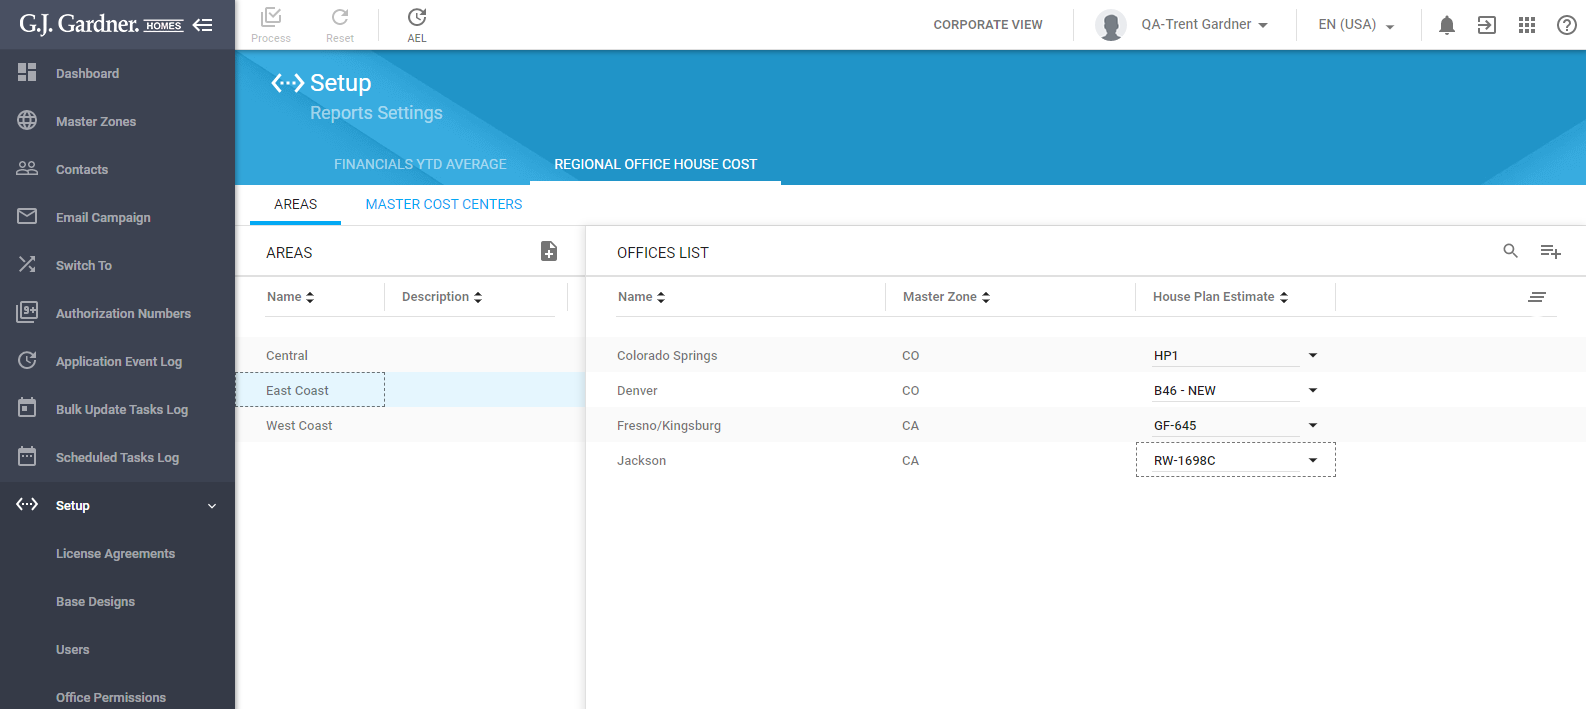
The Regional Office House Cost page is comprised of the two sections:
| Areas | Lists Areas with Offices within them. |
| Master Cost Centers | List Master Cost Centers with the Cost Centers mapped to them from Offices. |
Managing Areas
An area is a regional territory unit that can be used to organize your Master Offices depending on their current location. Once you have united Offices around a specific Area, the system will use this area to calculate figures for the Regional Office House Cost.
- Open the Regional Office House Cost page.
- Select the Areas tab.
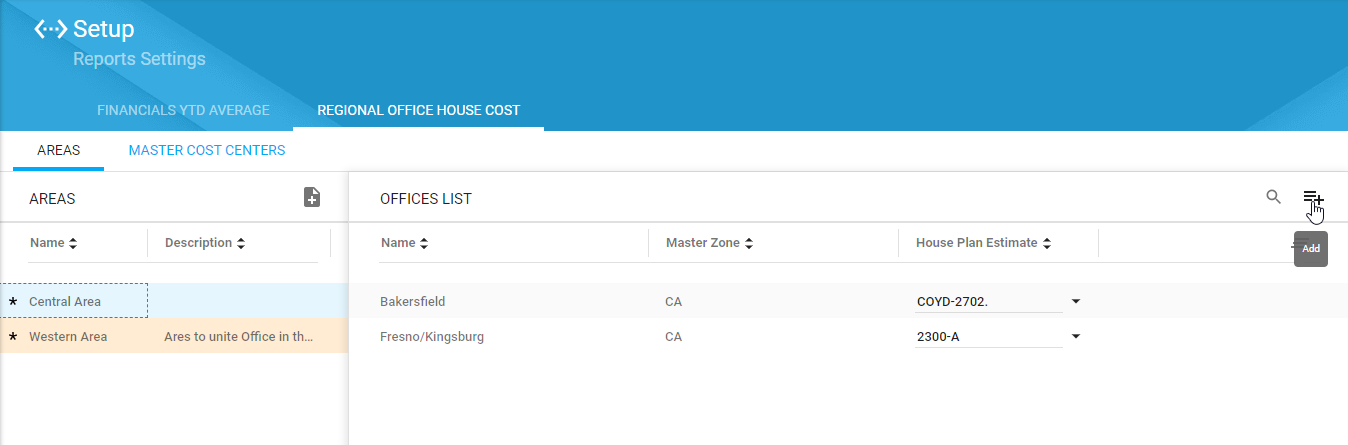
On the opened page, you can see the list with Areas and the list with Offices within the selected Area.
You can perform the following operations on Areas:
- add new Areas
- edit the existing Areas
- delete the no longer needed Areas
- manage Offices within a specific Area
To add a new Area:
- Above the list with areas, click the Create
 icon.
icon.
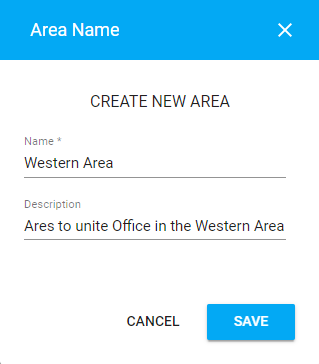
- In the Area Name form, specify the following information:
Name Name of the Area. Description Description of the Area. - When complete, click Save.
- To save the newly added Area, click Process.
To edit the Area:
- On the list with Areas, locate the Area you want to edit.
- Hover over the Area until the action icons appear.
- Click the Edit
 icon.
icon. - In the Area Name form, make the appropriate modifications.
- When complete, click Save.
- To save the edited Area, click Process.
To delete the Area:
- On the list with Areas, locate the Area you want to delete.
- Hover over the Area until the action icons appear.
- Click the Delete
 icon.
icon. - Confirm the removal of the Area.
- To save modifications, click Process.
To manage Offices within the Area:
Every Office has a House Plan which is used mostly for House Plan estimation. Within each Area, you can add Offices and select a specific House Plan which is primarily used for estimation.
- Select the Area which you want to add an Office into.
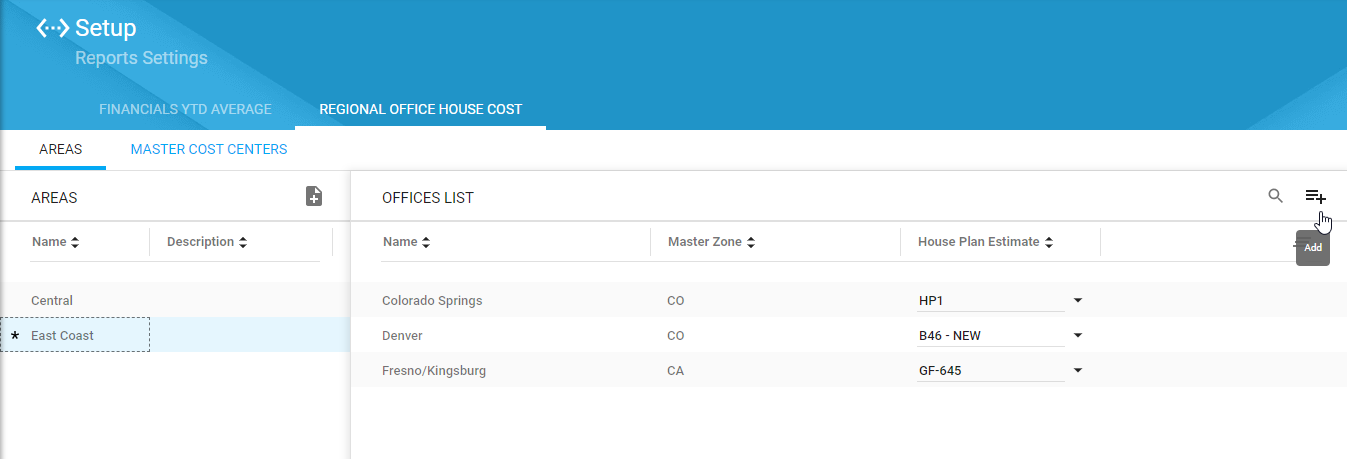
- Above the list with Offices, click the Add icon.
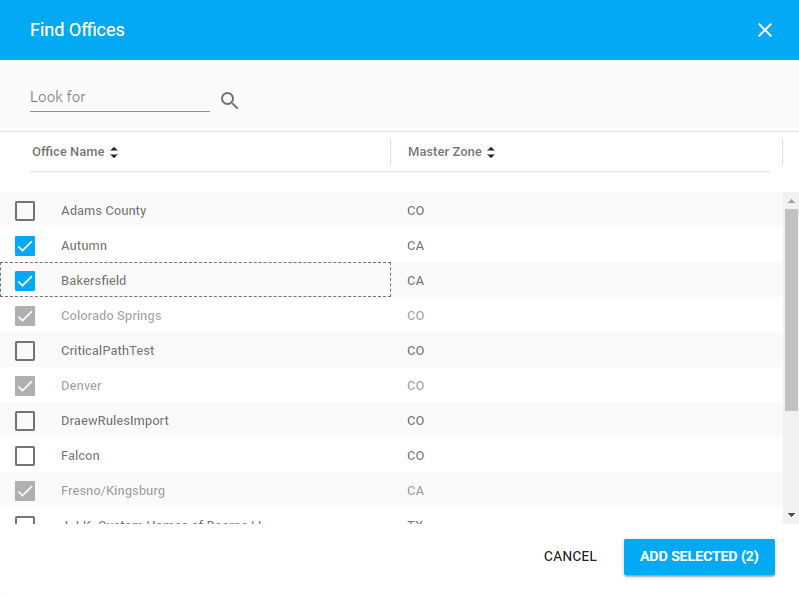
- In the Find Offices form, select the Offices which you want to attribute to the current Area.
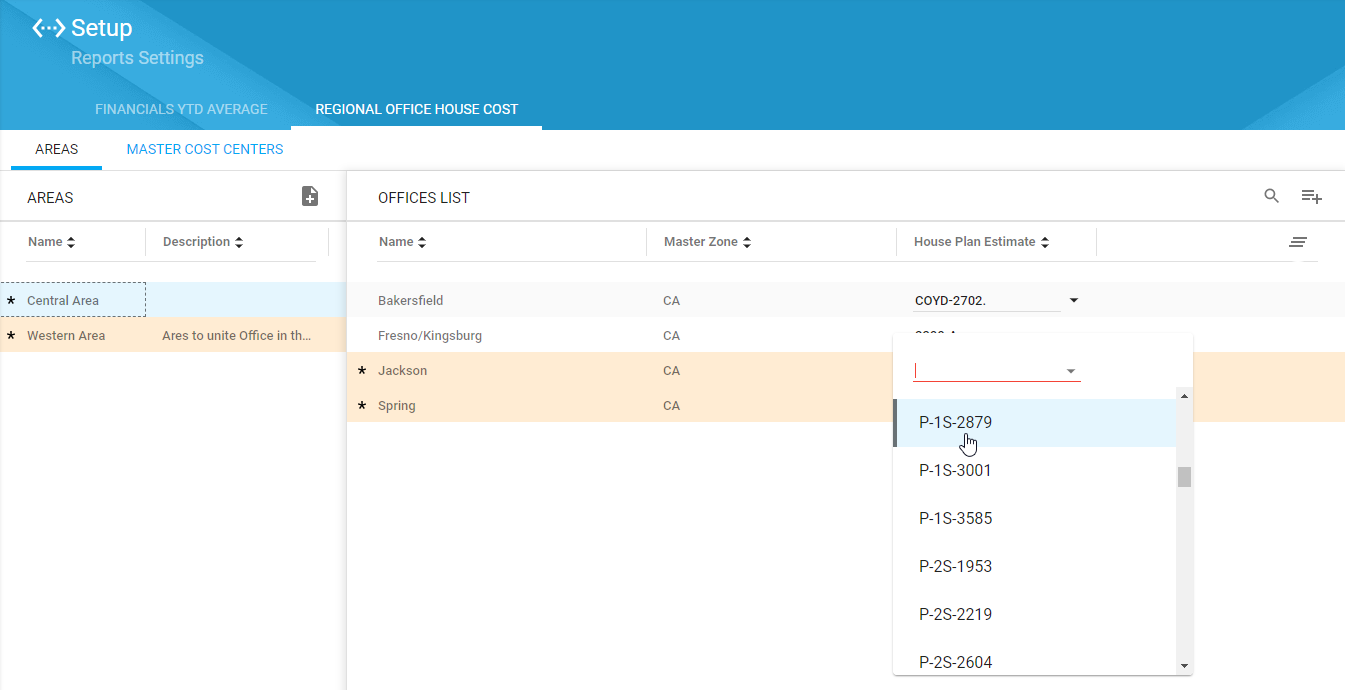
- Click Add Selected. Once you have added Offices, you need to select the mostly used House Plan for producing estimates.
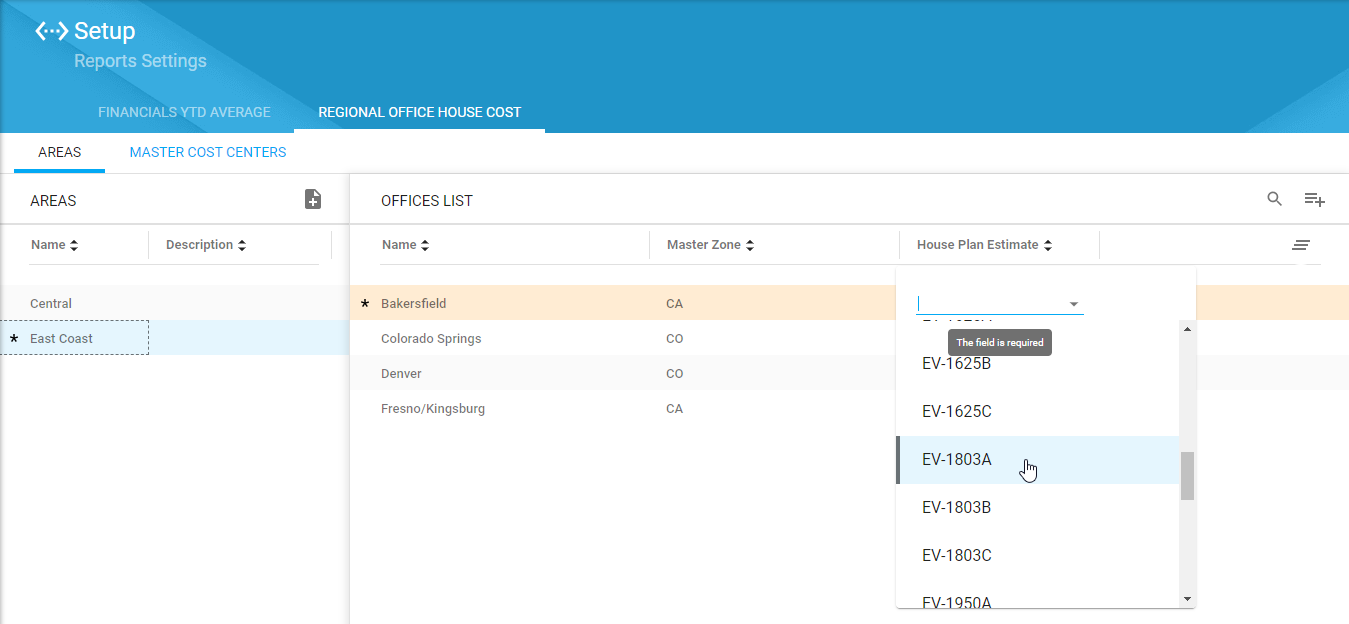
- Select the House Plan from the list of House Plans available in the Office.
- When complete, click Process.
To remove the Office from the Area:
- Select the Area which you want to remove the Office from.
- Locate the Office you want to remove.
- Hover over this Office until the action icon appears.
- Click the Remove
 icon.
icon. - When complete, click Process.
Managing Master Cost Centers
You can manage Master Cost Centers which may be used to group Cost Centers of the similar kind from Franchise Offices. This is needed when Franchise Offices have different sets of Cost Centers or different names of Cost Centers.
- Open the Regional Office House Cost page.
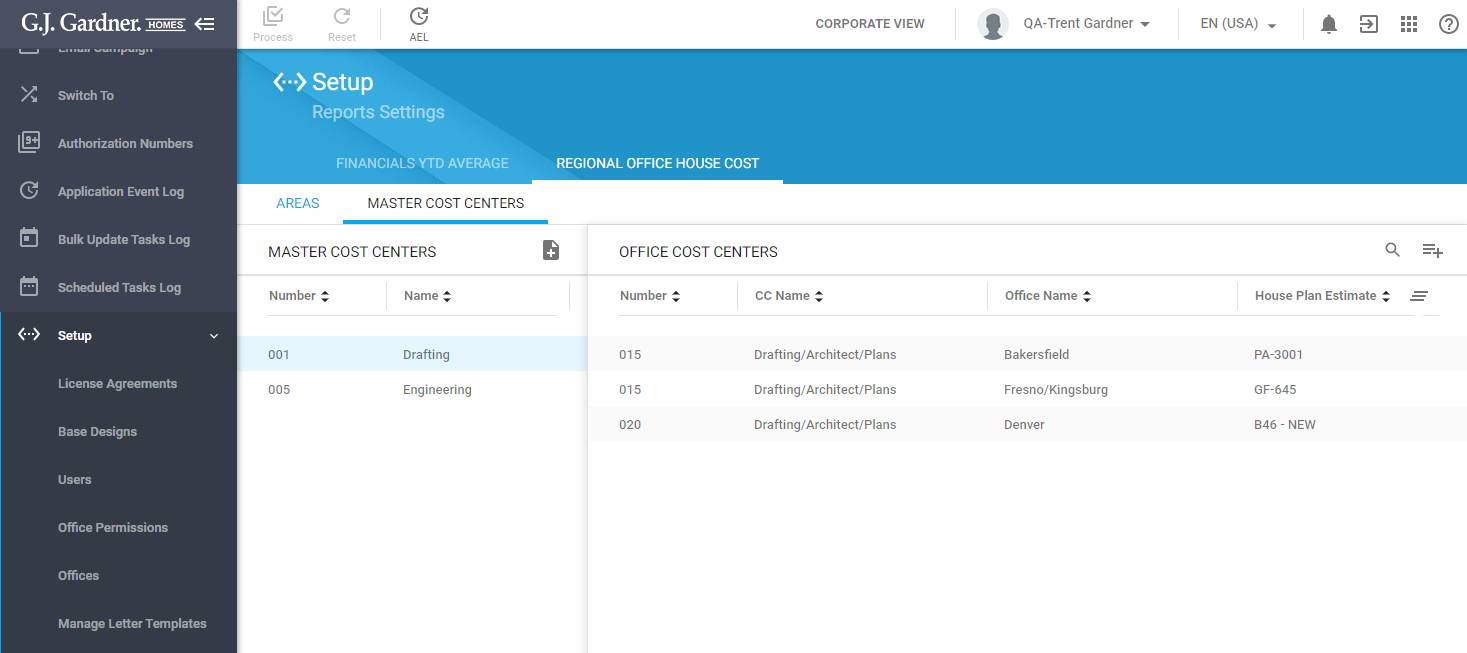
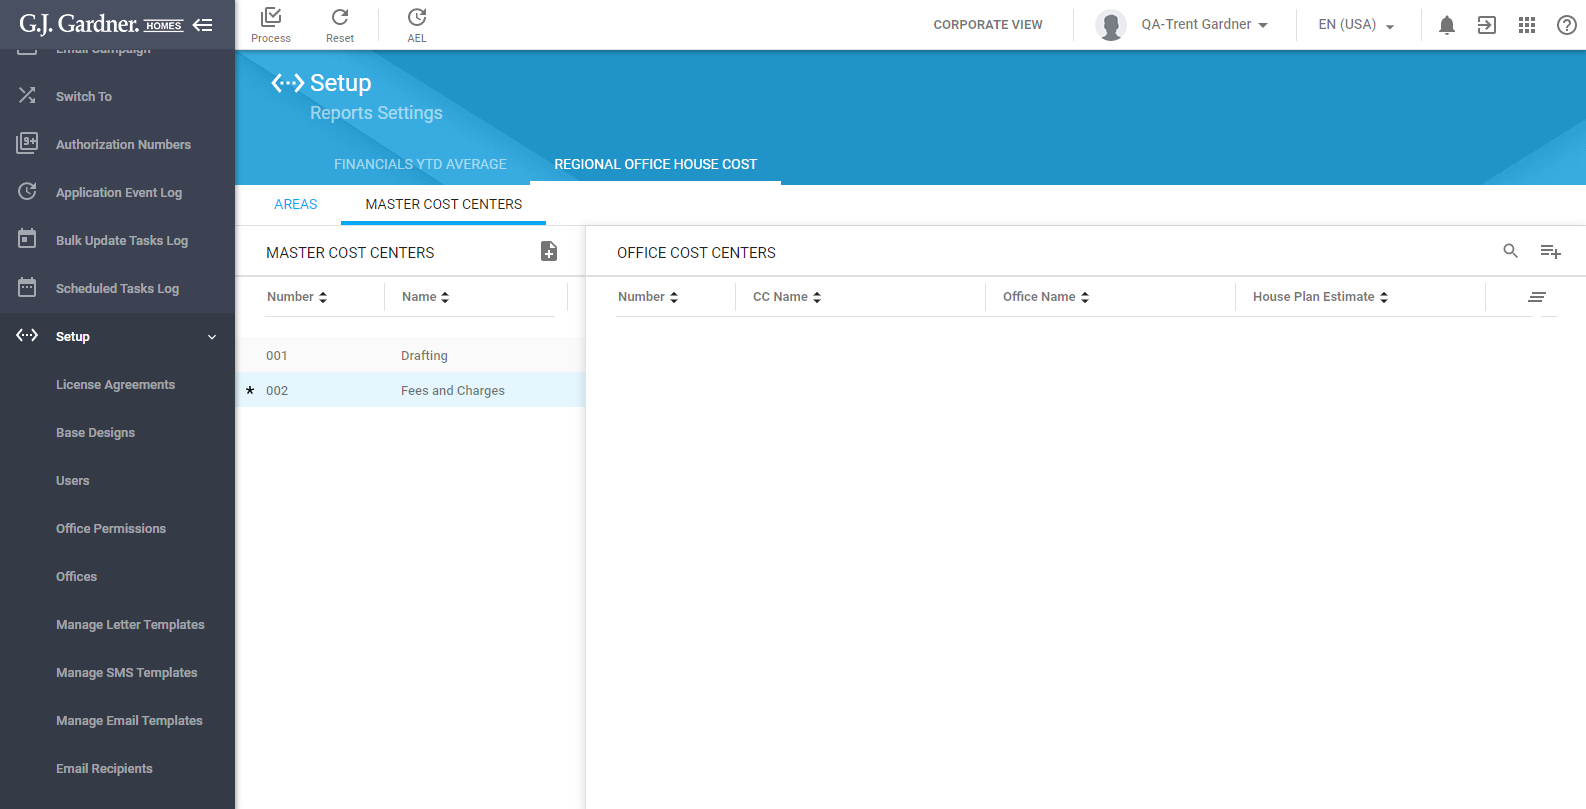
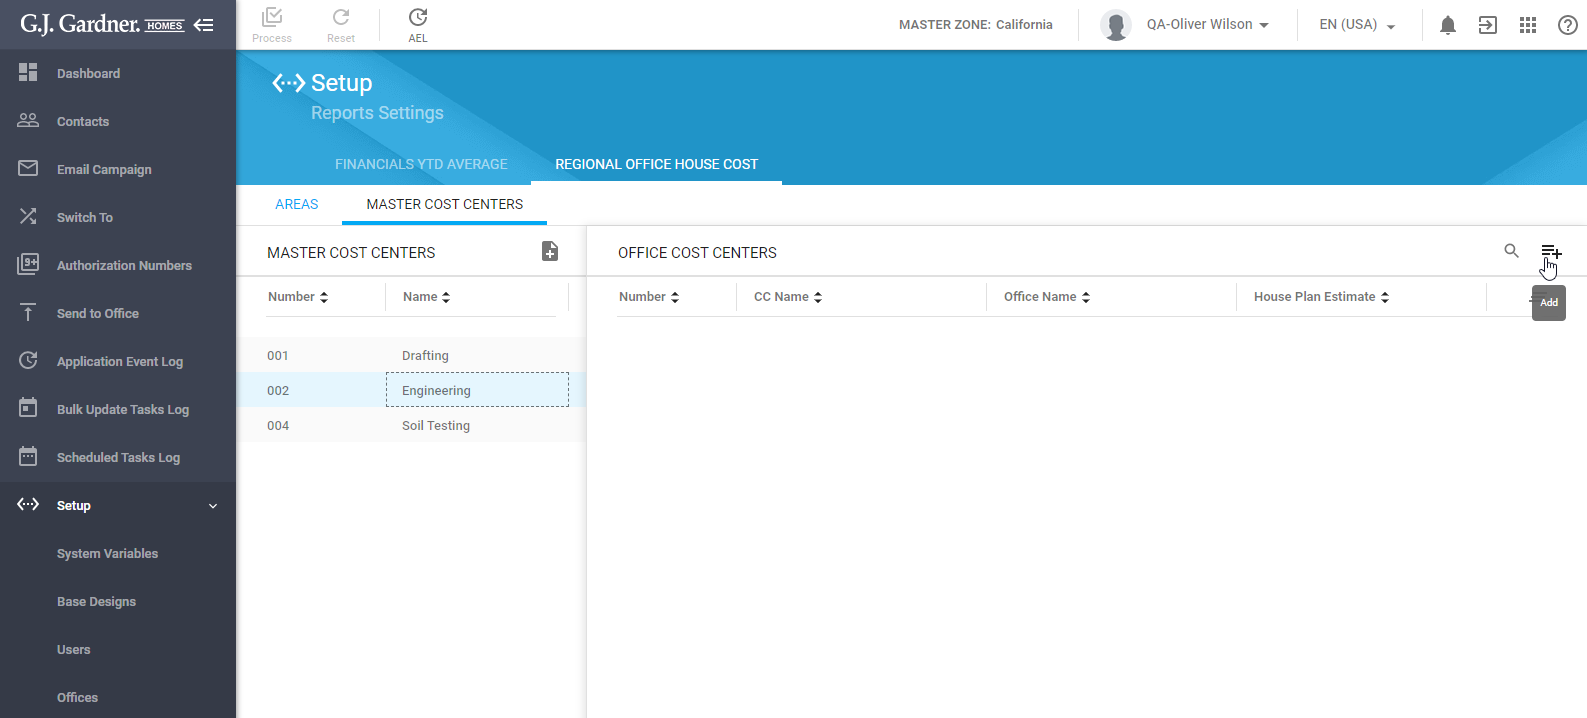
- Select the Master Cost Centers tab.
On the opened page, you can see the list with Master Cost Centers and the list with Cost Centers from Franchise Offices.

You can perform the following operations on Master Cost Centers:
- add new Master Cost Centers
- edit the existing Master Cost Centers
- delete the no longer needed Master Cost Centers
- manage Office Cost Centers within a specific Master Cost Center
To add a new Master Cost Center:
- Above the list with Master Cost Centers, click the Create icon.
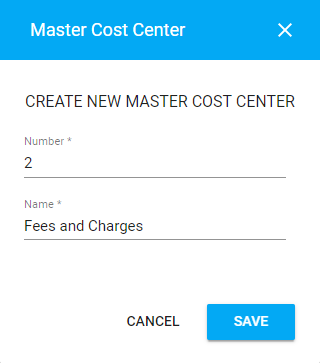
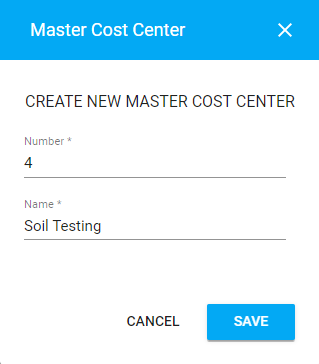
- In the Master Cost Center form, specify the following information:
Number Number of the Master Cost Center. Name Name of the Master Cost Center. - When complete, click Save.
- To save the newly added Master Cost Center, click Process.
To edit the Master Cost Center:
- On the list with Master Cost Centers, locate the Master Cost Center you want to edit.
- Hover over the Master Cost Center until the action icons appear.
- Click the Edit icon.
- In the Master Cost Center form, make the appropriate modifications.
- When complete, click Save.
- To save the edited Master Cost Center, click Process.
To delete the Master Cost Center:
- On the list with Master Cost Centers, locate the Master Cost Center you want to delete.
- Hover over the Master Cost Center until the action icons appear.
- Click the Delete icon.
- Confirm the removal of the Master Cost Center.
- To save modifications, click Process.
To manage Office Cost Centers within the Master Cost Center:
Every Master Cost Center is used to group multiple Office Cost Centers. You can further select these Cost Centers within the House Plan which is primarily used for producing the House Plan estimates within this Office. The system uses the Master Cost Centers to calculate figures for the Regional Office House Cost report.
- Select the Master Cost Center which you want to add Office Cost Centers into.
- Above the list with Office Cost Centers, click the Add
 icon.
icon.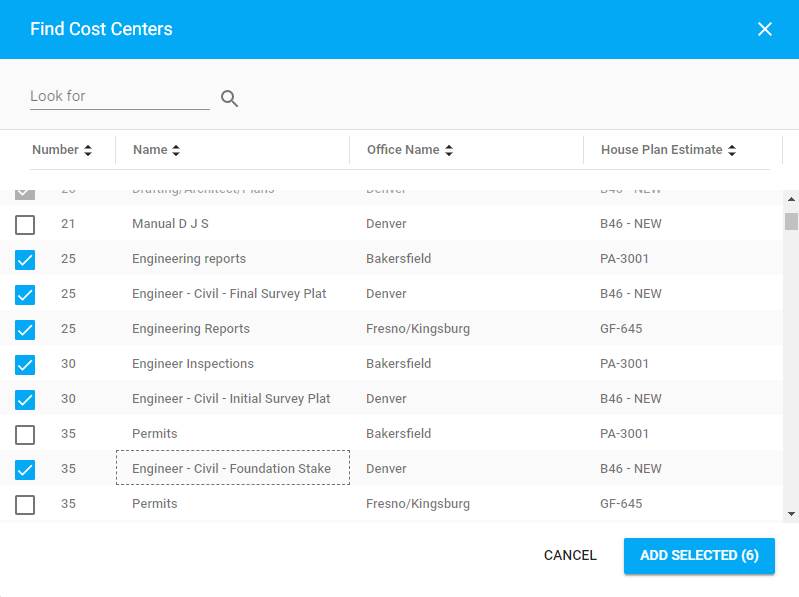
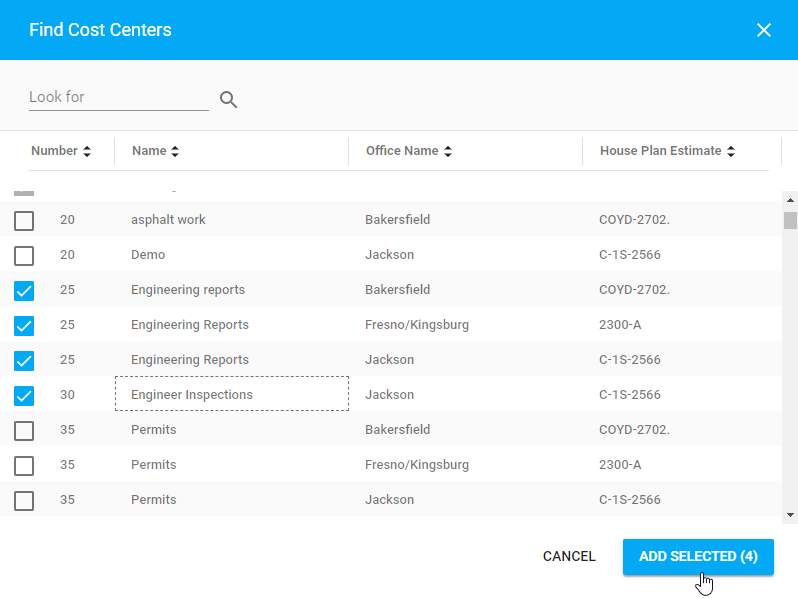
- In the Find Cost Centers form, select the Cost Center which you want to attribute to the current Master Cost Center. You can select only Cost Centers within the House Plans that were selected as default for the Offices.
- Click Add Selected.
- When complete, click Process.
To remove the Office Cost Center from the Master Cost Center:
- Select the Master Cost Center which you want to remove Office Cost Center from.
- Locate the Office Cost Center you want to remove.
- Hover over this Cost Center until the action icon appears.
- Click the Remove icon.
- When complete, click Process.
Master
You can configure the settings of the Regional Office House Cost report. You can create Areas that will unite several Offices from your Master Zone. Additionally, you can create Master Cost Centers that will unite different Cost Centers from these Franchise Offices of your Master Zone.
- On the navigational sidebar, select Setup.
- Once the menu expands, select Reports Settings.
- Select the Regional Office House Cost tab. The page opens, as follows:
The Regional Office House Cost page is comprised of the two sections:
| Areas | Lists Areas with Offices within them. |
| Master Cost Centers | List Master Cost Centers with the Cost Centers mapped to them from Offices. |
Managing Areas
An area is a regional territory unit that can be used to organize Franchise Offices within your Master Zone. Once you have united Offices around a specific Area, the system will use this area to calculate figures for the Regional Office House Cost report.
- Open the Regional Office House Cost page.
- Select the Areas tab.
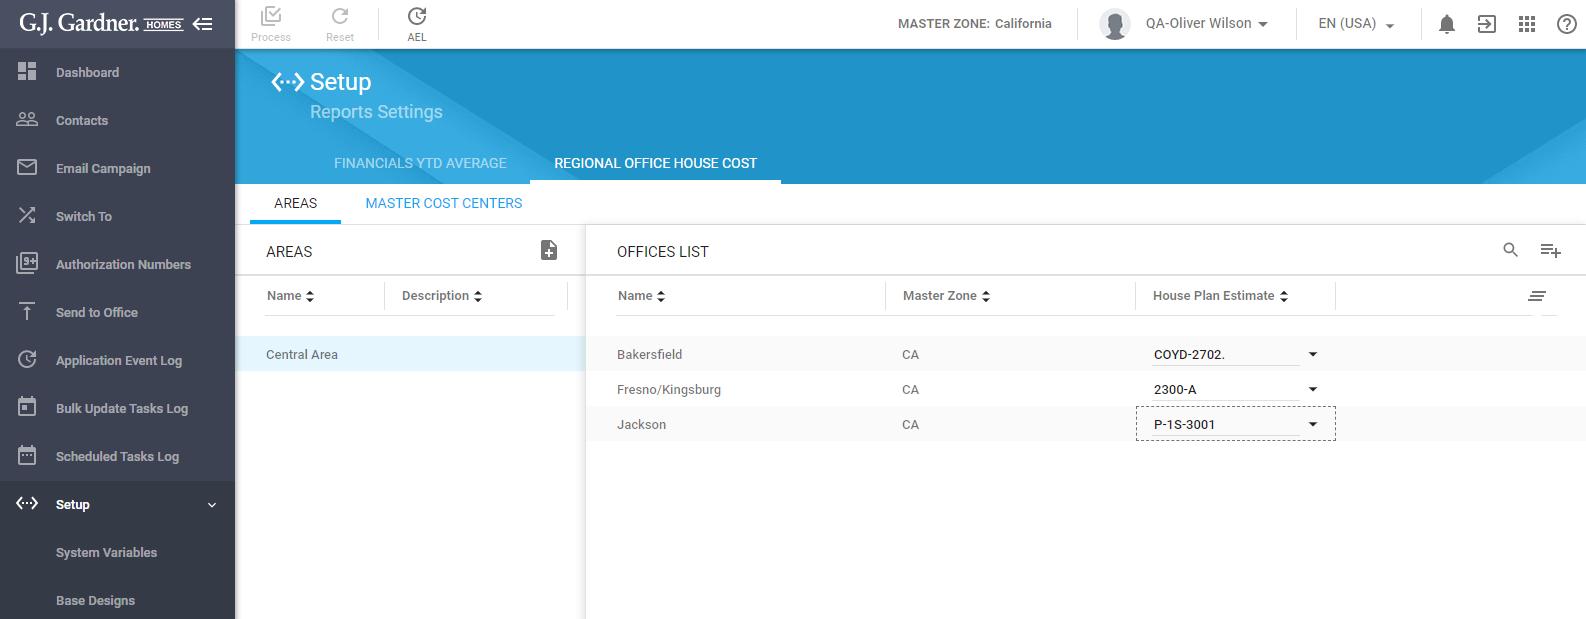
On the opened page, you can see the list with Areas and the list with Offices within the selected Area.
You can perform the following operations on Areas:
- add new Areas
- edit the existing Areas
- delete the no longer needed Areas
- manage Offices within a specific Area
To add a new Area:
- Above the list with areas, click the Create icon.
- In the Area Name form, specify the following information:
Name Name of the Area. Description Description of the Area. - When complete, click Save.
- To save the newly added Area, click Process.
To edit the Area:
- On the list with Areas, locate the Area you want to edit.
- Hover over the Area until the action icons appear.
- Click the Edit icon.
- In the Area Name form, make the appropriate modifications.
- When complete, click Save.
- To save the edited Area, click Process.
To delete the Area:
- On the list with Areas, locate the Area you want to delete.
- Hover over the Area until the action icons appear.
- Click the Delete icon.
- Confirm the removal of the Area.
- To save modifications, click Process.
To manage Offices within the Area:
Every Office has a House Plan which is used mostly for House Plan estimation. Within each Area, you can add Offices and select a specific House Plan which is primarily used for estimation.
- Select the Area which you want to add an Office into.
- Above the list with Offices, click the Add icon.

- In the Find Offices form, select the Offices which you want to attribute to the current Area.
- Click Add Selected. Once you have added Offices, you need to select the mostly used House Plan for producing estimates.
- Select the House Plan from the list of House Plans available in the Office.
- When complete, click Process.
To remove the Office from the Area:
- Select the Area which you want to remove the Office from.
- Locate the Office you want to remove.
- Hover over this Office until the action icon appears.
- Click the Remove icon.
- When complete, click Process.
Managing Master Cost Centers
You can manage Master Cost Centers which may be used to group Cost Centers of the similar kind from Franchise Offices. This is needed when Franchise Offices have different sets of Cost Centers or different names of Cost Centers.
- Open the Regional Office House Cost page.
- Select the Master Cost Centers tab.
On the opened page, you can see the list with Master Cost Centers and the list with Cost Centers from Franchise Offices.
You can perform the following operations on Master Cost Centers:
- add new Master Cost Centers
- edit the existing Master Cost Centers
- delete the no longer needed Master Cost Centers
- manage Office Cost Centers within a specific Master Cost Center
To add a new Master Cost Center:
- Above the list with Master Cost Centers, click the Create icon.
- In the Master Cost Center form, specify the following information:
Number Number of the Master Cost Center. Name Name of the Master Cost Center. - When complete, click Save.
- To save the newly added Master Cost Center, click Process.
To edit the Master Cost Center:
- On the list with Master Cost Centers, locate the Master Cost Center you want to edit.
- Hover over the Master Cost Center until the action icons appear.
- Click the Edit icon.
- In the Master Cost Center form, make the appropriate modifications.
- When complete, click Save.
- To save the edited Master Cost Center, click Process.
To delete the Master Cost Center:
- On the list with Master Cost Centers, locate the Master Cost Center you want to delete.
- Hover over the Master Cost Center until the action icons appear.
- Click the Delete icon.
- Confirm the removal of the Master Cost Center.
- To save modifications, click Process.
To manage Office Cost Centers within the Master Cost Center:
Every Master Cost Center is used to group multiple Office Cost Centers. You can further select these Cost Centers within the House Plan which is primarily used for producing the House Plan estimates within this Office. The system uses the Master Cost Centers to calculate figures for the Regional Office House Cost report.
- Select the Master Cost Center which you want to add Office Cost Centers into.
- Above the list with Office Cost Centers, click the Add icon.
- current Master Cost Center. You can select only Cost Centers within the House Plans that were selected as default for the Offices.
- Click Add Selected.
- When complete, click Process.
To remove the Office Cost Center from the Master Cost Center:
- Select the Master Cost Center which you want to remove Office Cost Center from.
- Locate the Office Cost Center you want to remove.
- Hover over this Cost Center until the action icon appears.
- Click the Remove icon.
- When complete, click Process.