
To simplify the process of producing Job Specifications, the system supports Job Specification Templates. These templates allows you to quickly fill out the specification with the required information and select clauses depending on the customer’s preferences.
You can manage Job Specification templates and adjust their contents to specific requirements.
- To manage the Job Specs, on the navigational sidebar, select Setup.
- Once the Setup section expands, select Job Admin.
- On the tabbed menu, select Job Specs. Once the page loads, you will see the list of job specification templates, as follows:
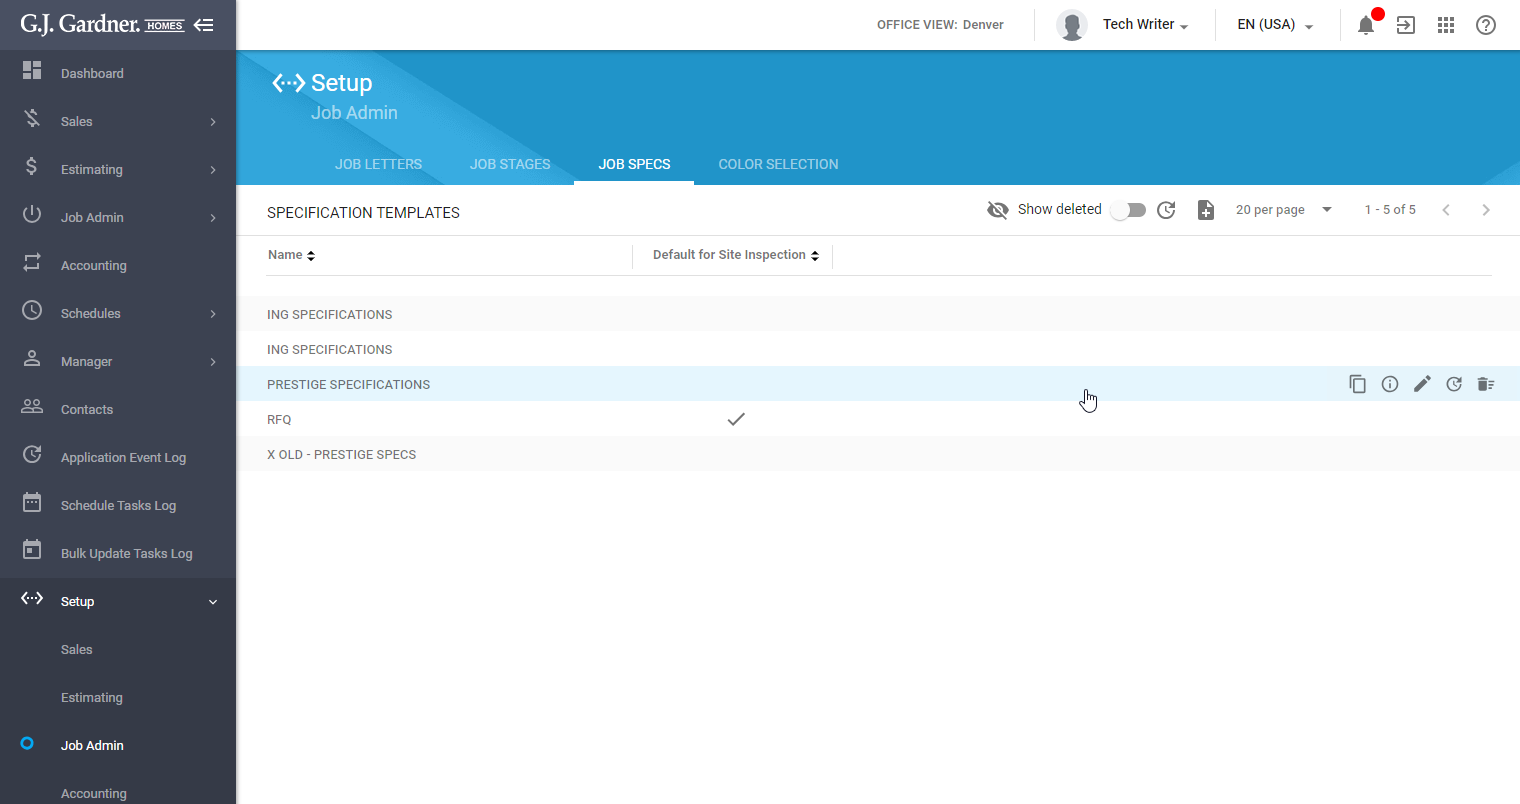
For each job specification template, you can view its name and the flag that it is default for site inspection.
You can perform the following operations on job specification templates:
- create new job specification templates
- managing structure of the job specification template
- edit the existing job specification templates
- mark the no longer needed job specification templates as deleted
- undelete the job specification templates
- clone the existing job specification templates
- view usage of job specification templates
Creating a New Job Specification Template
- On the Job Specs tab, click the Create
 icon.
icon.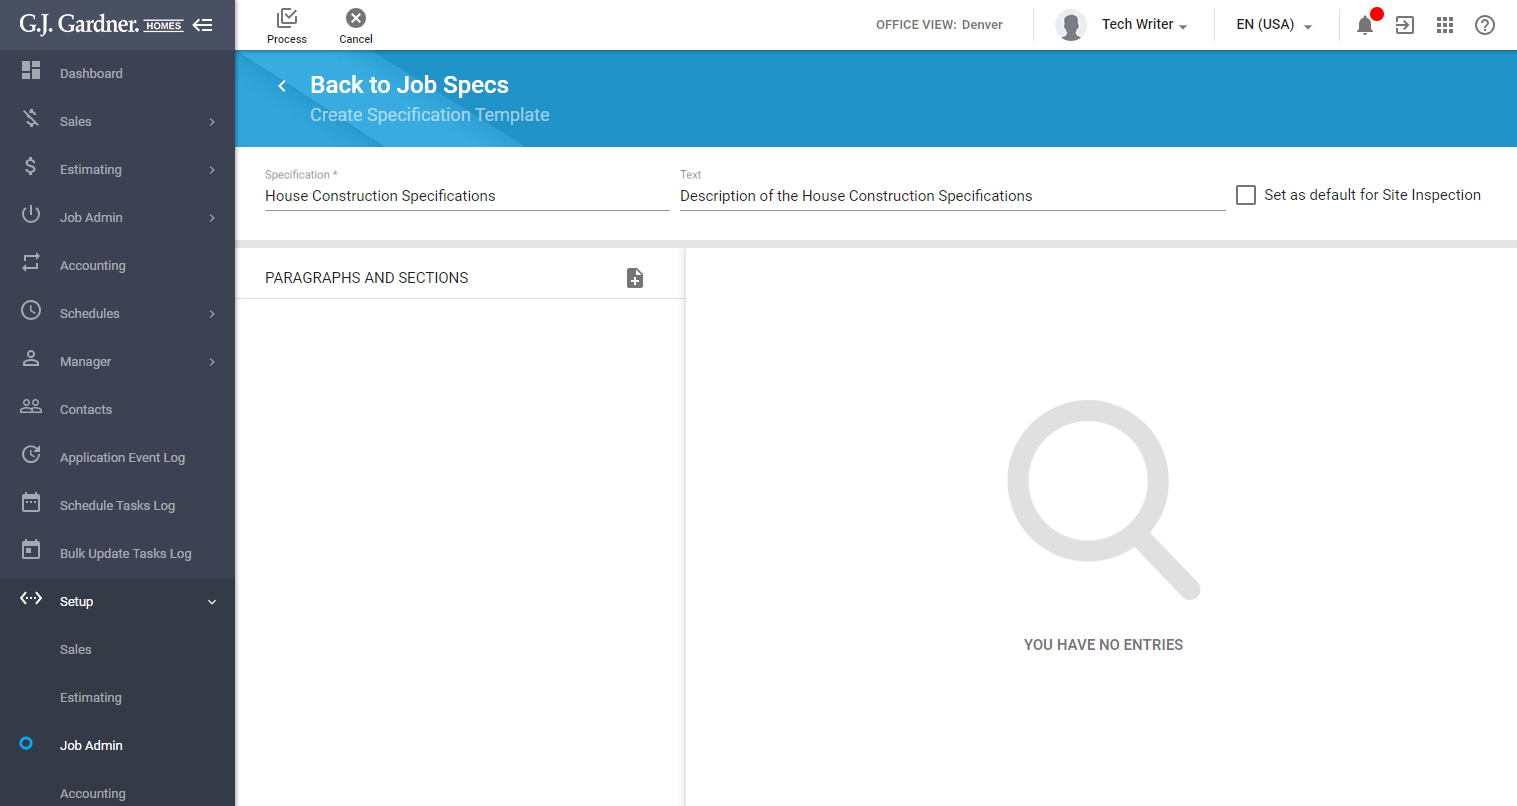
- On the Create Specification Template page specify the following information:
Specification Enter the name of a new job specification template. Text Enter the brief description of a new job specification template. Set as default for Site Inspection Check the box to make the current job specification template as default for site inspections in the Sales part of the system. - Click Process.
Managing Structure of Job Specification Template
The job specification template is comprised of paragraphs that can further fall into sections with specific clauses. You can manage the structure of the job specification template as you need and add the required paragraphs and sections.
Creating a new paragraph
- Create a new or edit the existing job specification template.
- On the Create/Edit Specification Template page, locate the Paragraphs and Sections list.
- In the top right part of this list, locate the Create new paragraph icon and click it. To the right side of the Paragraphs and Sections list, there appears the area with fields for entering information about a paragraph.
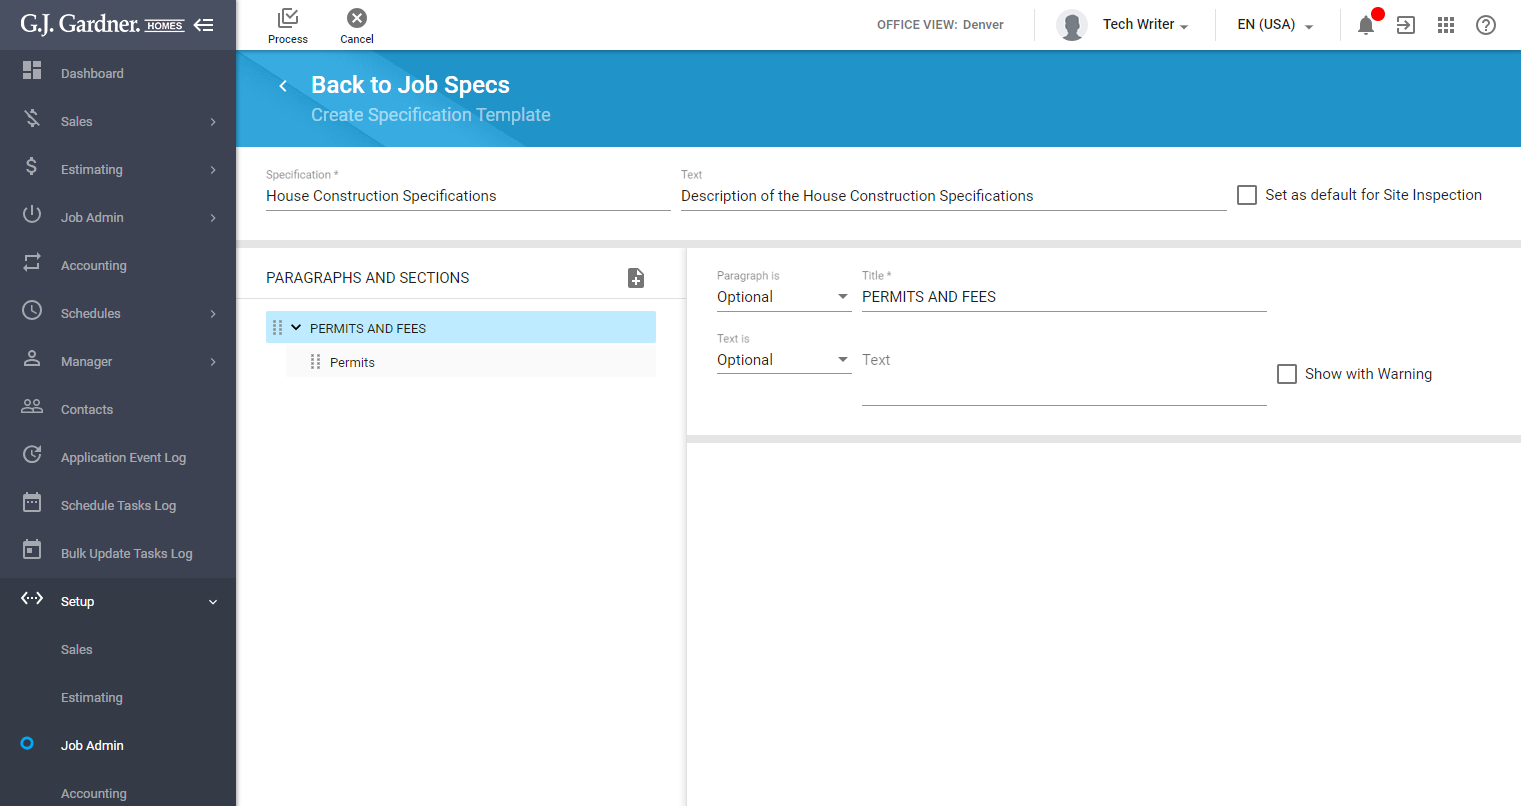
- Specify information for the paragraph, as follows:
Paragraph is Select the status of the paragraph from the following: - Optional – can be turned on or off on a Job by Job basis
- Mandatory – must show on every Job
Title Enter the title of the paragraph. Text is Select the status of the paragraph text from the following: - Optional – can be turned on or off on a Job by Job basis
- Mandatory – must show on every Job
Text Enter the text of the paragraph. Show with warning Check the box to show the current paragraph with a warning. - When complete, click Process.
Editing the paragraph
- On the Create/Edit Specification Template page, locate the Paragraphs and Sections list.
- On this list, locate the paragraph you want to edit.
- Select this paragraph.
- Update the contents of the paragraph.
- When complete, click Process.
Deleting the paragraph
- On the Create/Edit Specification Template page, locate the Paragraphs and Sections list.
- On this list, locate the paragraph you want to delete.
- Hover over the paragraph until the action icons appear.
- Click the Delete Paragraph
 icon.
icon. - Confirm the removal of the paragraph with all its sections.
- When complete, click Process.
Creating a new section
- On the Create/Edit Specification Template page, locate the Paragraphs and Sections list.
- On this list, locate the paragraph which you want to add a new section into.
- Hover over this paragraph until the action icons appear.
- Click the Create New Section icon.
- To the right side of the list, there appears an area with fields for entering information about the section.
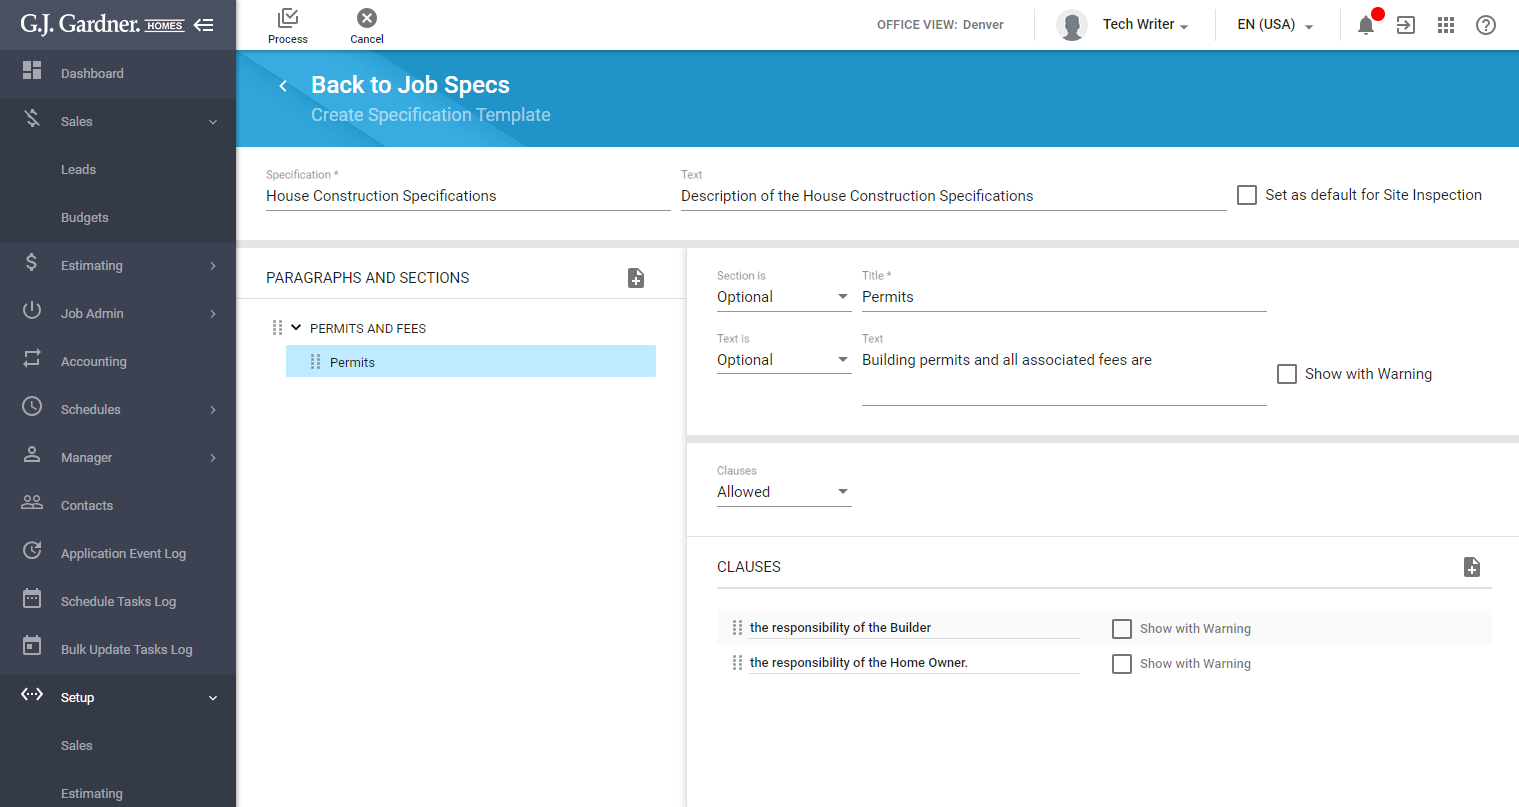
- Specify information for a new section, as follows:
Section is Select the status of the section from the following: - Optional – can be turned on or off on a Job by Job basis
- Mandatory – must show on every Job
Title Enter the title of the section. Text is Select the status of the section text from the following: - Optional – can be turned on or off on a Job by Job basis
- Mandatory – must show on every Job
Text Enter the text of the section. Show with warning Check the box to show the current section with a warning. Clauses Add clauses for the section. The user will be able to select the clause from the list of pre-defined variants. For the details on managing clauses, see the section below. - When complete, click Process.
Editing the section
- On the Create/Edit Specification Template page, locate the Paragraphs and Sections list.
- On this list, locate the paragraph which includes the section you want to edit.
- To expand the paragraph, click the
 icon.
icon. - Select the section you want to edit.
- Make the appropriate modifications in the section.
- When complete, click Process.
Deleting the section
- On the Create/Edit Specification Template page, locate the Paragraphs and Sections list.
- On this list, locate the paragraph which includes the section you want to delete.
- To expand the paragraph, click the icon.
- Hover over the section you want to delete until the action icon appears.
- Click the Delete Section icon.
- When complete, click Process.
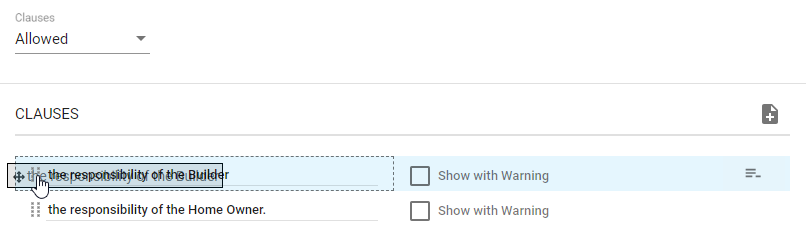
Creating a new clause
- On the Create/Edit Specification Template page, locate the Paragraphs and Sections list.
- On this list, locate the paragraph which includes the section you want to add a clause into.
- Select the paragraph and then the section. Below the area with the fields for entering information of the section, there appears a list with clauses.
- Select the status of clauses as either Allowed or Not Allowed.
- Click the Create New Clause icon.
- Double-click the row and enter the clause text.
- To enable display of the warning, check the Show with Warning box.
- When complete, click Process.
If you deal with multiple clauses, you may need to change their order. Drag the row with the clause to the appropriate position.
Editing the clause
- Select the paragraph and then the section which includes the clause you want to edit.
- Double-click the row with the clause description.
- Update the text of the clause.
- When complete, click Process.
Deleting the clause
- Select the paragraph and then the section which includes the clause you want to delete.
- Locate the clause you want to remove.
- Hover over this clause until the action icon appears.
- Click the Delete Clause
 icon.
icon. - When complete, click Process.
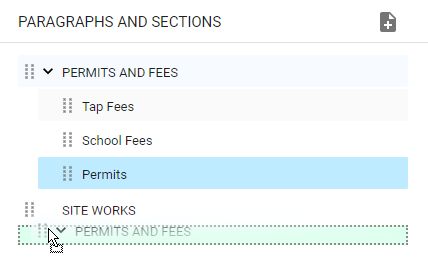
Managing order of paragraphs and sections
You can re-order paragraphs and sections in the job specification template.
- On the Paragraphs and Sections list, locate the paragraph or section which position you want to change.
- Drag the paragraph or section to a new position on the list. This way you can also move the section from one paragraph to another.
- When complete, click Process.
Editing the Job Specification Template
- On the list with job specification templates, locate the one you want to edit.
- Hover over the job specification template until the action icons appear.
- Click the Edit
 icon.
icon. - On the Edit Specification Template page, make the appropriate modifications in the contents or structure of the specification template.
- When complete, click Save.
Marking the Job Specification Template as Deleted
- On the list with job specification templates, locate the one you want to mark as deleted.
- Hover over the job specification template until the action icons appear.
- Click the Delete
 icon.
icon. - Confirm the operation.
Cloning the Job Specification Template
- On the list with job specification templates, locate the one you want to clone.
- Hover over the job specification template until the action icons appear.
- Click the Clone Specification Template
 icon. The Create Specification Template page opens. Here you will see the entire structure of the source job specification template you cloned.
 - Make the appropriate modifications.
- When complete, click Save.
Undeleting the Job Specification Template
By default, the system hides all the job specification templates marked as deleted. You need to enable display of specifications templates marked as deleted prior to undeleting them.
- Above the list with job specification templates, locate the Show deleted toggle.
- Move the toggle right. Job specification templates marked as deleted will appear on the list. They will be highlighted with the red Deleted label.
- On the list with job specification templates, locate the deleted specification templates which you want to undelete.
- Hover over the job specification template until the action icons appear.
- Click the Undelete
 icon.
icon.