
- Assign the Creditor/Supplier type to the contact. The Creditor/Supplier tab appears, as follows:

- For the creditor contact type, specify the following information:
Type Select the appropriate type between ‘Supplier’ and ‘Sub-Contractor’. Selecting the latter option adds an extra Sub-Contractor tab on the tabbed menu. - Configure the delivery parameters for each type of project files, as follows:
Order By Select the preferred option for delivery of orders either by email or to the specific mailing address. For emails, you can specify an email address different from the one specified in the contact profile. Billing By Select the preferred option for delivery of remittance advices either by email or to the specific mailing address. For emails, you can specify an email address different from the one specified in the contact profile. Schedule Updates By Select the preferred option for delivery of scheduled updates either by email or to the specific mailing address. For emails, you can specify an email address different from the one specified in the contact profile. Orders To Include Extra Documents Select this option to include additional documents that will be attached to the orders. Provides Select the options which the Sub-Contractor provides, as follows: - Supply – provides supply services.
- Install – provides installation services..
- Supply & Install – provides supply and installation services.
Category Select the category which the Sub-Contractor attributes to. - When complete, click Process.
Note
You can enter multiple email addresses separated with a comma for delivery if you select the Different option.
Filling Out Details of Sub-Contractor
- Switch to the Sub-Contractor tab.
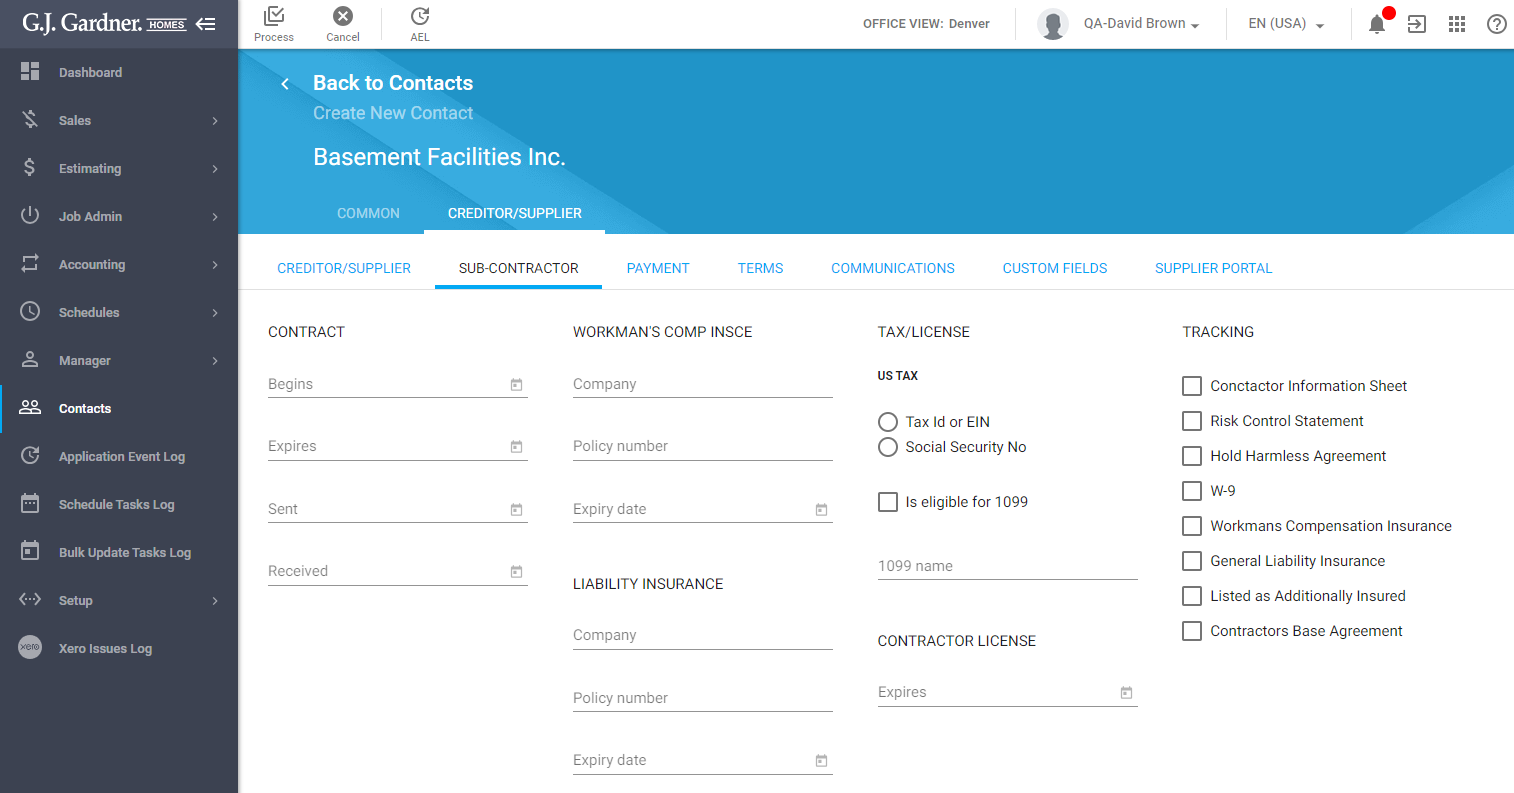
- Fill out information about the contract, as follows:
Begins Pick the date when the contract with the Sub-Contractor begins. Expires Pick the date when the contract with the Sub-Contractor expires. Sent Pick the date when the contract was sent to the Sub-Contractor for signing. Received Pick the date when the signed contract was received from the Sub-Contractor. - Fill out information about the Workman’s Compensation Insurance, as follows:
Company Enter name of the company which issued the Workman’s Compensation Insurance. Policy number Enter the policy number of the Compensation Insurance. Expiry date Enter the expiry date of the Compensation Insurance. - Fill out information about the Liability Insurance:
Company Enter name of the company which issued the Liability Insurance. Policy number Enter the policy number of the Liability Insurance. Expiry date Enter the expiry date of the Liability Insurance. - Fill out information about the Tax / License, as follows:
Tax Select the appropriate taxation option from the provided variants: - Tax ID or EIN – enter the Tax ID or EIN (Employer Identification Number) of the Sub-Contractor.
- Social Security No – enter the social security number of the Sub-Contractor.
Is eligible for 1099 Check the box if the Sub-Contractor is eligible for the Form 1099. Enter the 1099 name for the form. - Fill out information about the Contractor License, as follows:
Expires Pick the date when the Contractor License expires. - Select the items for tracking for the current Sub-Contractor.
- When complete, click Process.
Setting Payment Details for Creditor/Supplier
- On the tabbed menu, select Payment. This is a view only tab.
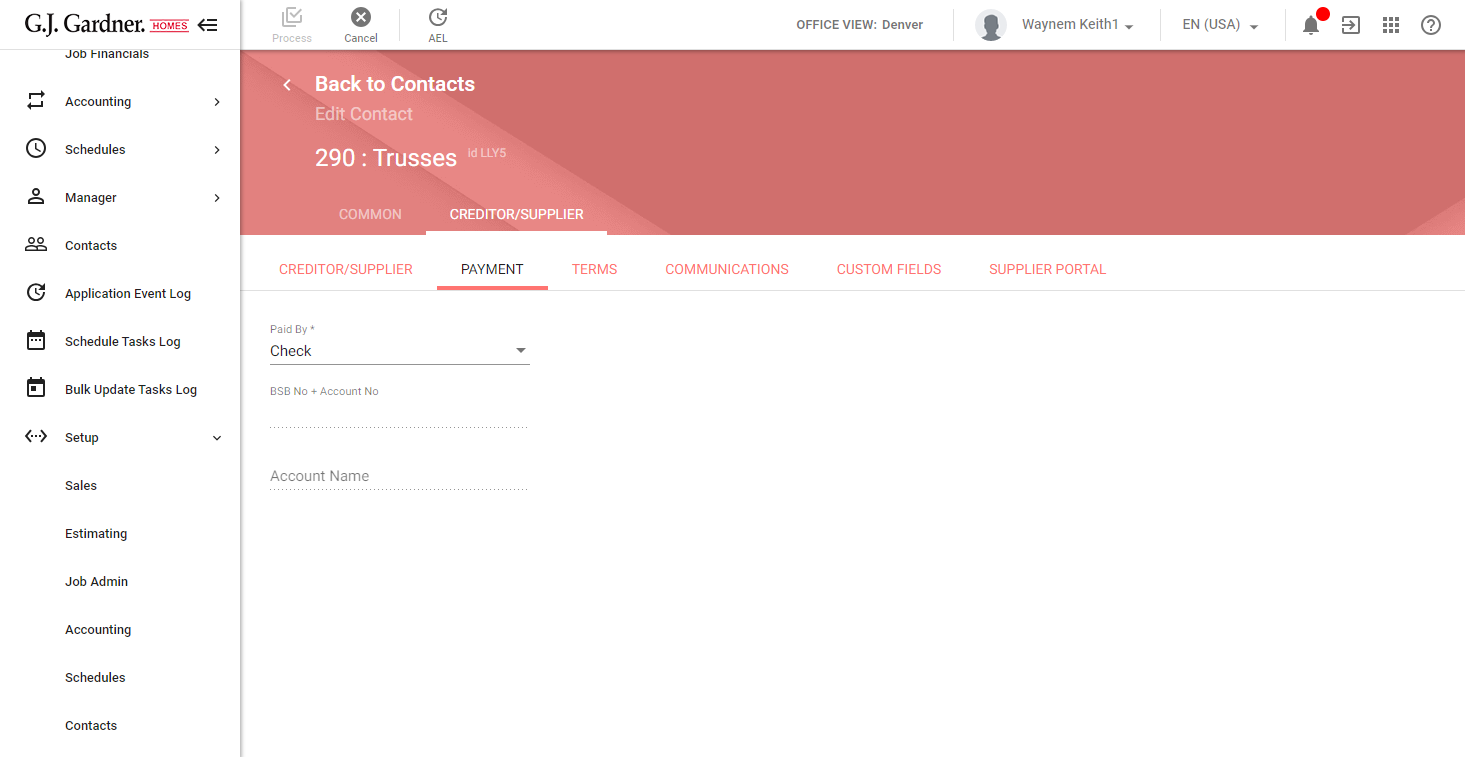
- All Payment Settings are controlled in Xero. If you need to add or change a bank account please follow the steps in Xero for updating a contact. User permissions apply.
- Depending on the operational region, the region-specific validation may be applied to the payment information, as follows:
| Field | USA | Australia / New Zealand |
| BSB Number + Account Number | The value in the field cannot exceed 32 characters.
The field can tolerate only the following characters:
| The value in the field cannot exceed 32 characters.
The field can tolerate only the following characters:
|
Setting Payment Terms for Creditor/Supplier
You can configure the payment terms for the contact of the Creditor/Supplier type. The system calculates the due date of an Invoice (either Payables or Receivables) on the basis of the values specified in the Payment is Due, Invoice Data and Balance Due Days fields.
- On the tabbed menu, select Terms.
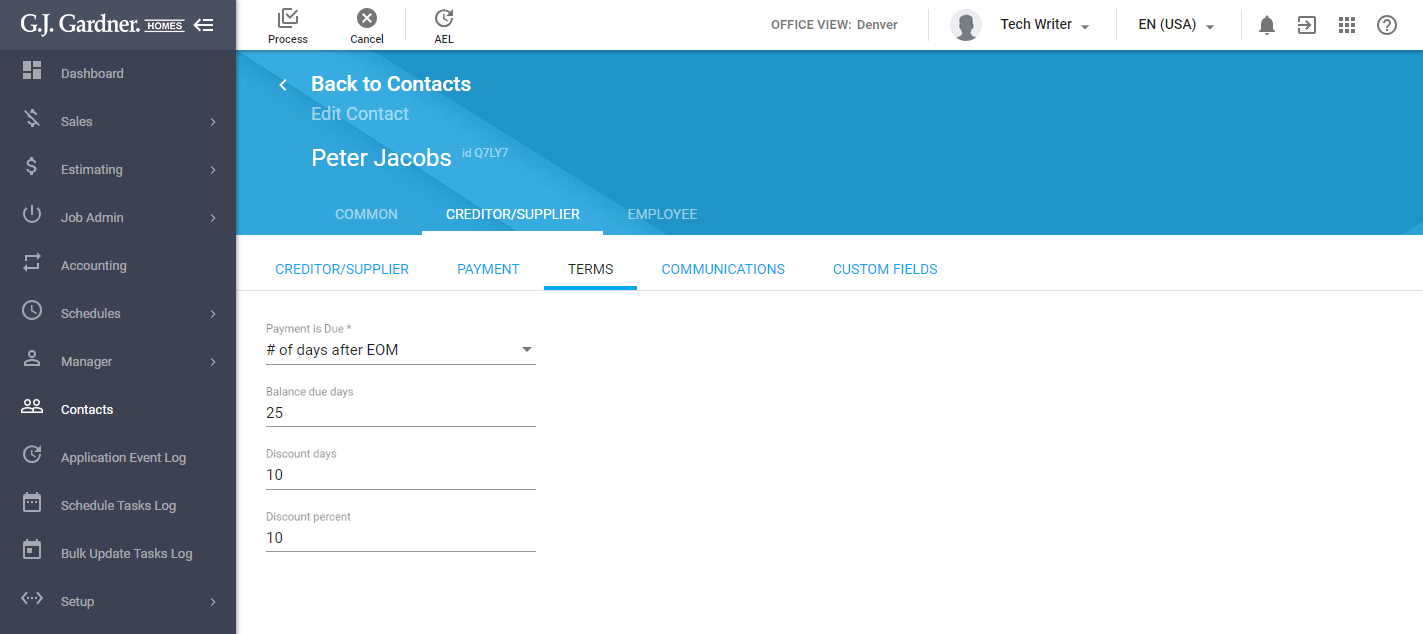
- Configure the payment terms, as follows:
Payment is Due Select the option for calculating the payment due date from the following ones: - None Advised – no specific date is required.
- COD (Cash on Delivery) – no specific due date is required. The payment is made upon delivery of the mail order.
- Prepaid – no specific due date is required. The order is considered to be prepaid.
- In a given number of days – the payment is due within the given number of days.
- On a day of the month – the payment is due on a specific day of every month.
- # of days after EOM – the payment is due within a specific number of days following the end of the month.
- Day of month after EOM – the payment is due by the specific day of the following month.
- If you select any of the last four options, you will have to specify additional information, as follows:
Due day of month Enter the due day of month. Discount days Enter the number of days before the due date when the discount can be applied if the invoice is paid in full. Discount percent Enter the discount percent which applied when the invoice is paid in full within the discount period. - When complete, click Process.
Managing Communication with Creditor/Supplier
You can directly communicate with the contact of the Creditor/Supplier type by email or by SMS, and view MailChimp newsletters that were sent.
- On the tabbed menu, select Communications. On the opened page you can view the list of communication items between you and the contact.
- For each communication item, you can view the following information:
| Type | Type of the communication item (SMS or email). |
| Created | Date when the communication item was created. |
| Subject | Subject of the email. It is not applicable to SMS. |
| Sender | User who initiated the communication. |
| Message | Text of the communication item. |
| Attachments | List of files attached to the email. It is not applicable to SMS. |
To sort communication items:
- Click the header of the column which you want to sort by.
- You can also click the down or up arrow icons, to sort items in the descending or ascending order.
To send a new SMS:
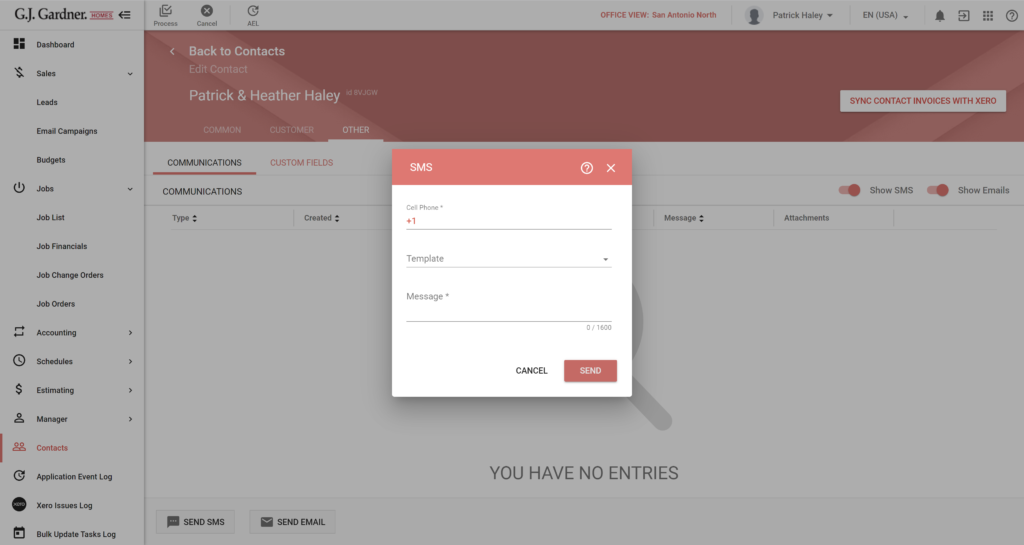
- Click Send SMS.
- In the SMS form, specify the following information:
Cell Phone Enter the cell phone number of the contact. By default, the system populates it automatically with the phone number specified in the contact profile. Template Select a template to repopulate the message field with a template from Setup > Manage SMS Templates. Message Specify the message for SMS. One SMS message can include up to 160 characters. If you exceed this limit, your message will be separated into two SMS. - Click Send.
Note
The system may automatically adjust the format of the phone number when you send an SMS to the addressee. This is required for the correct processing of the phone number by the external service. The following adjustments may occur:
- US region: +1 is added to the phone number.
- AU region: +61 is added to the phone number.
- NZ region: +64 is added to the phone number.

The system may automatically drop the zero ‘0’ in the phone numbers of AU and NZ regions, as follows: 0418989661 becomes +61418989661.
To send a new Email:
- Click Send Email.
- In the Email form, specify the following information:
| Email, CC, BCC | Enter the email address of the Lead. By default, the system populates it automatically with the email address specified in the Lead profile. You can specify multiple email addresses of recipients by separating them with a semicolon (;). |
| Subject | Enter the email subject. |
| Template | Select a template to repopulate the message field with a template from Setup > Manage Email Templates. |
| Subject | Enter the email subject. |
| Message | Enter the email message. Use the visual editor to apply the required formatting to your message and align the text. |
- To attach files to the email message, click Attach Files and select the appropriate files on your Google Drive.
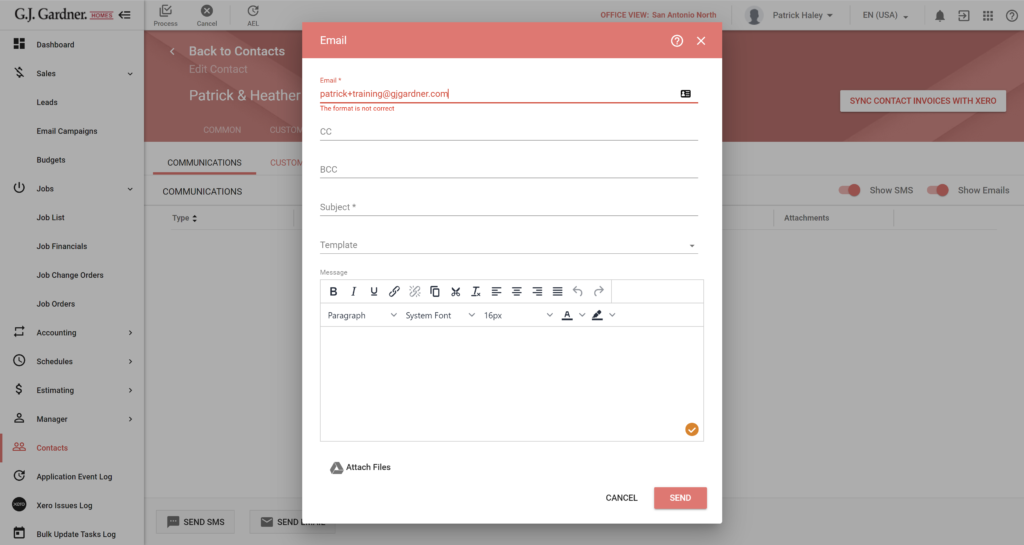
- Click Send.
Filling Out Custom Fields
- On the tabbed menu, select Custom Fields.
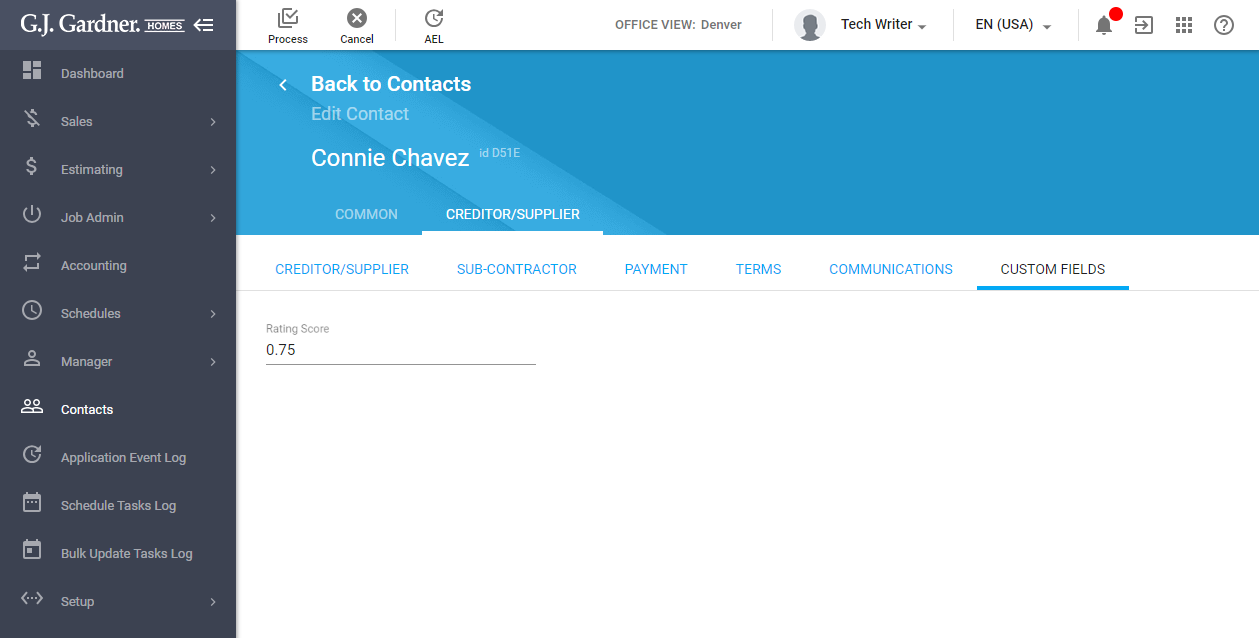
- On the opened tab, fill out the custom fields for the contact.
- When complete, click Process.