
Creation of a new Lead requires creation of a Sales Folder. The Sales Folder is a place where you can keep information about a customer from the initial communication till the completion of a sale or loss of a lead due to some circumstances. The collected information is used for generation of several sales management reports and as a basis for generation of Request for Quotations (RFQ) and project estimates.
This information is maintained and updated by Salespersons. Salespersons can see only their own Leads and Leads that were assigned to them by other Salespersons. In the User Account, you can grant access to all Leads or Leads of selected Salespersons. To assign a Lead to another user, you need to have the Sales > Leads > Reassign permission.
The Sales Folder is tied to a Customer. Once you add a Customer as a Lead and create a Sales Folder, the system may prompt you to send the First Contact Letter if the Prompt user to print first contact letter option is enabled in the System Variables.
Creating Leads
- On the Leads Board, click Create New Lead
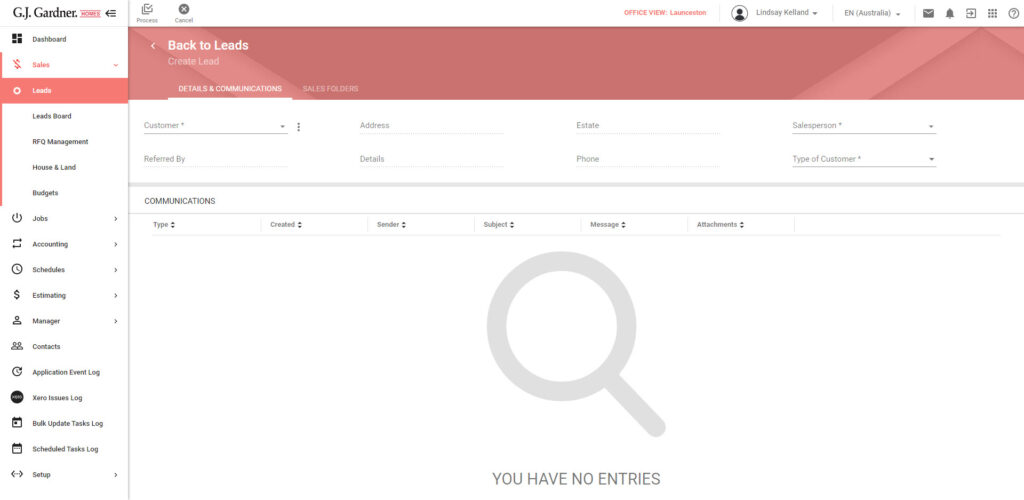
2. On the Create Lead page, specify the following information about the Lead:
| Customer | Start entering the Customer’s name (name of the Contact of the customer type) and select the match from suggested variants. Alternatively, you can click the icon and select Create New Contact. (add link) |
| Address | Address of the Contact loads. |
| Community | Community which the Contact attributes to loads. |
| Salesperson | Name of the Salesperson who created the Contact. |
| Referred By | Reference source of the Contact. |
| Details | Additions details on the Contact. |
| Phone | Phone number of the Contact. |
| Type of Customer | Select the type of the Customer from the provided options. |
3. When complete, click Process. You will automatically switch to the Sales Folders tab.
Creating Sales Folders
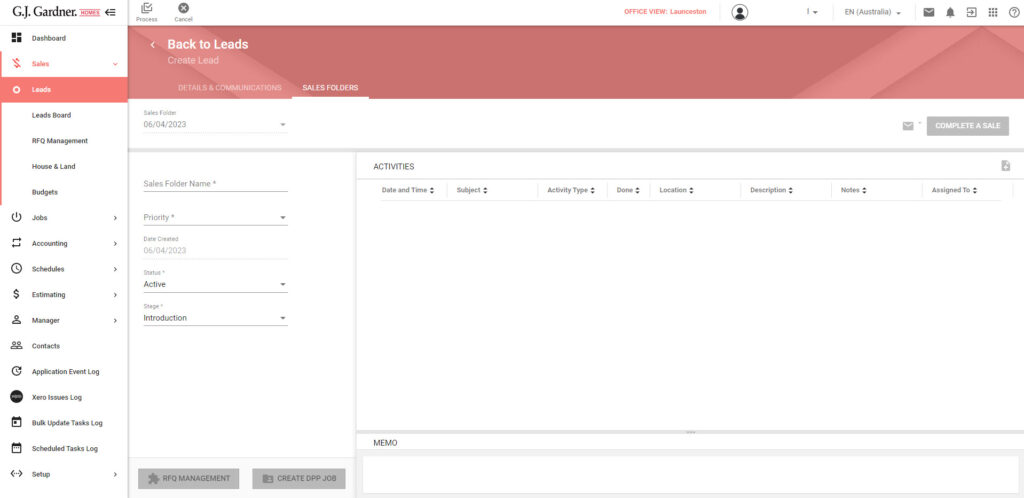
- Once you specify initial information about the Lead on the Details & Communications tab and click the Process button, you will automatically switch to the Sales Folders tab.
- On the Sales Folders tab, specify the following information about the Sales Folder:
| Sales Folder Name | Enter the name of the Sales Folder. This name should be Job specific, because one Customer can have multiple Sales Folders and each Sales Folder can become a Job |
| Priority | Select the priority level (Other, A, B, C). |
| Follow Up Date | Pick the date you would like to receive a notification to Follow Up with the Customer |
| Status | Select the status of the Sales Folder (Active, Will not Complete). |
| Stage | Select the development stage of the Lead. |
For completed Sales, information in the Sales Folder becomes read-only. Additional information, appears, as follows:
| Completed Job # | Number of the Job associated with the completed Sales Folder. |
| Deposit Date | Date when the deposit was made. |
| Contract Date | Date when the contract was signed. |
| Completed By | Name of the user who completed the Sale. |
- When complete, click Process. The system will ask if you would like to send the first contact letter to the Lead.
- In the 1st Contact Letter form, click YES or NO accordingly. If you click YES, the system will generate a letter and open the form with the link to edit it. You may click this link to edit the letter before sending or you can send it as by clicking the Confirm button.
- When complete, click Confirm.
The Sales Folder is created. The record with information about creation of a Sales Folder with the date will appear on the Meetings list.
You can perform the following operations on Sales Folders:
- create a new Sales Folder for the Lead
- edit the existing Sales Folders of the Lead
Editing Sales Folders
- On the list with Leads, locate the one whose Sales Folder you want to edit.
- Hover over the Lead, until the action icons appear, click the Edit
 icon.
icon. - Switch to the Sales Folders tab.
- Locate the Sales Folders box, select the Sales Folder from the box.
- To the right side of the box, locate the Edit icon and click it.
- Make the appropriate modifications.
- When complete, click Process.