
Warranty Schedules provide a capability to track the completion of warranty tasks for a specific Job, view dependencies of tasks, and visualize the entire progress of warranty tasks on the Gantt chart.
List of Warranty Schedules
You can manage Warranty Schedules and correctly plan all the required warranty activities and visualize them with a Gantt chart.
- To manage Warranty Schedules, on the navigational sidebar, select Schedules.
- Once the Schedules section expands, select Warranty.
The Warranty Schedules section opens, as follows:
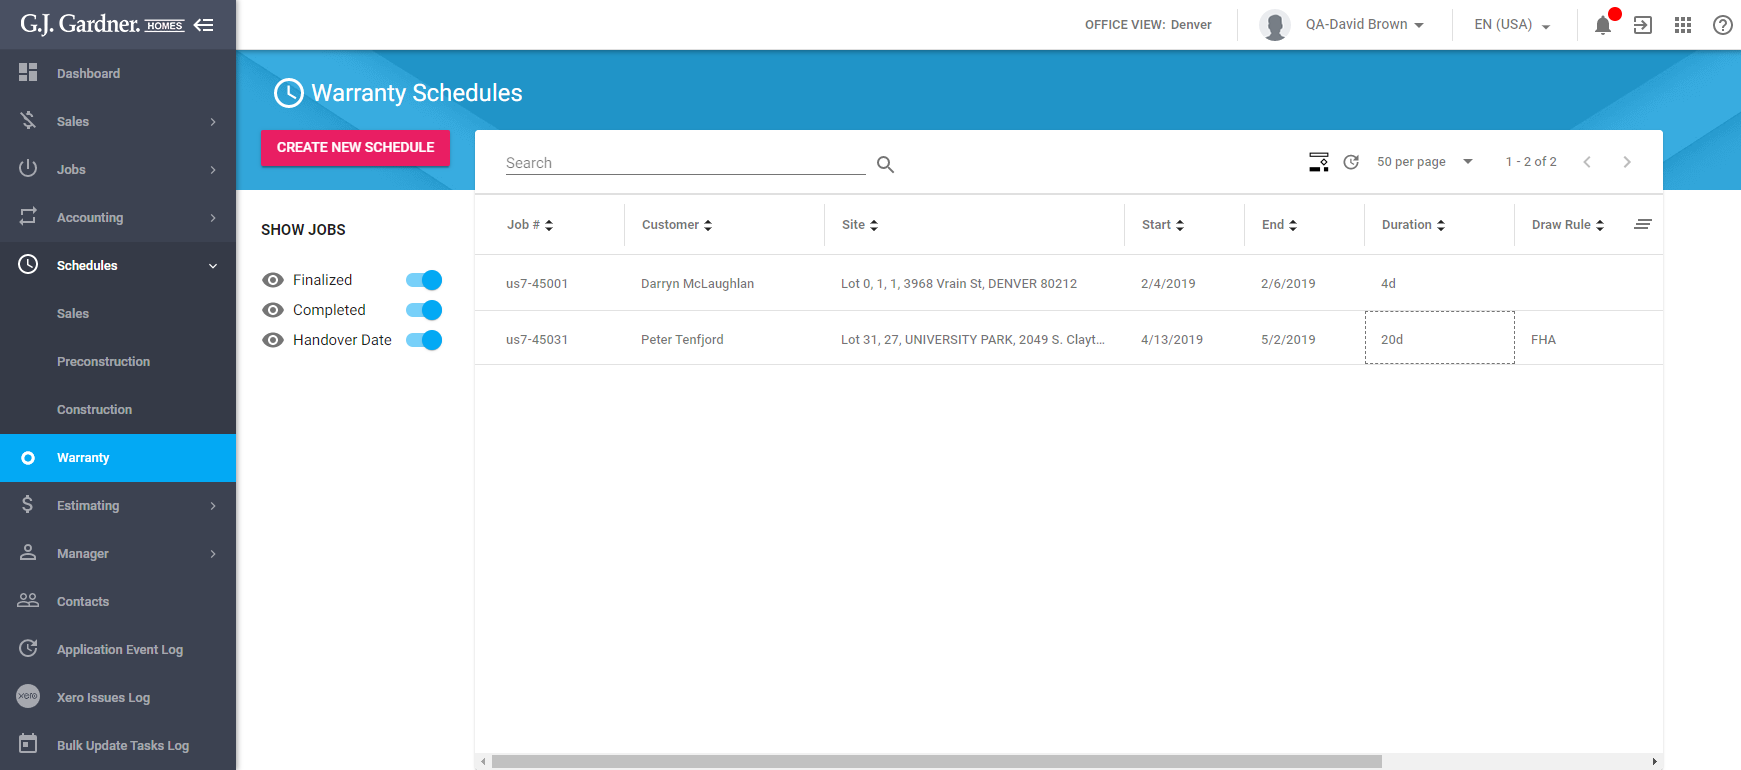
Here you can see the list of all Warranty Schedules. For each Warranty Schedule, the following information is displayed:
| Job | Number of the Job which the Warranty Schedule is created for. |
| Customer | Name of the Customer that the Warranty Schedule attributes to. |
| Site | Site which the warranty activities will be run for. |
| Start | Start date of the Warranty Schedule. |
| End | End date of the Warranty Schedule. |
| Duration | Duration of the Warranty Schedule. |
| Draw Rule | Draw rule applied to the Warranty Schedule. |
| Supervisor | Supervisor who is responsible for running the warranty activities. |
| ToDo’s | Flag that the Warranty Schedule contains ToDo items. |
You can perform the following operations on Warranty Schedules:
- create a new Warranty Schedule
- edit the existing Warranty Schedule
- delete the no longer needed Warranty Schedule
- manage tasks within Warranty Schedules
Creating / Editing Warranty Schedules
Creation of a new Warranty Schedule depends on the following factors:
- Job is not finalized.
- Job is not in the Not proceeding status.
Note
You will not be able to create a new Warranty Schedule if you do not have a permission to create Warranty Schedules.
- On the Warranty Schedules page, click Create New Schedule.
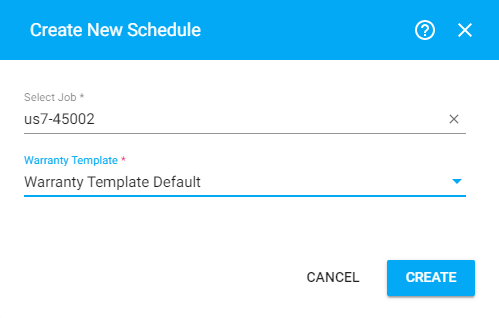
- In the Create New Schedule form, specify the following information:
Select job Select the job which the Warranty Schedule is created for. Besides the Job number, you can enter the Customer name or the Site address.
Warranty Template Select the warranty schedule template to use for the Warranty Schedule creation. - When complete, click Create. The Warranty Schedule page opens.
Once you have created a Warranty Schedule, you can view the list of warranty tasks, as follows:
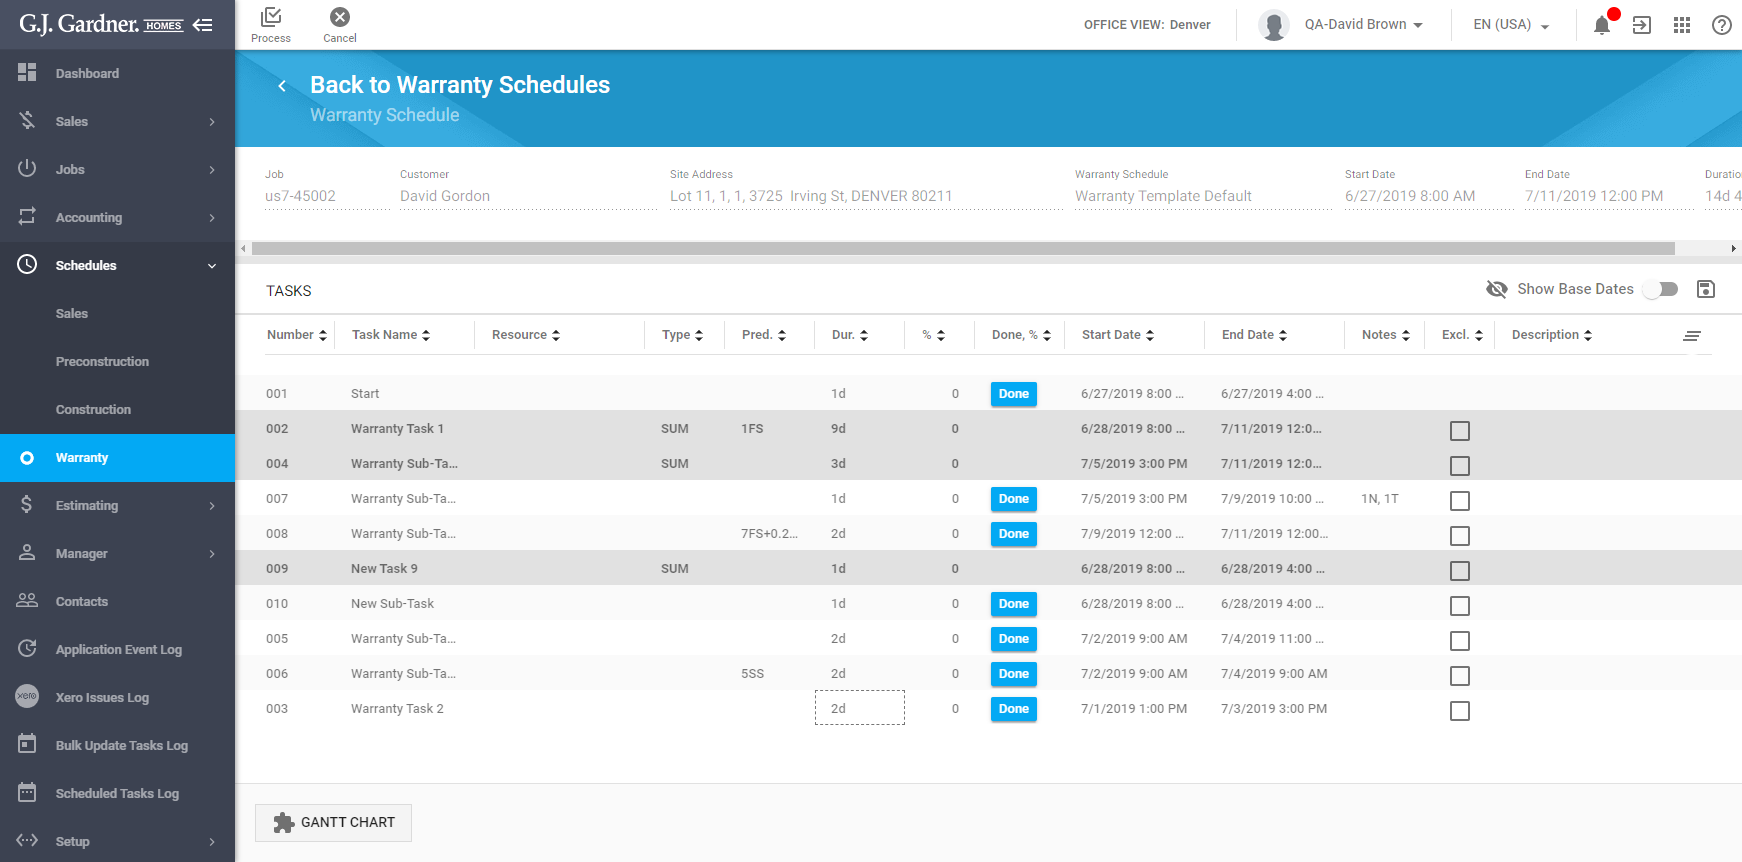
For each Warranty Schedule, the following information is displayed:
| Job | Number of the Job which this warranty schedule attributes to. |
| Customer | Full name of the customer who the warranty work starts for. |
| Site Address | Address of the site which the warranty will be prepared for. |
| Warranty Schedule | Name of the warranty schedule template used for performing the warranty activities. |
| Start Date | Date when the warranty preparation work starts. |
| End Date | Date when the warranty preparation work ends. It is calculated automatically by the system on the basis of warranty duration in the warranty schedule template. |
| Duration | Duration of the house warranty phase in days. |
All this information is read-only. You cannot modify it.
Editing the Warranty Schedule
- On the Warranty Schedules page, locate the one you want to edit.
- Hover over this warranty schedule until the action icons appear.
- Click the Edit
 icon. Alternatively, you can click the corresponding row on the list with warranty schedules.
 - On the Warranty Schedule page, make the appropriate modifications.
- When complete, click Process.
Deleting the Warranty Schedule
- On the Warranty Schedules page, locate the one you want to delete.
- Hover over this warranty schedule until the action icons appear.
- Click the Delete
 icon.
icon. - Confirm the removal of the warranty schedule.
Searching for Warranty Schedules
You can search for specific Warranty Schedules by Job Number and Customer.
- Above the list with Warranty Schedules, locate the search box.
- Into the search box, enter the Job Number or Client name.
- Click the Find
 icon or press Enter. The system will show the list of Warranty Schedules that match the search query.
To clear the search query, click the Clear icon located within the search box.
Showing Warranty Schedules
By default, the system hides Pre-construction Schedules for Jobs if there is a handover date for the Job, and Jobs in the Finalized and Completed statuses. If needed, you can show them again on the list with current Warranty Schedules.
To the right side of the list with Warranty Schedules, locate the three toggles labeled as Finalized, Completed, and Handover Date.
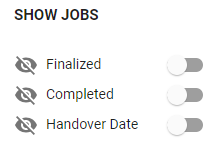
Move the appropriate toggle right to show Warranty Schedules for Jobs in the Finalized, Completed, and Handover Date statuses.