
Items represent the simplest building blocks for estimation. They are the smallest units in Bill of Materials (BoM), in Components, and in an amalgamation of Items (they cannot include any other Components).
Every Item has a unique identifier which looks like an alphanumeric sequence of up to 10 characters.
The system uses the following patterns for differentiating between Items and Components:
- Identifiers of Items look like 4 alpha and 4 numeric characters (for example, APPL9160).
- Identifiers of Components look like ‘COMP’ followed by 4 numeric characters (for example, COMP5260).
- To manage Items, on the navigational sidebar, select Setup.
- Once the Setup section expands, select Estimating.
- On the tabbed menu, select Items.
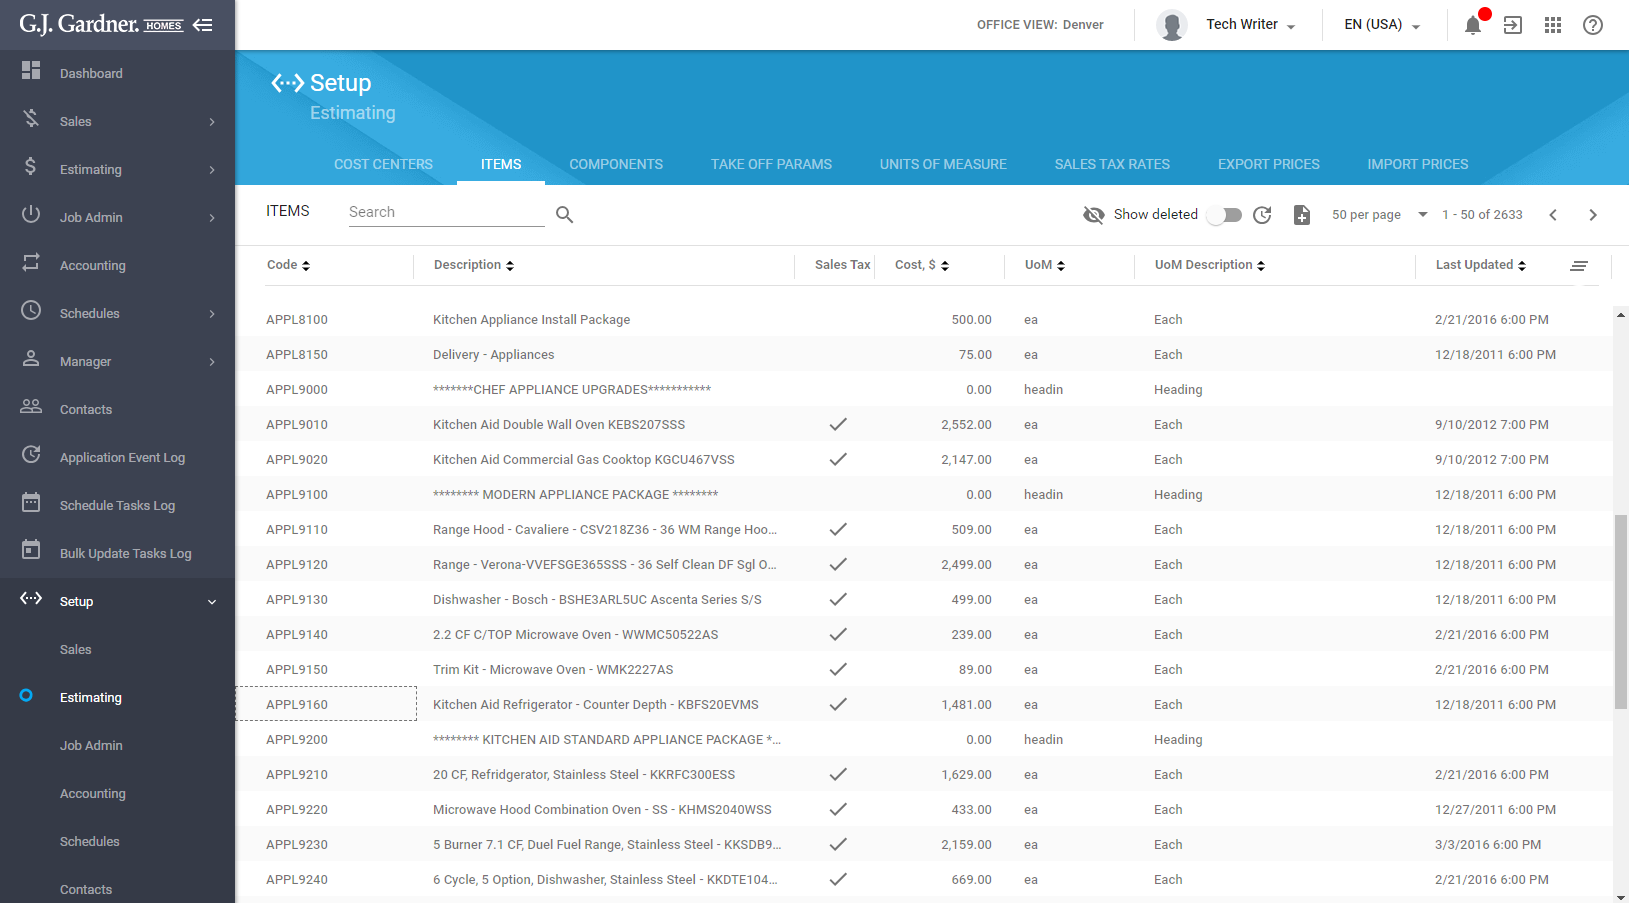
Here you can see the list of Items registered in the system. For each Item the following information is available:
| Code | A unique identifier of an Item. |
| Description | Description of an Item. |
| Sales Tax | Mark if the sales tax applies to an Item. |
| Cost, $ | Cost in dollars per unit. |
| UoM | Unit of measure of an Item. |
| UoM Description | Description of a unit of measure. |
| Last Updated | Date and time of the last Cost update of an Item. |
| Fml | Mark that there is a formula attached to an item. |
| Pic | Mark that an Item has an image attached. |
You can perform the following operations on Items:
- add new Items
- edit the existing Items
- delete the no longer needed Items
- undelete the deleted Items
- view the usage of specific Items
To view deleted Items:
- Above the list with Items, locate the Show deleted toggle.
- Move the toggle right.
You can search for Items by Item code and its description. Enter the search query into the search box and press Enter.
Adding an Item
- Above the list with Items, click the Add
 icon.
icon.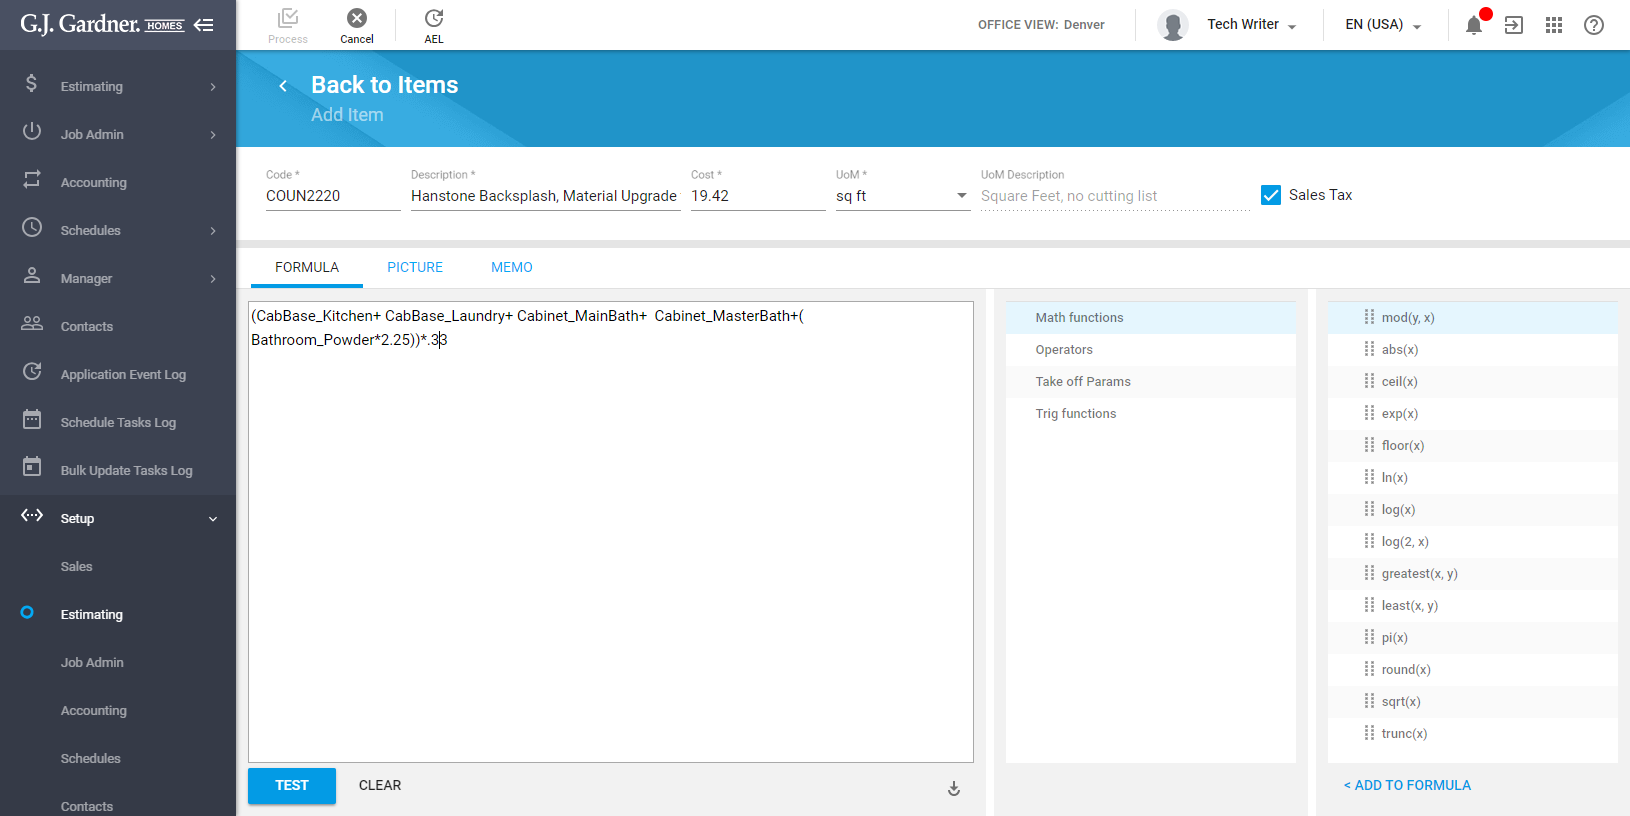
- On the Create Item page, specify information about an Item, as follows:
CodeEnter a unique identifier of an Item according to the pattern.DescriptionEnter description of an Item.CostEnter the cost of an Item.UoMSelect the unit of measure of an Item. UoM description is automatically pre-populated by the system.Sales TaxCheck the box if Sales Tax should be added to an Item. - When complete, click Process.
While creating a new Item or editing the existing item, you can add a formula, attach an image of an Item, or leave a memo.
Adding a Formula
You can add a Formula and define Take Off Parameters within it. Such Formula will be carried over to the House Plan’s Items and Components where it may be further modified without affecting the base Item Formula. The defined formula will be used to calculate the Quantity.
You can construct a formula from the following sets of elements:
| Math functions | Mathematical functions. |
| Operators | Mathematical operators. |
| Take Off Params | Take Off Parameters. |
| Trig functions | Trigonometric functions. |
To construct a formula:
- Select the appropriate element set and then drag an individual function or parameter to the Formula box.
- Add the appropriate operator into the function.
- To verify the formula, click Test.
- When complete, click Save.
To clear the constructed formula, click Clear.
For the details on constructing the formulas, please see Expression Builder.
Note
You cannot save the incorrect formula. The system will position the cursor where an error in the formula occurs.
Note
If you change the formula of an existing Item or Component, you will be prompted to propagate the modified formula to all or to specific House Plans which used the original formula.
To propagate the formula to House Plans:
- Modify the original formula.
- Click Process. The Propagate Formula form opens. Alternatively, you can click the Propagate icon under the Formula box.
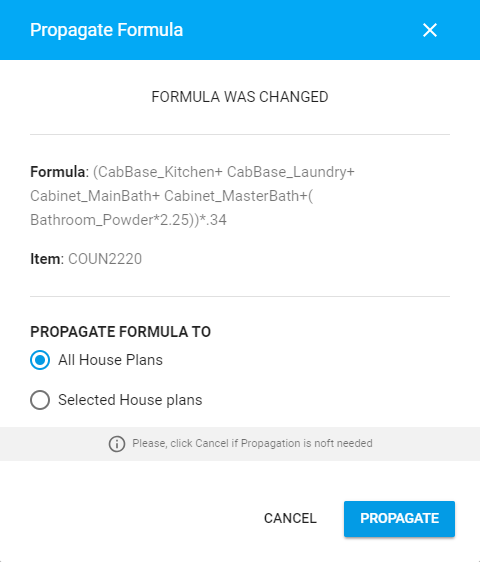
- Select the way of propagating the modified formula to House Plans:
All House PlansThe modified formula will be propagated to all the House Plans where this formula was used.Selected House PlansThe modified formula will be propagated to the selected House Plans only. You will need to select the specific House Plans. - Click Propagate.
Note
If you do not want to propagate the modified formula to House Plans, click Cancel.
Note
Please consider that the modified formula will not be updated in all the estimated Jobs.
Note
The modified formula will be propagated to House Plans which contain the Item with the prior formula (before modifications were made). All the House Plans with the Item having formulas different from the originally modified formula will not be affected.
Attaching an Image
You can attach an image or visualization while adding or editing the Item. The following images formats are supported:
- *.jpg
- *.gif
- *.bmp
- *.png
To attach an image:
- Create a new Item or edit the existing one.
- On the pane, select Picture.
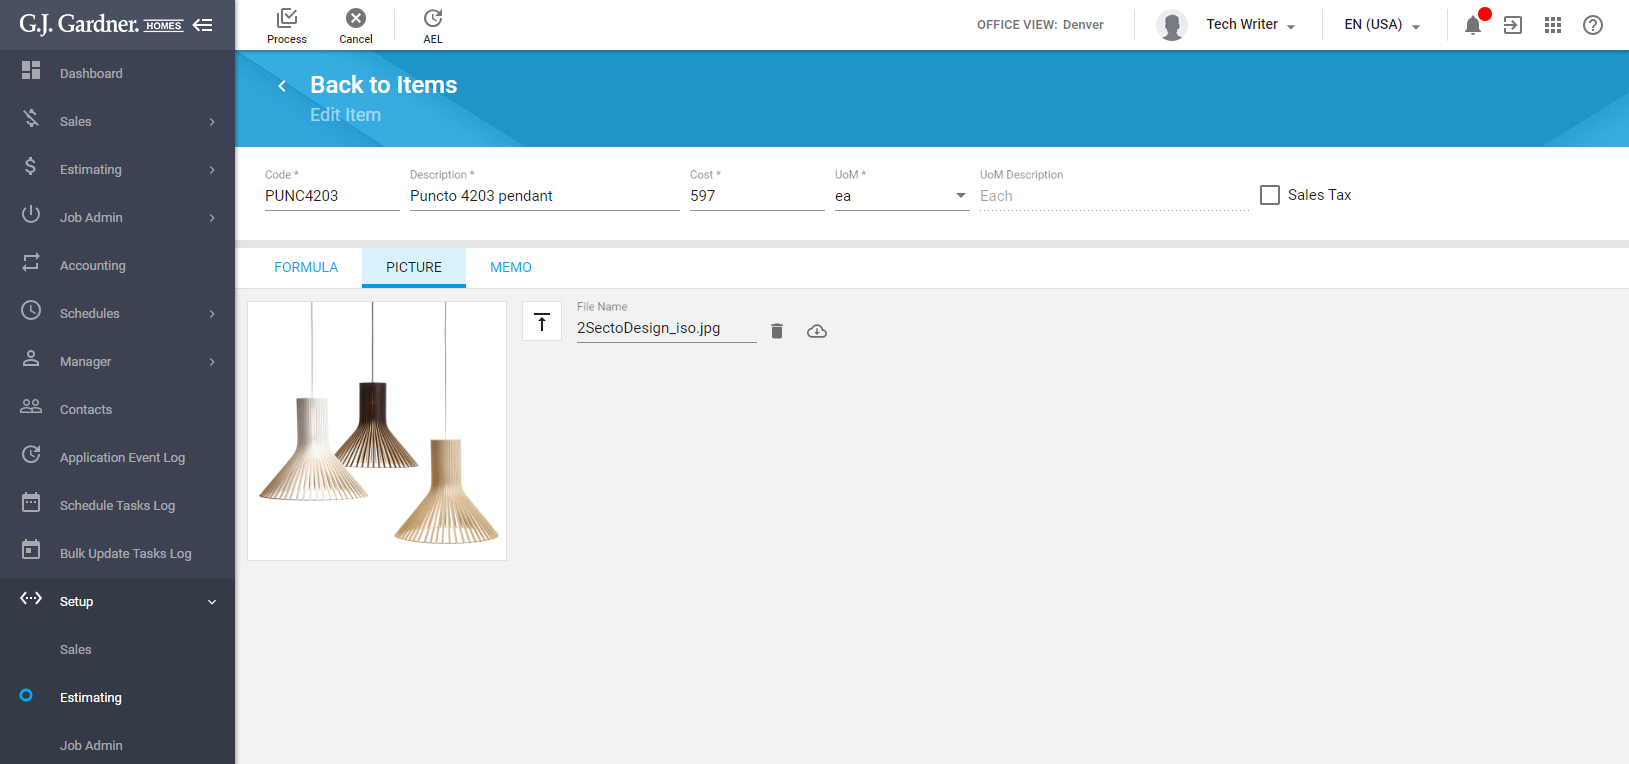
- Click the
 button and select the image on your computer.
 - When complete, click Process.
Alternatively, you attach an image by dropping it on the ![]() button.
button.
To delete the attached image:
- Click the
 icon.
icon. - When complete, click Process.
To download the attached image:
Click the ![]() icon.
icon.
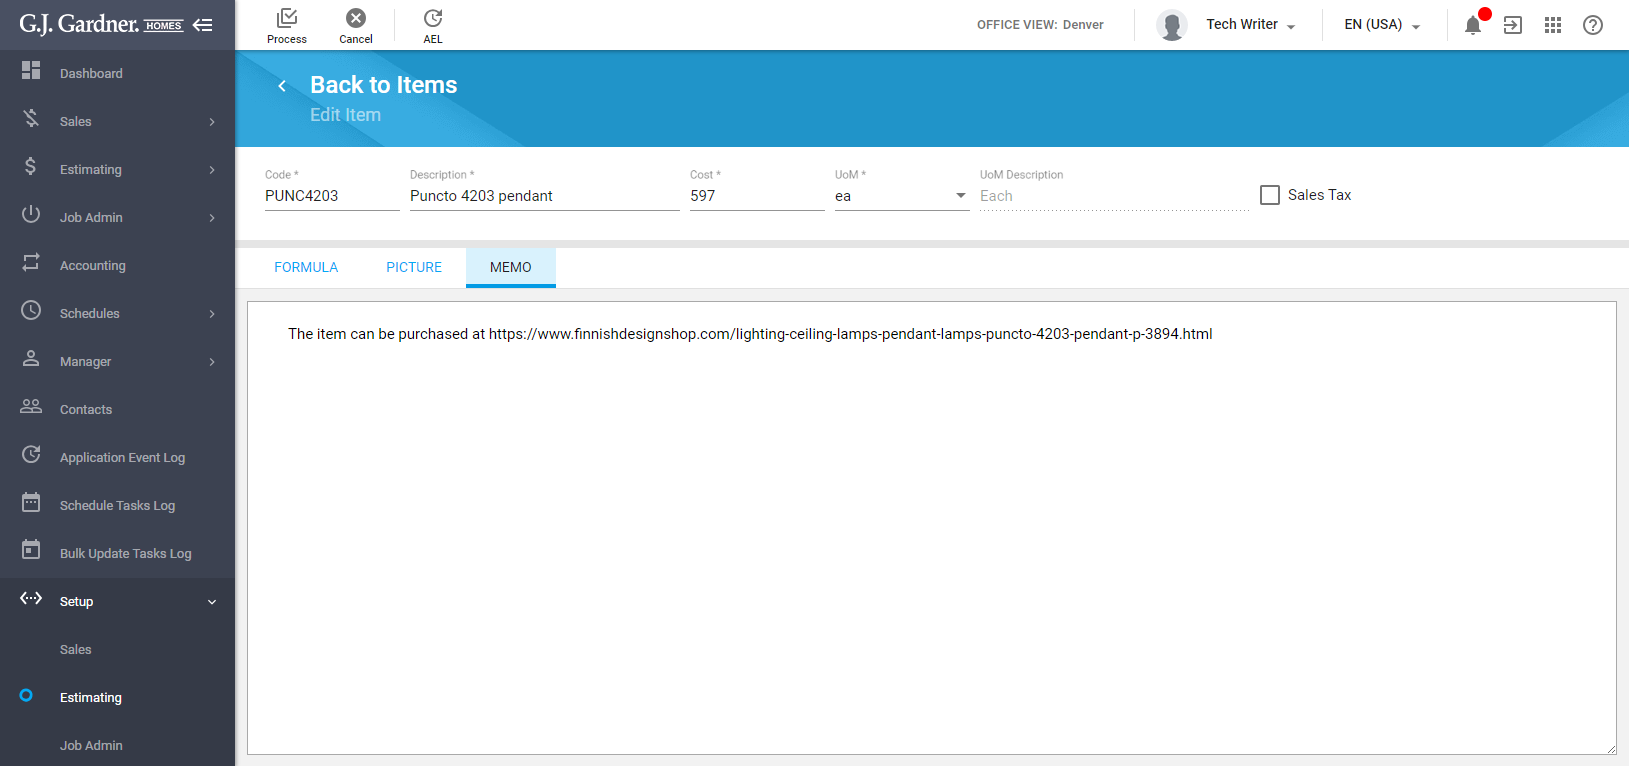
Adding a Memo
You can add optional notes or remarks for Items while adding or editing them.
To add a memo:
- Create a new Item or edit the existing one.
- On the pane, select Memo.
- Leave your notes in the text area.
- When complete, click Process.
Editing the Item
- On the list with Items, locate the one you want to edit.
- Hover over the Item, until the action icons appear.
- Click the Edit icon.
- On the Edit Item page, make the appropriate modifications.
- When complete, click Process.
Note
If you change the code of the Item, it will be automatically updated in all the entities where it was already in use.
Viewing Usage of the Item
- On the list with Items, locate the one which usage you are interested in.
- Hover over the Item, until the action icons appear.
- Click the Display Usage icon.
- In the Item Use form, you can see all the entities where the Item is used.
- When complete, close the form.
Deleting the Item
- On the list with Items, locate the one you want to delete.
- Hover over the Item, until the action icons appear.
- Click the Delete icon.
- In the appeared form, confirm the operation.
Note
If you delete the Item, it will be preserved in all the entities where it was already in use. But this Item will be no longer available for adding into new entities after the deletion.
Undeleting the Item
You can undelete the deleted Item and further use it in the system.
- Enable display of deleted Items.
- On the list with Items, locate the one you want to undelete.
- Hover over the Item, until the action icons appear.
- Click the Undelete icon.
- In the appeared form, confirm the operation.