
You can manage accounts of Users who can have access to the system and its specific sections.
- To manage users, on the navigational sidebar, select Setup.
- Once the Setup section expands, select Manager.
- On the tabbed menu, select Users.
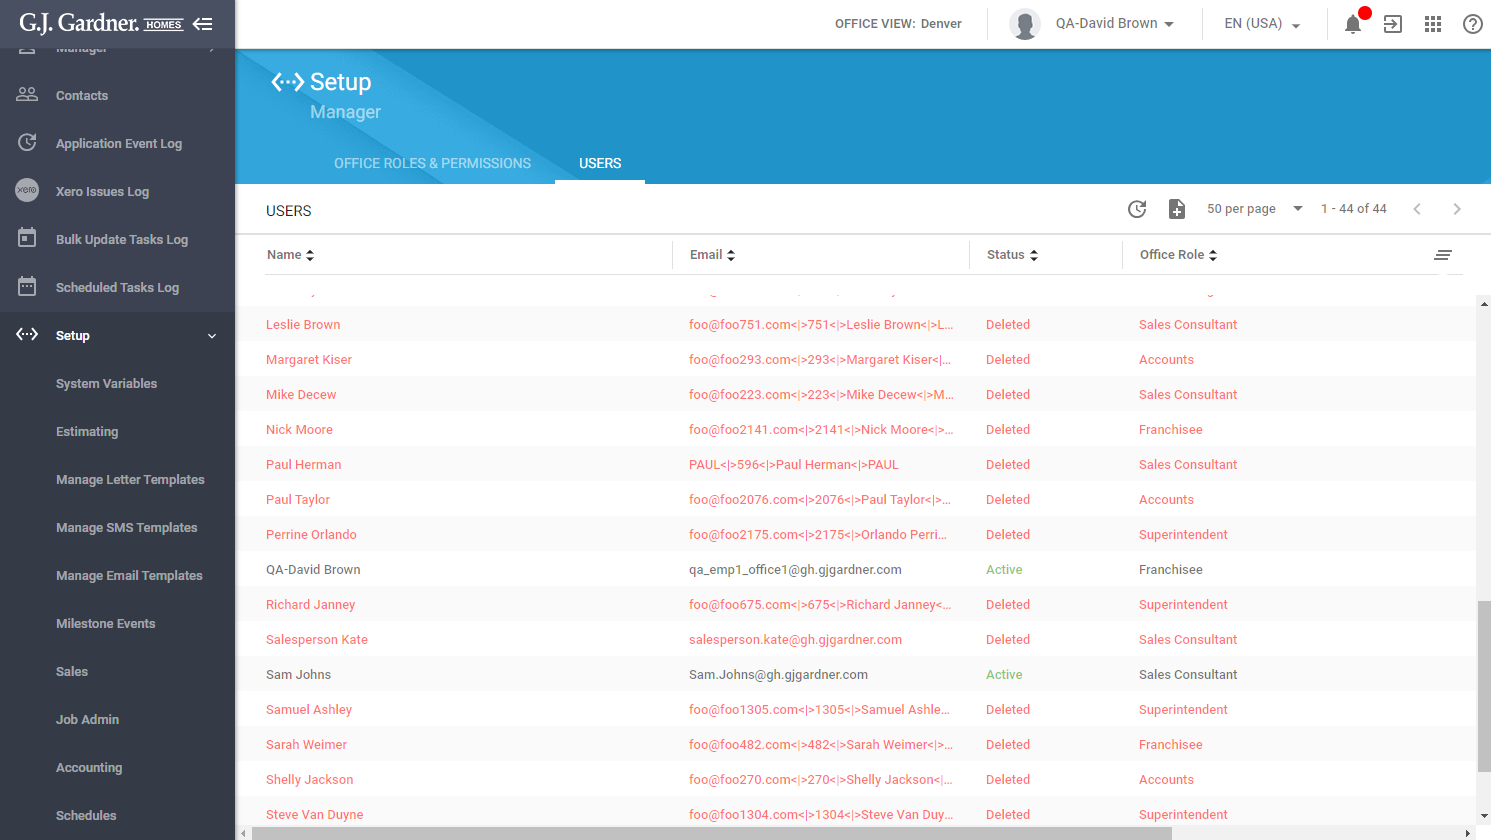
Here you can see the list of Users. For each User, the following information is available:
| Name | Full name of the User. |
| Email address of the User. | |
| Status | Status of the User – active or deleted. The deleted User accounts are colored red. |
| Office Role | The Office Role assigned to the User. |
| System Roles | System roles assigned to the User. |
You can perform the following actions on Users:
- create new Users
- edit the existing Users
Creating a User
- On the Users tab, above the list with users, click the Add
 icon.
icon.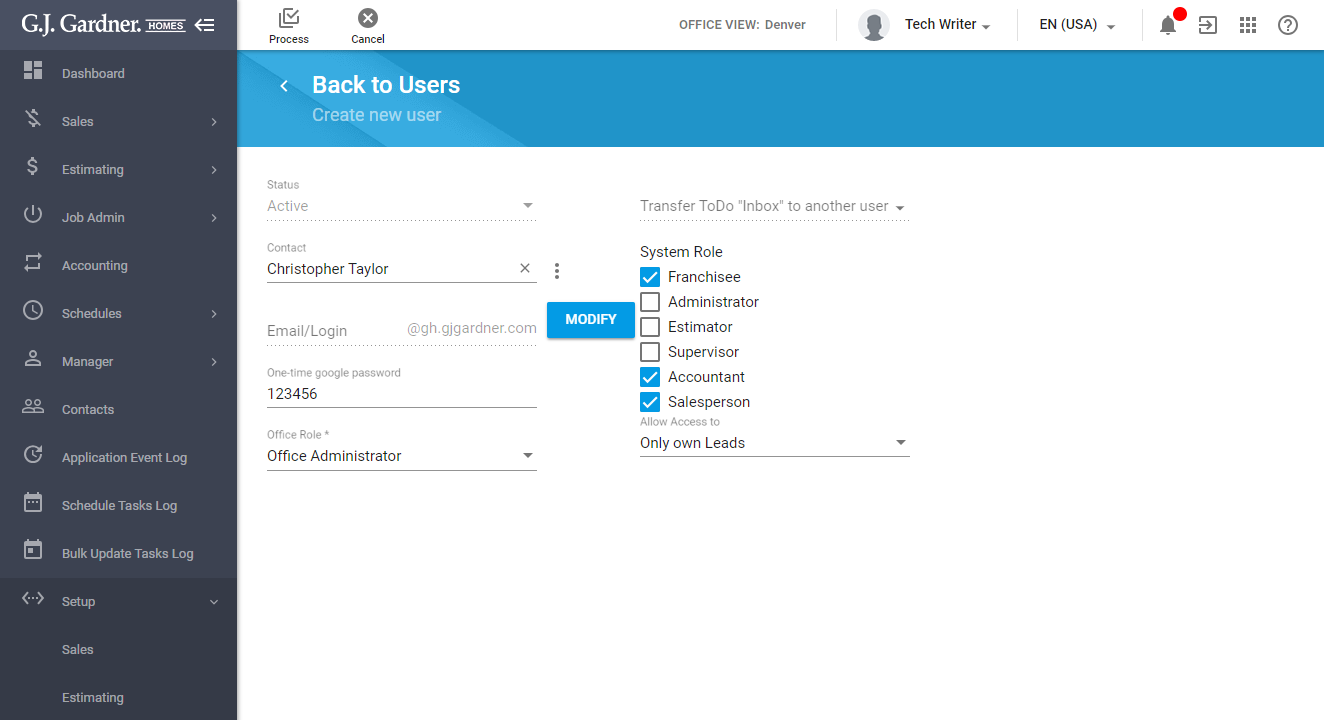
- On the Create new user page, specify information about a new user, as follows:
Status Status of the User account in the system. All the new accounts are automatically set as ‘Active’. Contact Select the Contact or start typing the name of the Contact and select the one from the list of suggested matches. Alternatively, you can create a new Contact, by clicking the icon and selecting Create New Contact. Email/Login Click Modify. You will be requested to enter the authorization number in the Authorization required form. You can get this number from the Master Franchise. Enter this authorization number and click Apply. One-time Google password Enter the one-time Google password. Office Role Select the Office Role to assign to the User. Transfer ToDo ‘Inbox’ to another user This action is not available when you create a new user. System Role Select one or multiple system roles that you want to assign to the User. Allow access to Select the access level to Leads from the following options: - Only own Leads – the user will be able to view only Leads added by this user.
- Salespersons’ Leads – the user will be able to view Leads added by selected Salespersons.
- All Leads – the user will be able to view all Leads registered in the system.
- When complete, click Process.
Note
You cannot create a new User without specifying the email address.
Note
The system will automatically share Google Drive folders of Leads which the user account has access to. If you change the level of access to Leads, the system will automatically share or unshare the Leads’ Google Drive folders according to the granted access level.
Editing the User
When editing users, you can set the status for the User account and transfer his/her ToDo tasks to another User in the system.
- On the list with Users, locate the one you want to edit.
- Hover over the User until the action icons appear.
- Click the Edit icon.
- On the Edit User page, you can perform additional operations, as follows:
- Status – select the status of the User from the following ones:
Active The User account is active and can perform operations according to the granted Office Roles. Inactive The User account is no longer active and such user cannot log in to the system to perform operations in it. Transferred The User account was transferred to another Office. Such user can no longer log in to the current Office. - Transfer ToDo ‘Inbox’ to another user – start entering the name of another User who you want to transfer ToDo tasks of this User to.
- When complete, click Save.
Allowing Access to Multiple Offices for Users
You can allow access to multiple Offices for a specific User.
- On the list with Users, locate the User who you want to allow access to multiple Offices.
- Hover over this User until the action icons appear.
- Click the Edit
 icon.
icon. - On the Edit User page, locate and select the Allow User access to multiple Offices option.
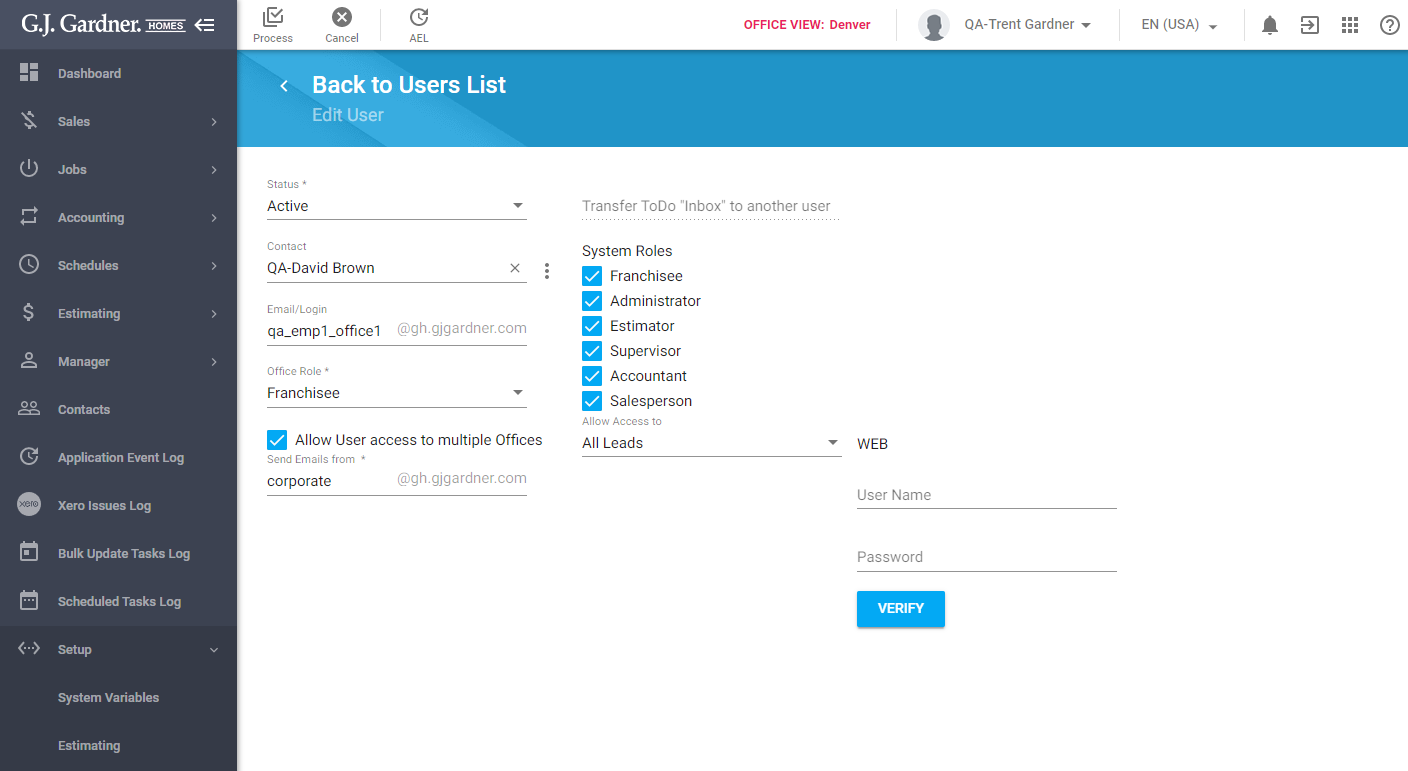
- Specify the email which the User the email will be sent from.
- When complete, click Process.
Note
The email which you specified in the Send Emails from field will be used for sending emails from Offices which the User has access to.
Note
The system uses the email address to verify that the User can access multiple Offices