
When a job does not proceed, we need to clean up the system to make sure there are no outstanding claims for the client and that claims truly financially reflect what was paid. We also need to ensure the invoices entered against the Job are correct and then finalise the Job.
There are many reasons why a client may not want to move forward with their project. This includes job that are under DPP with monies paid against them.
The franchisee will decide whether the client is due for a Refund/No Refund/Money is owed.
If it is a DPP job then the steps are a little different but will be covered in the scenarios below.
When a job will not progress we need to change the job status to Not Proceeding. However, there are three scenarios in which to Not Proceed a job for a client:
- Job Not Proceeding – When no refund and no further payment is required
- Job Not Proceeding – When a refund is due
- Job Not Proceeding – When further payment is required from the client
In this article we’ll examine the steps for each process.
Sale not completed.
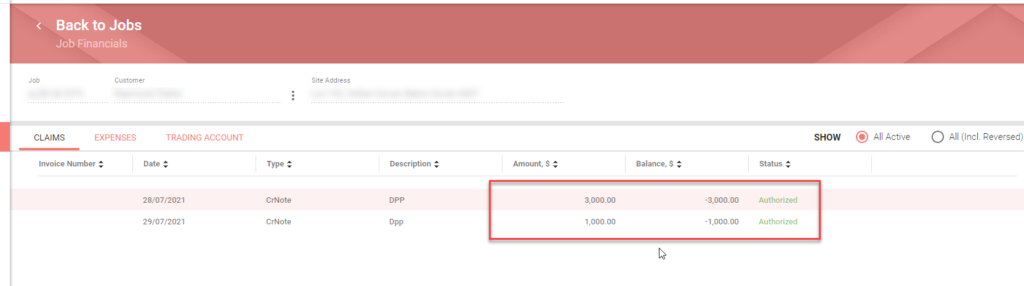
A DPP job that hasn’t been processed to a real job may have credit notes attached to it that need to be cleared up by making a claim in the Builders Portal or issuing a refund in Xero.
However, we can not make a claim for the job until the sale has been completed and turned into a real job from a DPP job. To do this we need to Complete the Sale of the DPP job.
Click the link to view How to Complete a Sale.
KB Article – How to Complete a Sale
Things to remember when trying to complete a sale for DPP job that is Not proceeding is to;
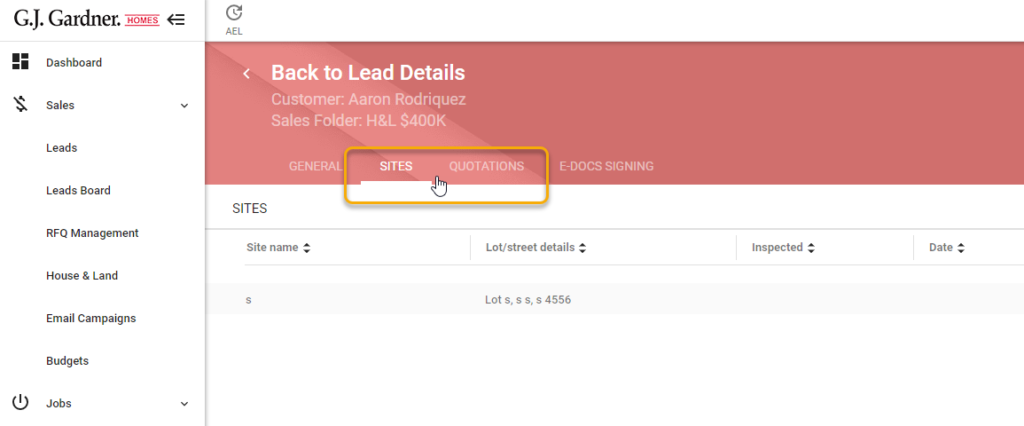
- Check the site inspection has been completed.
- The quotataion has been approved.
These can be found in the RFQ Management function in the Sales Folder
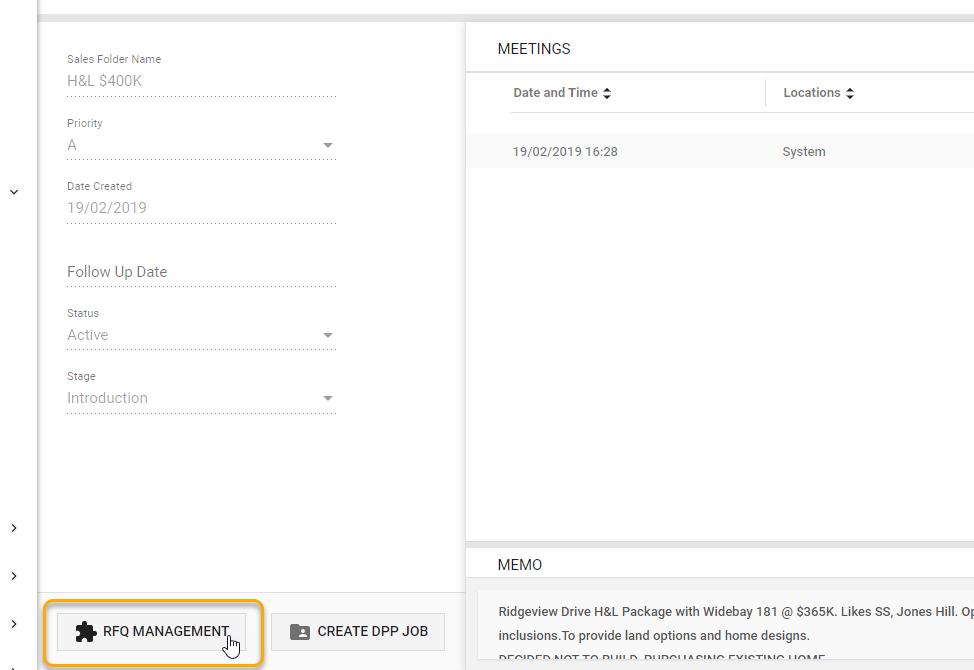
Go into the Sites and Quotation tabs to complete the above.
Steps to Complete Prior to making a Job Not Proceeding.
1. Check the job expenses
First you need to verify if all the expenses have been allocated correctly for the Job.
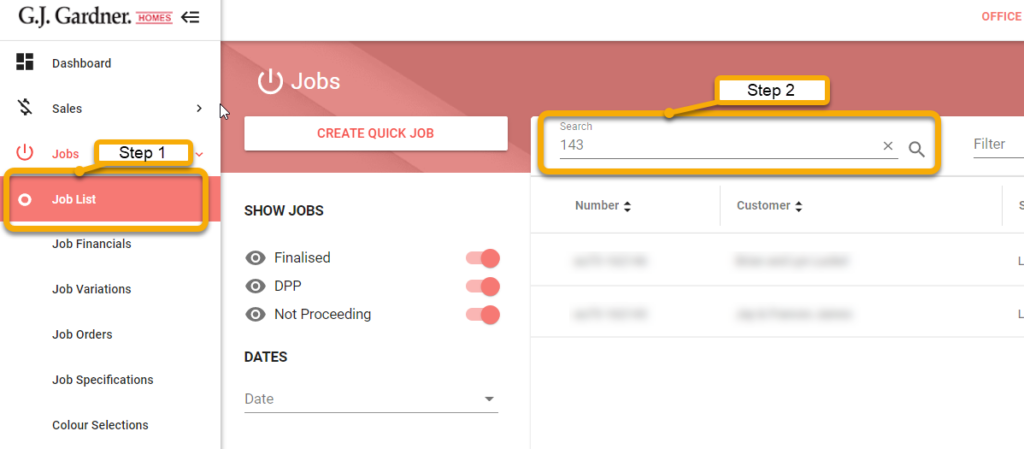
- In the sidebar click Jobs > Job Financials.
- Use the Find icon and select the job.
- Navigate to the Expenses tab.
- Check that the Cost Center Totals are correct and make a note of any that are incorrect.
2. Correct the job expenses
If any job expenses need to be corrected, you need to find the transaction that has the wrong Cost Center or Job number in Xero.
- Click Bill Options > Edit
- Change the Cost Center or Job Number
- Click Update
3. Enter all missing invoices
Make sure that there are no missing invoices that need to be entered against the Job. If there are missing invoices, these need to be tracked down and entered against the Job before it is made Not Proceeding.
4. Verify the draws are correct
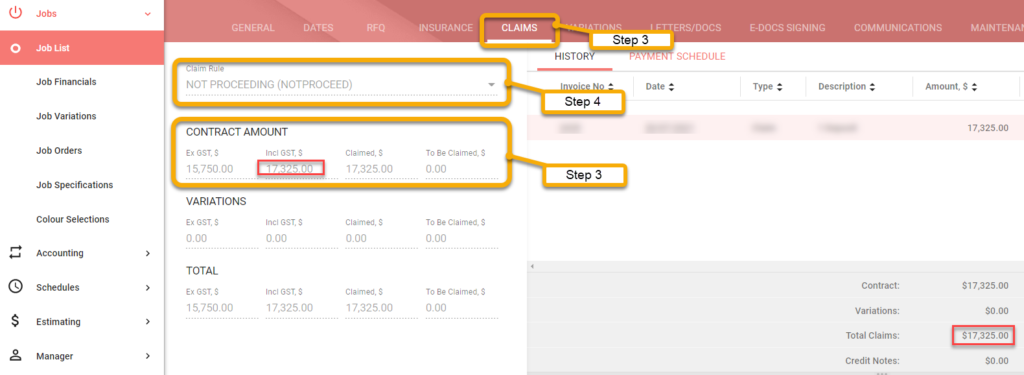
Now we have to make sure the draws are correct. Check how much has actually been received from the client. This is what we are going to set as the Contract Price of the Job.
- Click Jobs > Jobs List.
- Find and select the job.
- Navigate to the Draws tab.
- Change the Contract Price to the amount you want to retain.
- Change the Draw Rule to the Not Proceeding draw rule.
5. Select the corresponding scenario
- No refund and no further payment is required.
- A refund is due to the client.
- A further payment is required by the client.
No refund and no further payment required
If no refund and/or further payment is required you may simply Finalize the job. Once you are satisfied that the draws against the job are correct and there are no outstanding invoices, you can Not Proceed and Finalize the job.
- Click Jobs > Jobs List.
- Find and select the job.
- Navigate to the Dates tab.
- Click the checkbox next to Not Proceeding.
- Click the checkbox next to the Finalized.
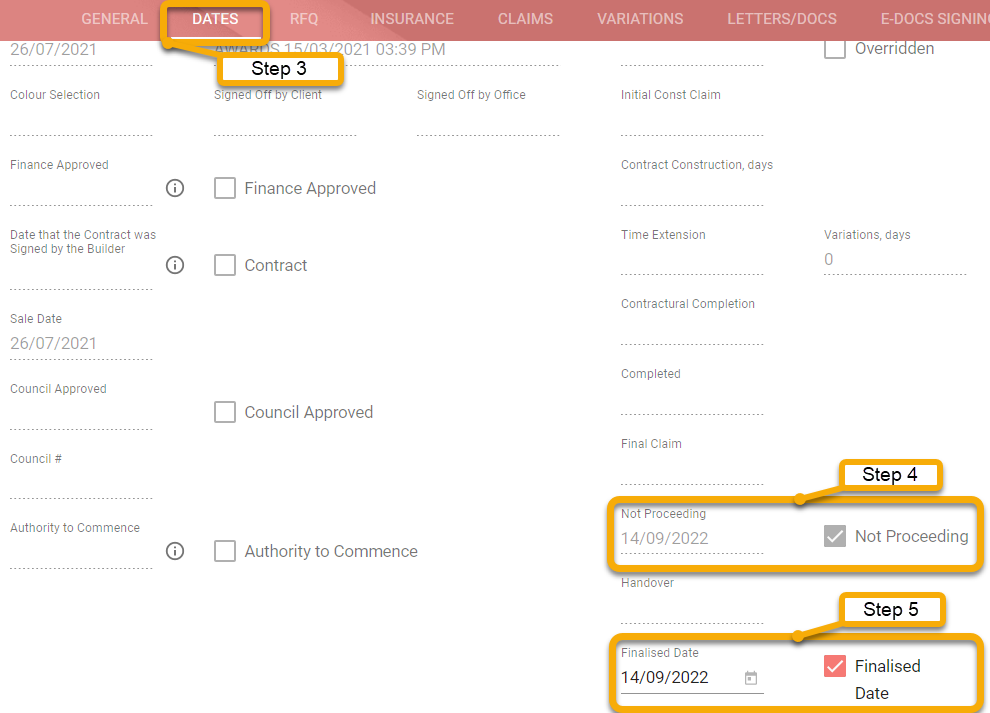
You have successfully Not Proceeded and Finalized the job.
Refund Due to Client
If a refund is due to the client you need to create a negative draw for the difference of the new Contract Price and any original draw raised and paid. This will create a Credit Note in Xero which you will then refund.
1. Create a negative draw
- Click Accounting > Make A Draw.
- Find and select the job.
Note: If there is any amount to raise a negative draw for, it will appear here. If there is, it will have a box saying it would be better to reverse the original draw. - Click Yes.
- Click Process. Click here to view article for further explanation. https://help.gjgardner.com/hc/xero/how-to-refund-a-job-when-a-progress-claim-has-been-made-and-paid/
2. Refund the Credit Note in Xero
- Log in to Xero and navigate to Business > Invoices.
- Click on the Awaiting Payment tab.
- Open the credit note you want to refund.
- Scroll down to the Make a cash refund section and enter all information into the payment fields.
- Click the Add Refund button.
- To read an article on how to do this click here: https://help.gjgardner.com/hc/xero/how-to-refund-a-credit-note-or-overpayment-in-xero/
3. Finalize the job
If you are satisfied that the draws against the job are correct and there are no outstanding invoices for the Job, you can Not Proceed and Finalize the Job.
- Click Jobs > Jobs List.
- Find and select the job.
- Navigate to the Dates tab.
- Click the checkbox next to Not Proceeding.
- Click the checkbox next to the Finalized.
You have successfully Not Proceeded and Finalized the job.
Further payment required by client
If further payment is owed from the client, you need to make a draw for the difference between the new Contract Price and any original draw raised.
1. Make a draw
- Click Accounting >Claims.
- Find and select the job.
- Select the Make a claim tab.
- Enter in claim amount.
- Click Process.
2. Finalize the job
If you are satisfied that the draws against the job are correct and there are no outstanding invoices for the Job, you can Not Proceed and Finalize the Job.
- Click Jobs > Jobs List.
- Find and select the job.
- Navigate to the Dates tab.
- Click the checkbox next to Not Proceeding.
- Click the checkbox next to the Finalized.
You have successfully Not Proceeded and Finalized the job.
Great info.
Can we add a note at the start that if you have a DPP job with money received that is not proceeding, it will first need to be turned into a full job – then you can follow these steps to not proceed and finalise.
I’ve noticed offices are making DPP jobs not proceeding by changing the sales folder status to Will Not Complete. The problem is when you go to Jobs> Jobs List > Show DPP Jobs, you see all the DPP jobs that are not proceeding from all of your history.
Good suggestion. I have added that note.
Hi, may I request to change the term “Draw” to “Claim” – took me 10 minutes to figure out what it was talking about.
Hi Patrick,
Could we add a note for DPP with no money paid?
If you have a DPP job with NO money received that is Not Proceeding, make the sales folder Will Not Complete will Not Proceed and Finalise it.
Hi Tim & Kathryn,
Just wondering if we can update the process for Not proceeding a job when we need to provide a refund and to show a couple of different examples.
The Help Doc is not very clear for this proceedure.
Thanks
The link to complete a sale under the heading sale is not completed is not working.
Hi team, The video in the link does not show the process to refund a client. The video link defaults to the dashboard after selecting the job number in claims.
Click here to view article for further explanation. https://help.gjgardner.com/hc/xero/how-to-refund-a-job-when-a-progress-claim-has-been-made-and-paid/