
You can manage the list of Sub-Contractors and Suppliers who should automatically receive a copy of the Job Progress Report.
- To manage Sub-Contractors and Suppliers, on the navigational sidebar, select Setup.
- Once the Setup section expands, select Schedules.
- On the tabbed menu, select Sub-Contractors/Suppliers.
The page for adding sub-contractors and suppliers opens, as follows:
By default, no sub-contractors and suppliers are shown until you select the Supervisor. Once you select the appropriate Supervisor, you will see the list of Sub-Contractors and Suppliers who he/she deals with.
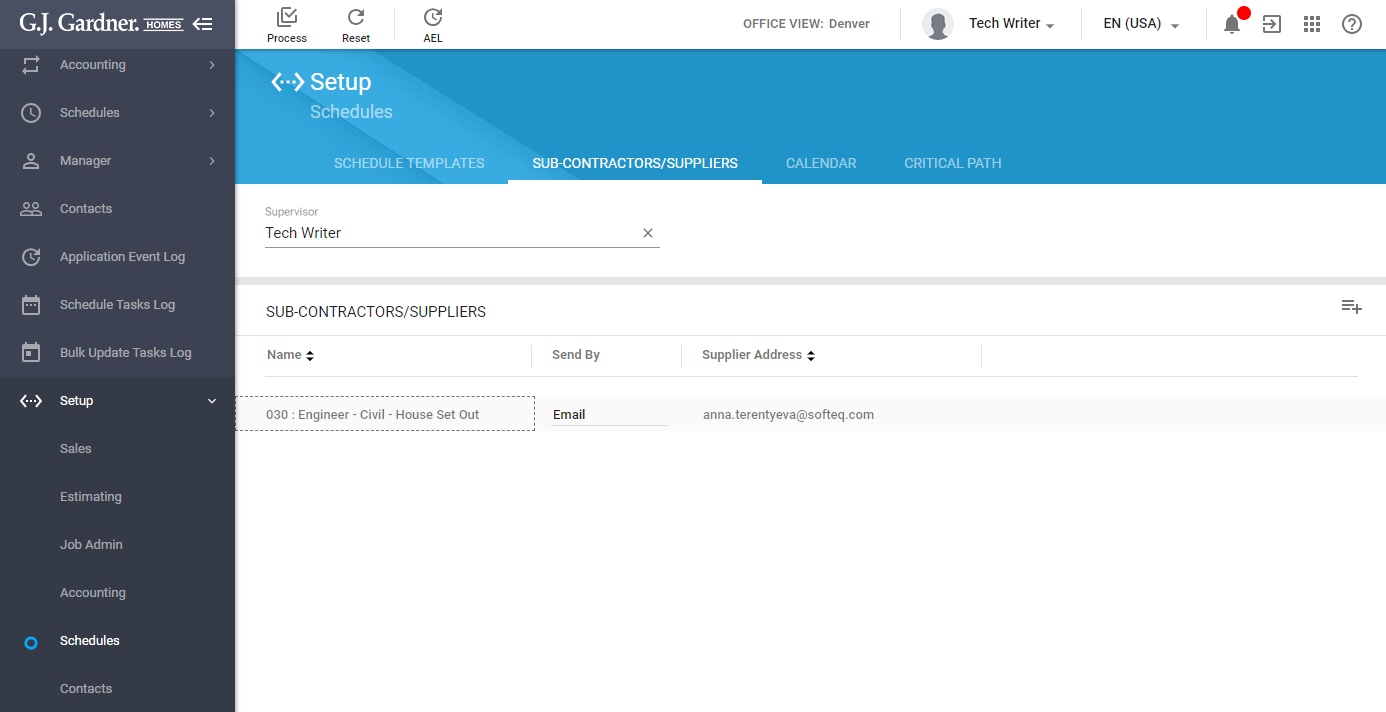
For each Sub-Contractor/Supplier, the following information is displayed:
| Name | Name of the Sub-Contractor/Supplier (Cost Center) which the Job Progress Report is sent to. |
| Send By | Preferred way to send the Job Progress Report to the Sub-Contractor/Supplier. You can select between Email and Mail. |
| Supplier Address | Sub-Contractor’s/Supplier’s address or email address which the email or letter with the Job Progress Report is sent to. |
You can add new Sub-Contractors/Suppliers and delete the no longer needed Sub-Contractors/Suppliers.
Adding Sub-Contractors/Suppliers
- Select the Supervisor.
- Click the Add
 icon.
icon.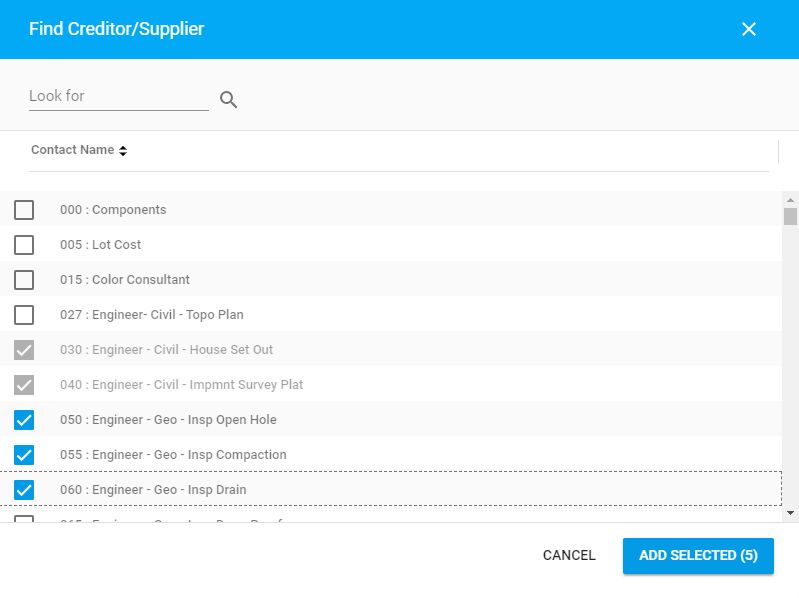
- In the Find Creditor/Supplier form, select the Sub-Contractors/Suppliers who should receive the Job Progress Report. You can look for them by the contact name.
- Click Add Selected. The selected Sub-Contractors/Suppliers will appear on the list.
- Select the preferred way to deliver the Job Progress Report to them, as follows:
- When complete, click Process.
Deleting Sub-Contractors/Suppliers
You can delete Sub-Contractors and Suppliers who should no longer receive the Job Progress Report.
- On the list with Sub-Contractors/Suppliers, locate the one you want to delete.
- Hover over it until the action icons appear.
- Click the Delete
 icon.
icon. - When complete, click Process.