
Before Starting (typically two weeks prior the issuing of the Building Permit)
- Retrieve the following files before commencing;
- Customer signed copy of the Contract,
- Customer signed copy of the Specifications,
- Customer signed copy of Color Selection,
- Customer signed copies of all Job Change Orders (if applicable),
- Final construction architectural plans,
- Final construction engineers / structural plans,
- Soil classification report and geotechnical reports (if applicable),
- Final contour / identification survey plan or site plan,
- Final drainage, erosion and sediment control plan.
- Review all the Job information.
- Compare information on the various documents for clarity and consistency.
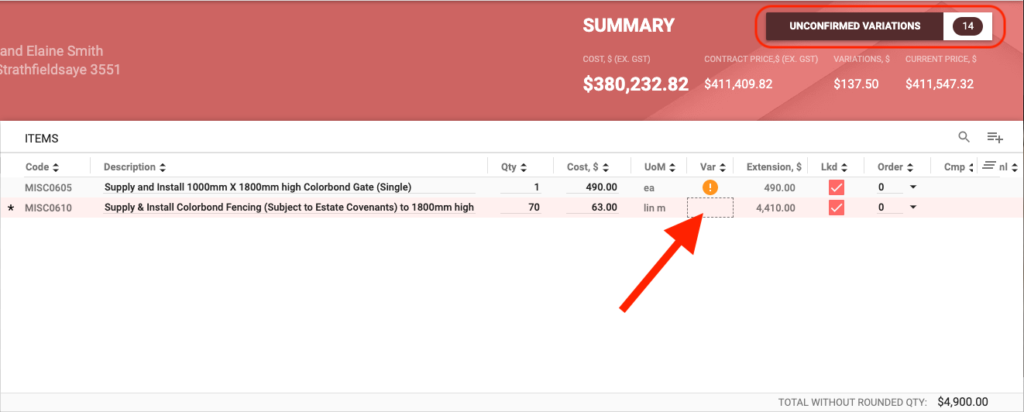
- Review all Unconfirmed Change Orders (an unconfirmed Change Order is either a Quote Change from a Completed Sale or an approved Job Change Order);
- Click the black / white text and number button at the top right corner of the Job Estimate page (where each unconfirmed Change Orders will be displayed in cost center and code order).
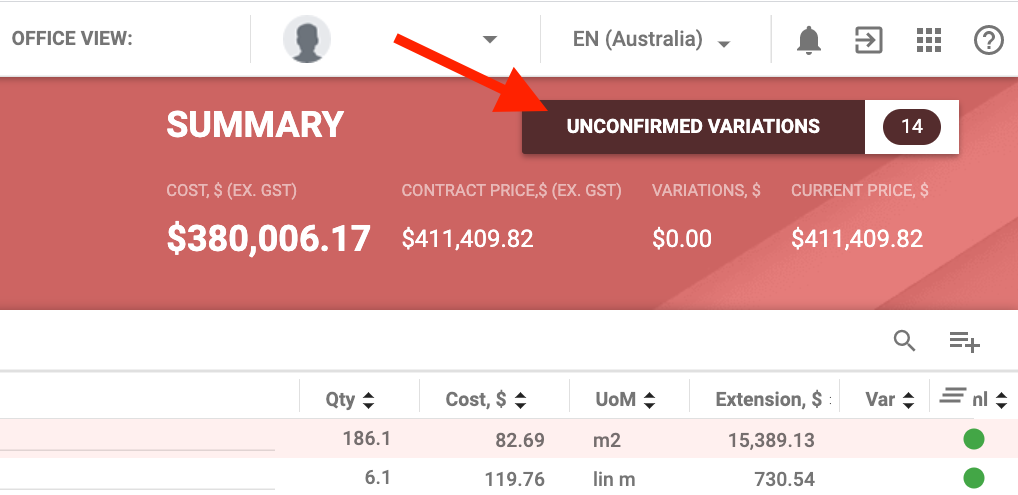
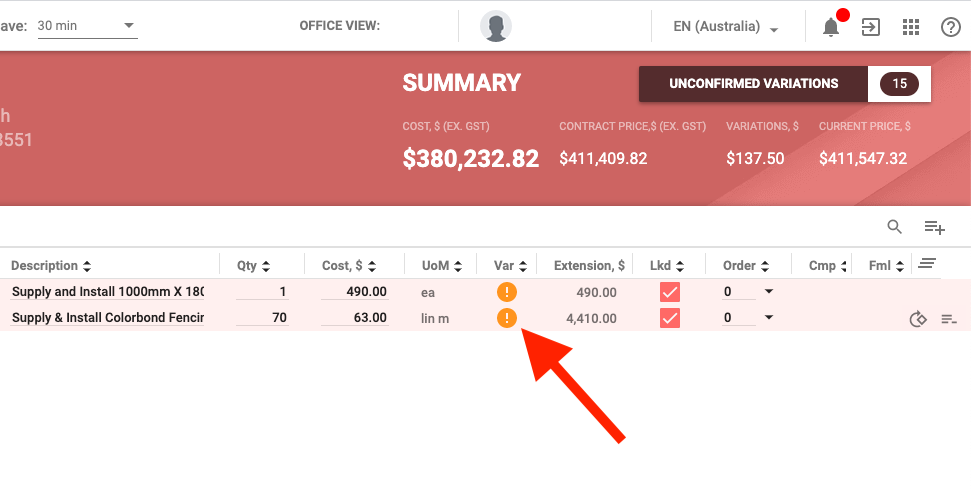
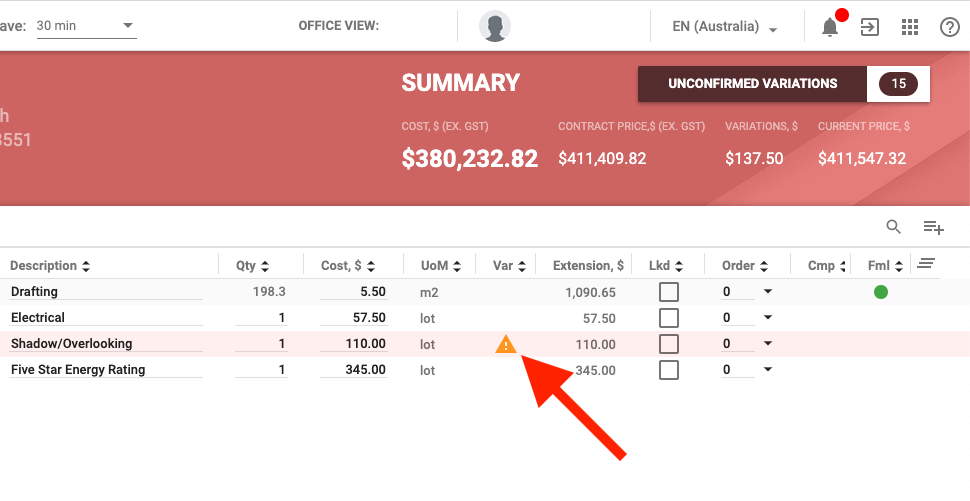
- Bring all errors or discrepancies to the attention of the Franchise Owner / Operations Manager.
- Export to Google Drive the Job Bill of Materials Report – Summary.
- Export to Google Drive the Job Bill of Materials Report – Detail.
- Export to Google Drive the Job Bill of Materials Report – Take off Parameters.
- Obtain all necessary supplier / subcontractor quotations.
Preparing the Job Estimate (typically when Building Permit issued)
- Log in to the Builder Portal.
- Choose Jobs > Job List, search for the Job and click the ‘$’ icon to the right on the row of the searched Job to open the Job Estimate.
- Determine, if any, Cost Centers that require repricing, if so;
- Select File > Lock All,
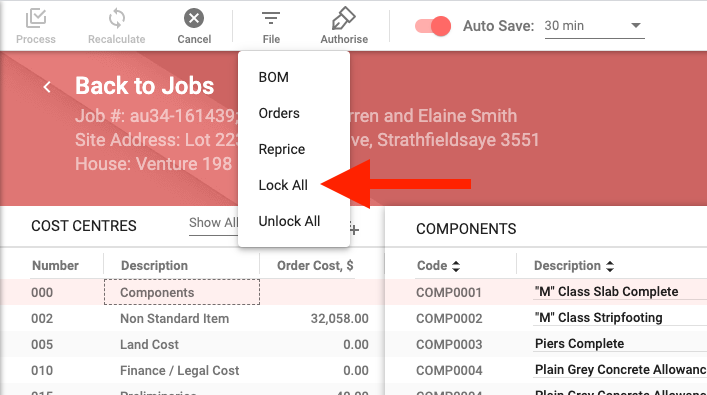
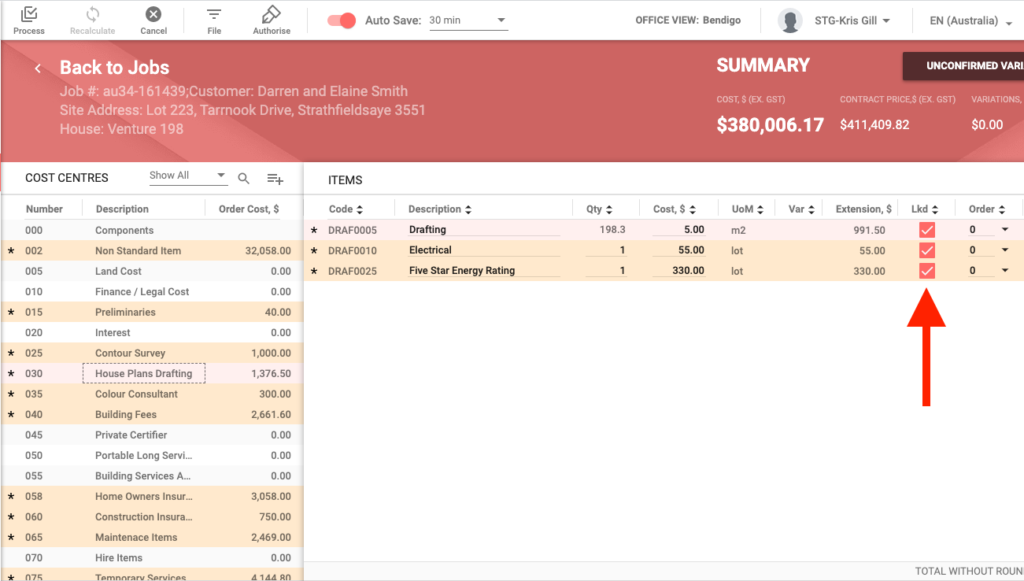
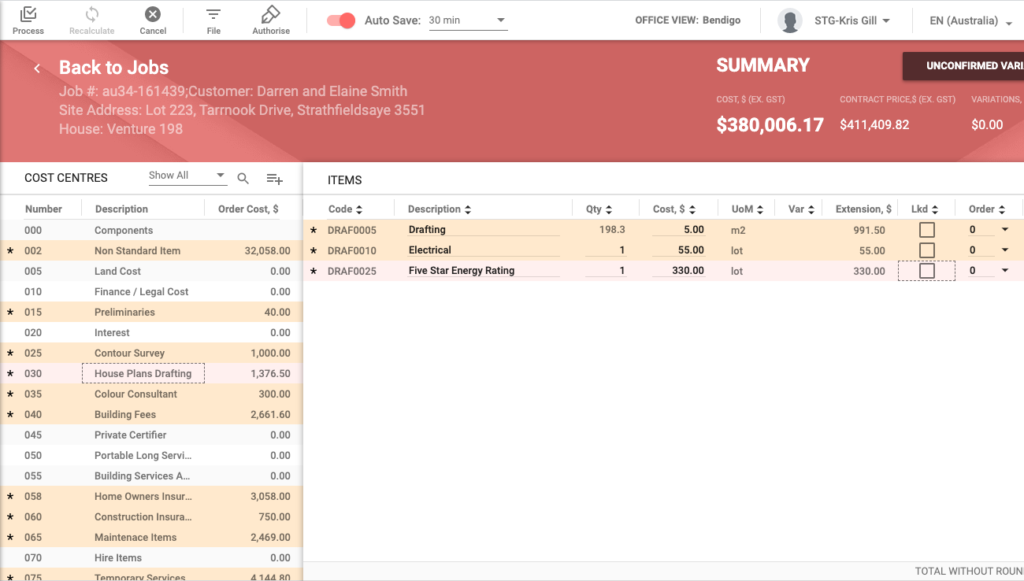
- Click the Cost Centers that require repricing and unselect the ‘Lkd’ column checkboxes of each Item and/or Component that requires repricing,
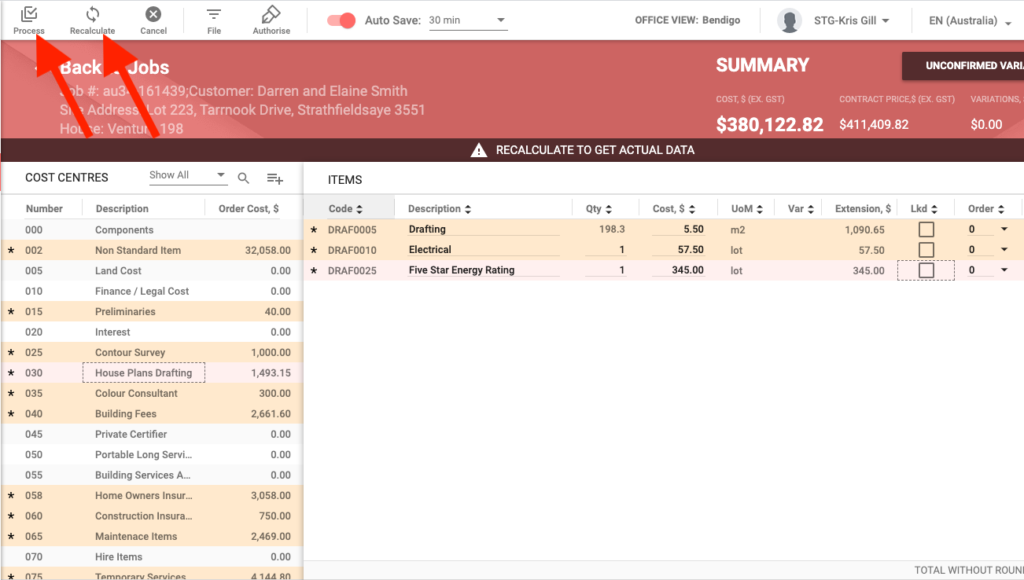
- Select File > Reprice,

- Click Recalculate to get actual data (check and make changes , if required),
– OR –
- Click Process (saves the actual data).
- Review and amend and/or change cost center of all Unconfirmed Change Orders.

- Check and amend, as required, all Items and Components, being sure to add and/or remove any Items and/or Components as necessary.
- Check and amend, as required, any Formulas attributed to Items and/or Components as necessary.
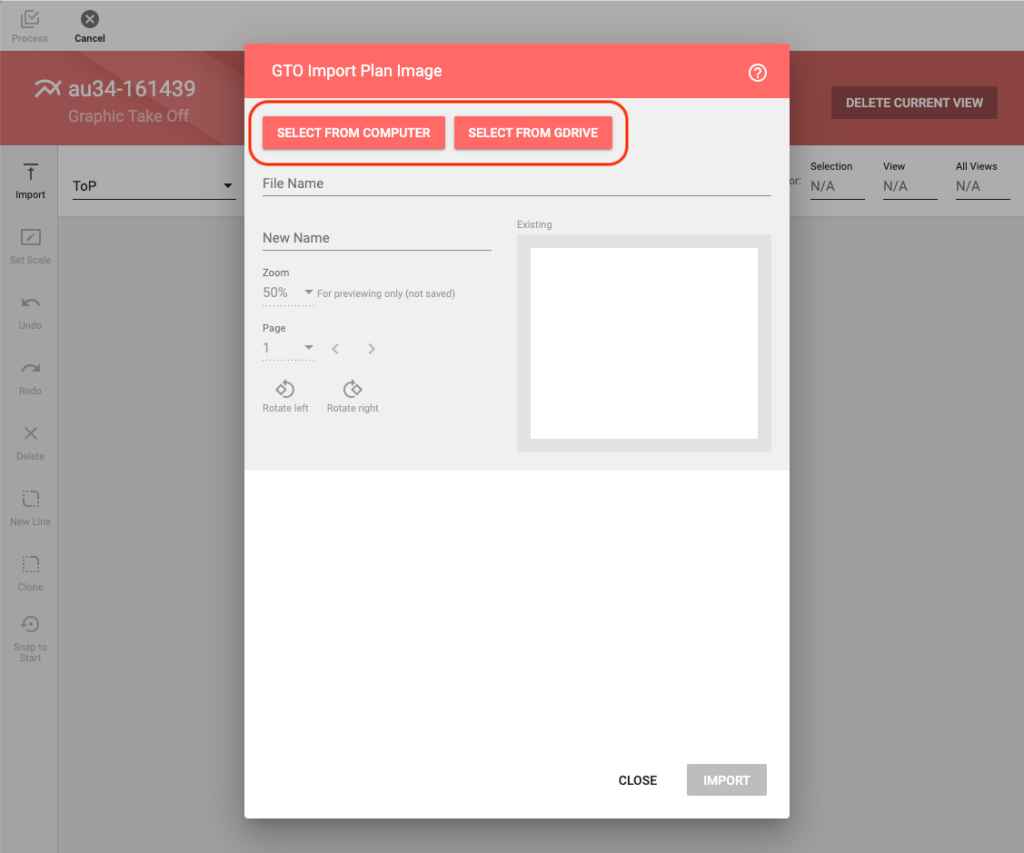
- Import plans via the Graphic Takeoff Import Plan Image function.
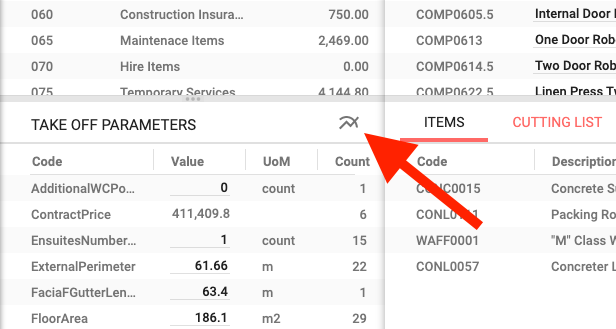
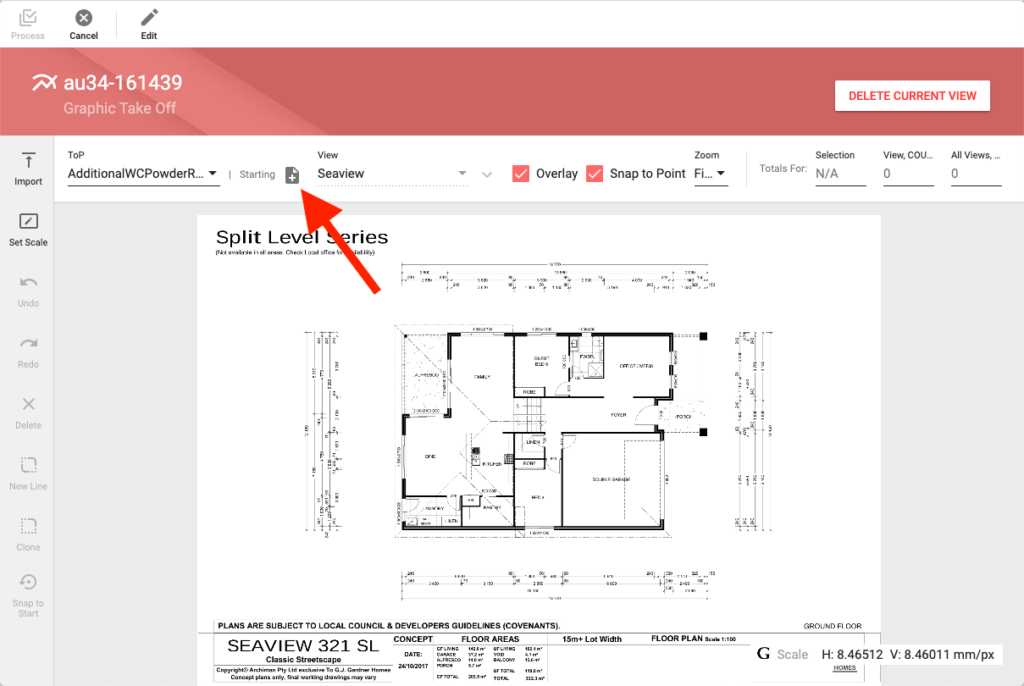
- Measure all Take Off Parameters (ToPs), either by using the Graphic Take Off function or by manually editing the values of the ToPs.
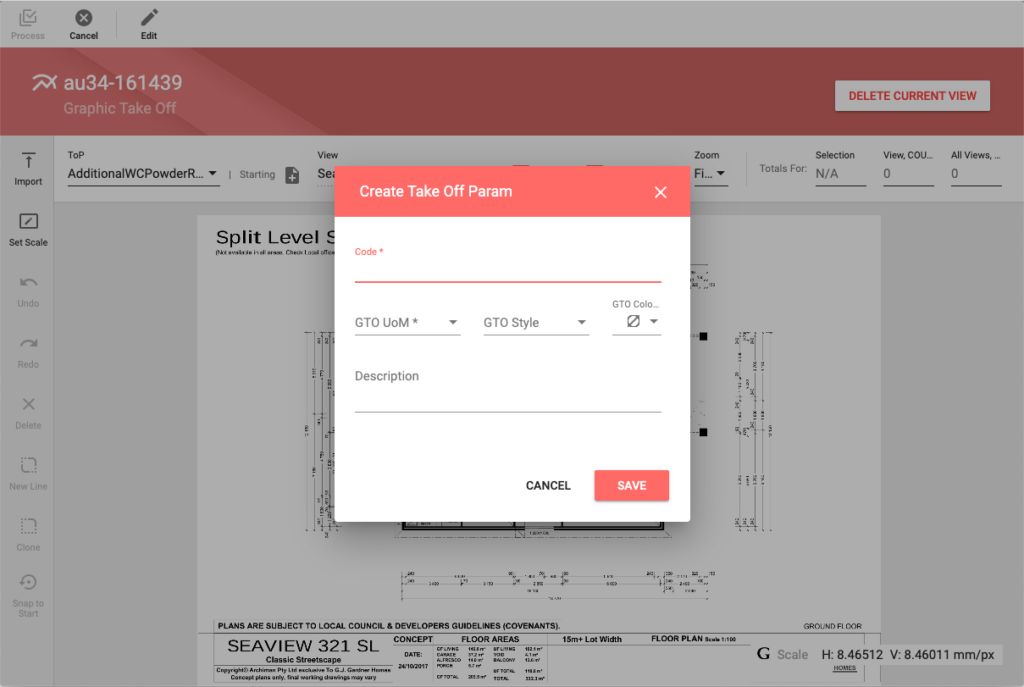
- Create any additional ToPs required via the Add ToP function in Graphic Take Off.
- Print / Export to Google Drive, the Job Bill of Materials Report – Take off Parameters;
- This report can be used to record any specific information that may be relevant to the particular office, their unique practices, and as an Estimator checklist.
Review ALL Cost Centers
- Click each Cost Center and review every Item and Component.
- If an Item or Component has a zero quantity;
- Check for Formula and ToP accuracy;
- If Formula and ToP are ok, decide if Item and/or Component is still required;
- If so, add a manual quantity or add a Cutting List line (Unit of Measure must be setup to allow pieces),
- If not, Remove the unnecessary Item and/or Component.
- If Formula and ToP are ok, decide if Item and/or Component is still required;
- Check for Formula and ToP accuracy;
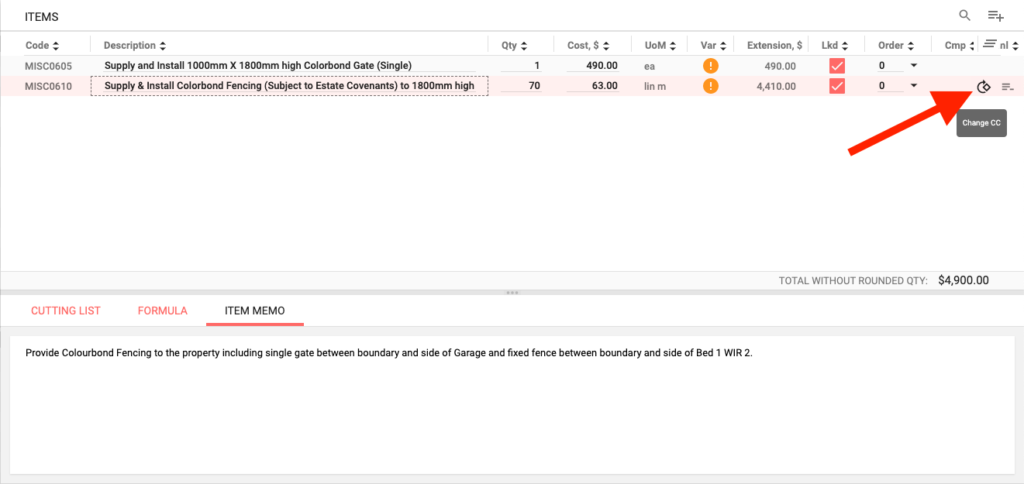
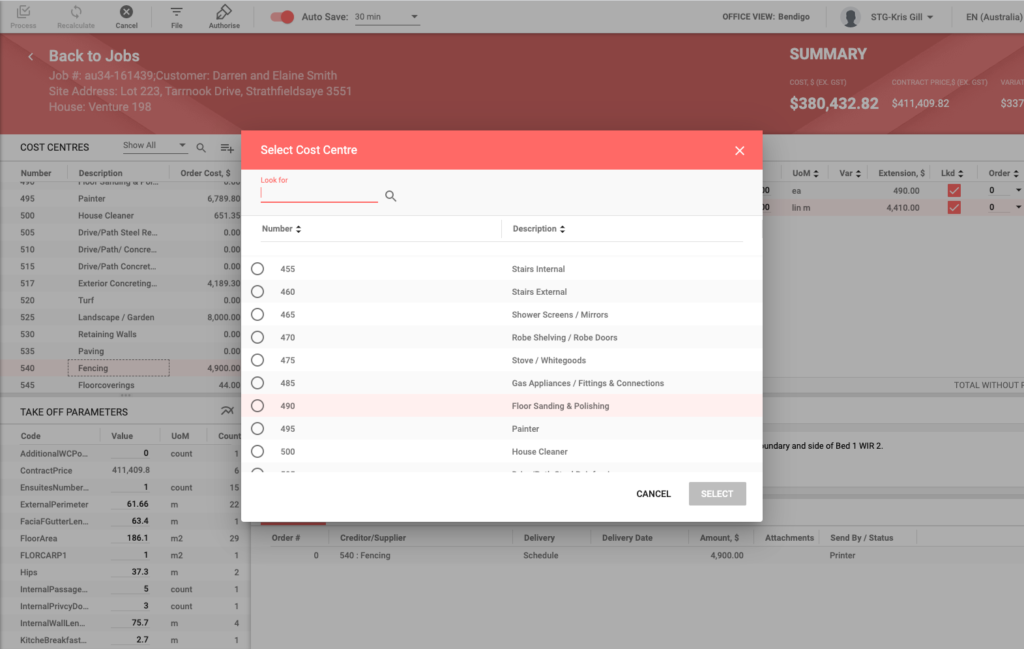
- If an Item is not in the correct Cost Center use the Change Cost Center function to move to the correct Cost Center.

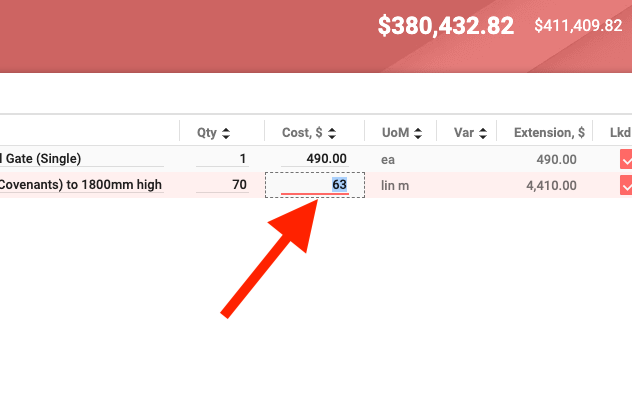
- Check and amend, if required, all Items for the correct unit Cost;
- Single click the Cost, $ column item, this will display the dotted-line box around the selected data box, which can be amended by typing to over type (a double click of the Cost, $ column item will highlight text, which can be amended by typing to over type or once text is highlighted, the cursor can be placed to amend text),
- Click Process.
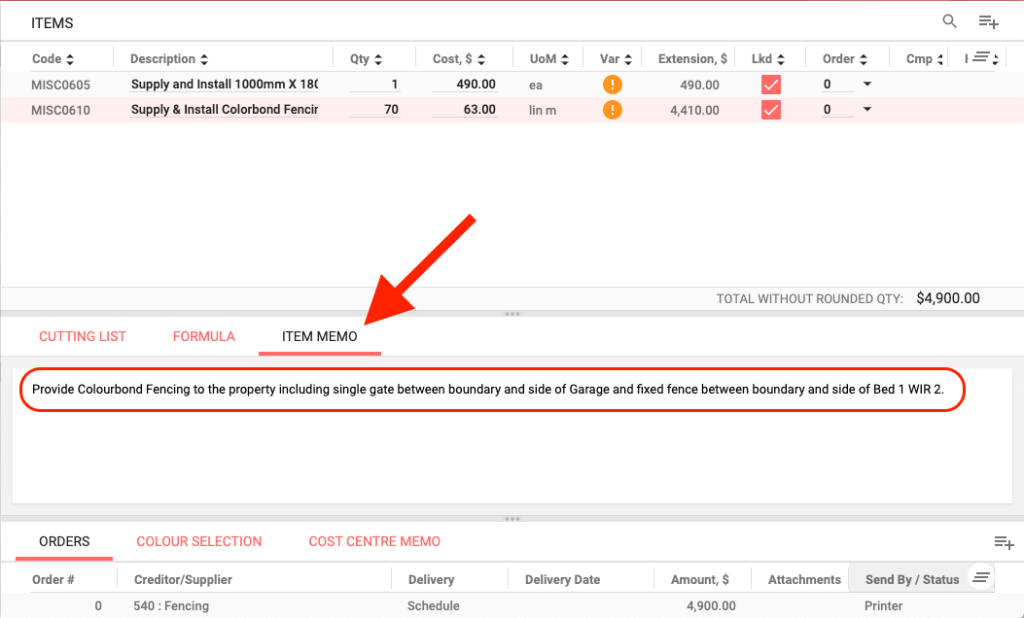
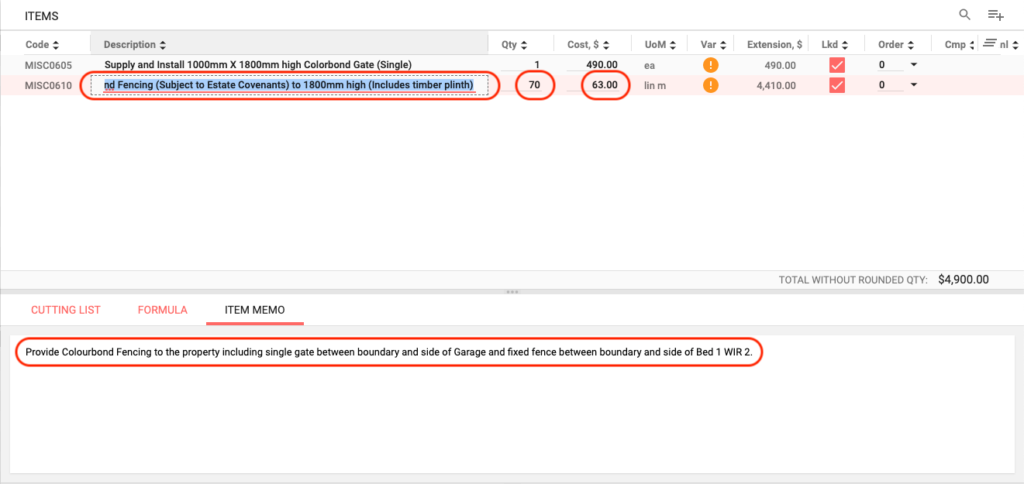
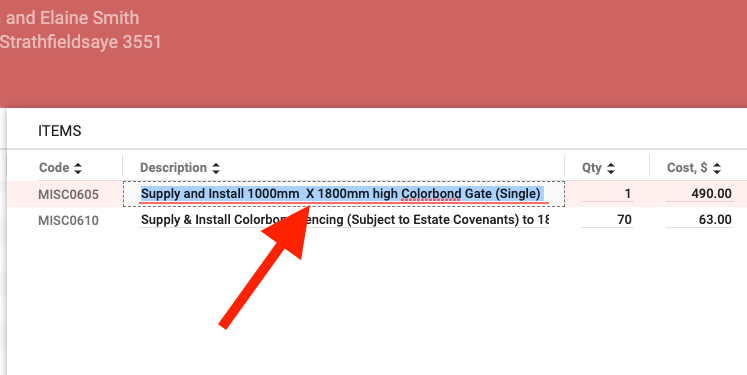
- Check and amend, if required, all Items and Components Description;
- Single click the Description column item, this will display the dotted-line box around the selected data box, which can be amended by typing to over type (a double click of the Description column item will highlight text, which can be amended by typing to over type or once text is highlighted, the cursor can be placed to amend text),
- Click Process.
- Check, add and/or amend, if required, any supplier and/or subcontractor quotations.
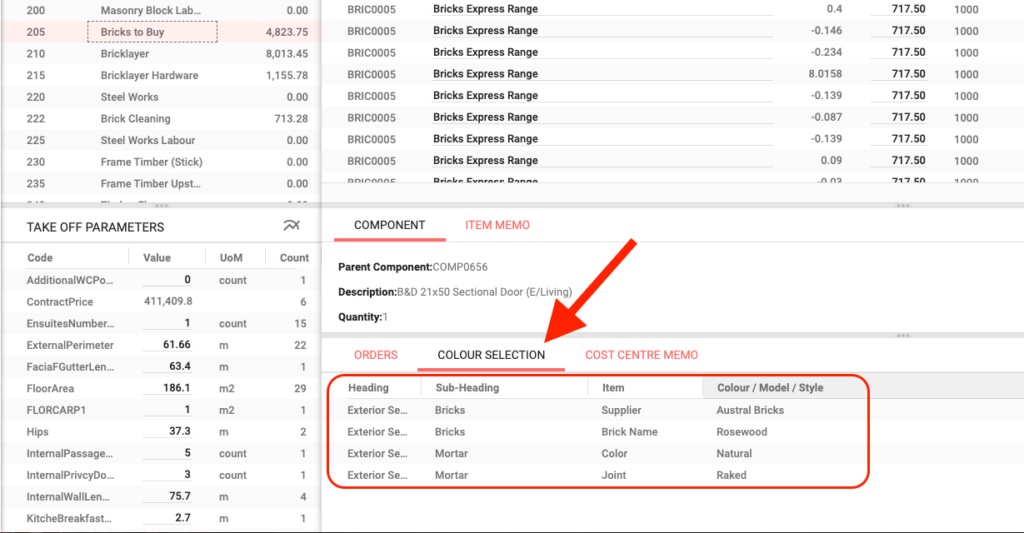
- Check the Color Selection information for correctness and consistency, if incorrect, advise the Color Consultant to make the required corrections.
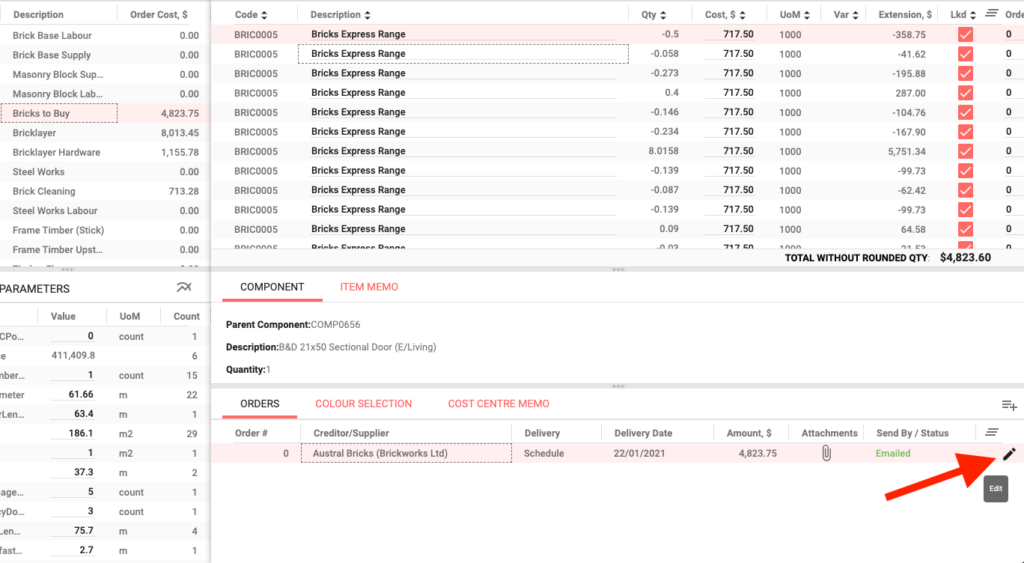
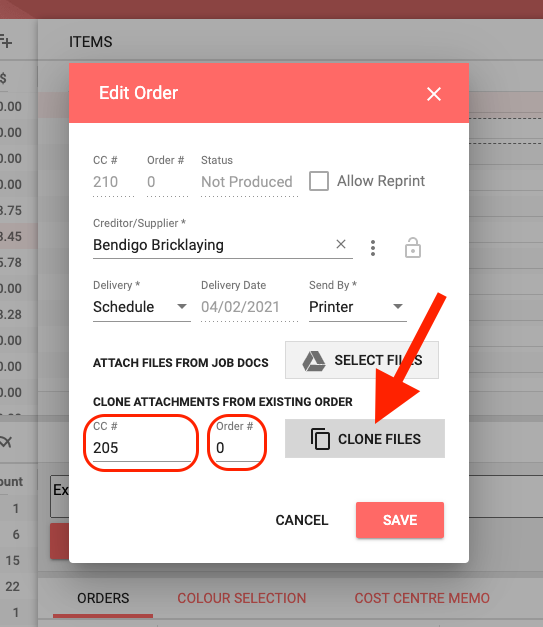
- Check, assign and/or amend, if required, the Creditor/Supplier information, including Delivery (as per Schedule or Entered date) and Send By (Email or Printer);
- Click on the required Cost Center Row,
- Click Orders,
- Click Order # Row or click the pencil icon at the right hand end of the Order # Row to open the Edit Order page,
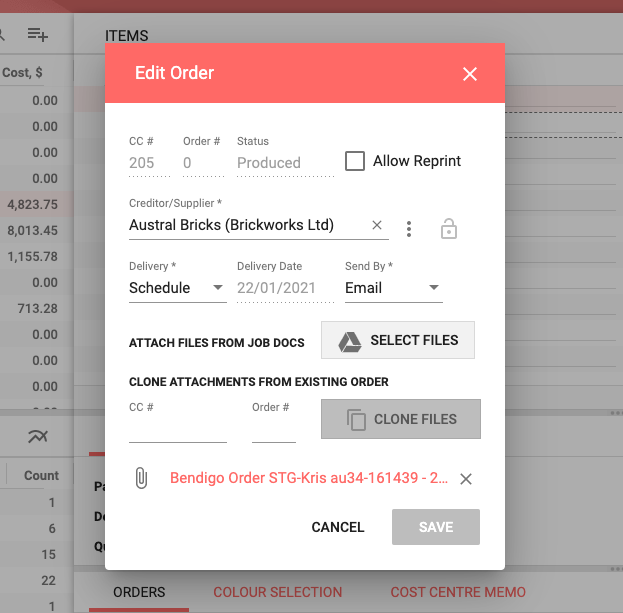
- Click the ⠇three vertical dots beside Creditor/Supplier name,
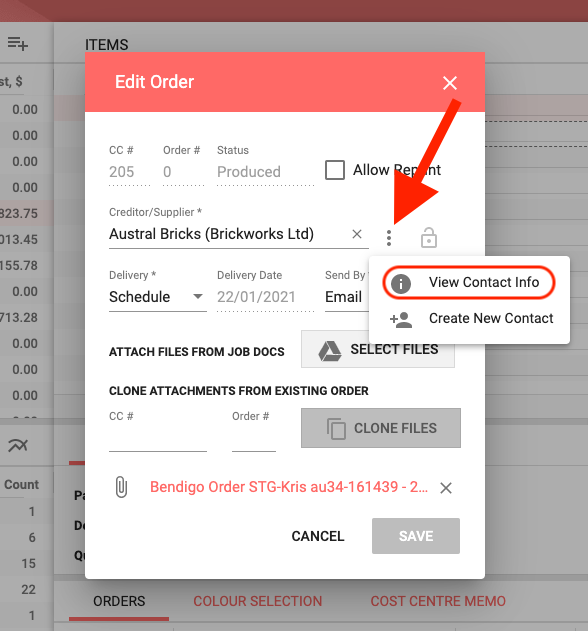
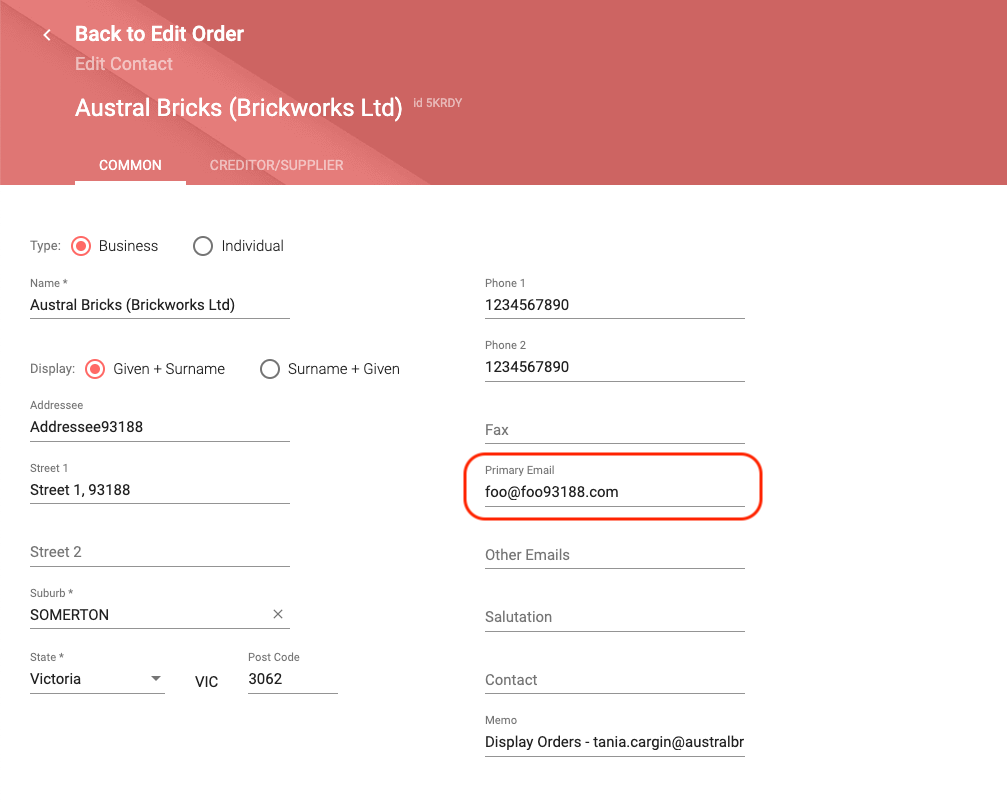
- Click View Contact Info which will open Edit Contact page, where email address etc. can be checked,
- Click Process,
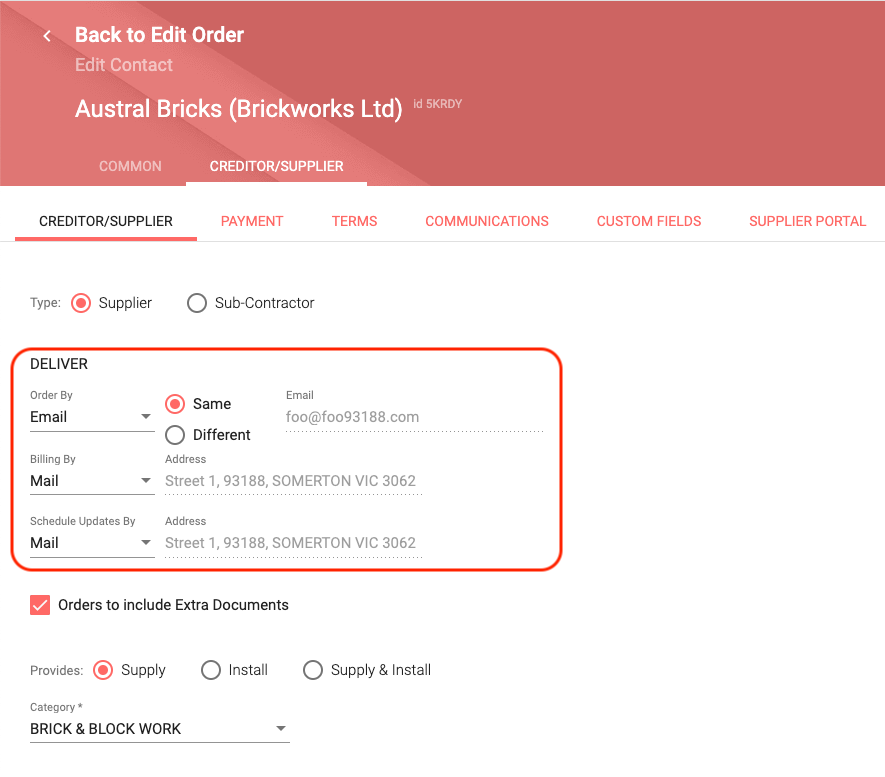
- Select required Delivery option from dropdown list Schedule or Entered,
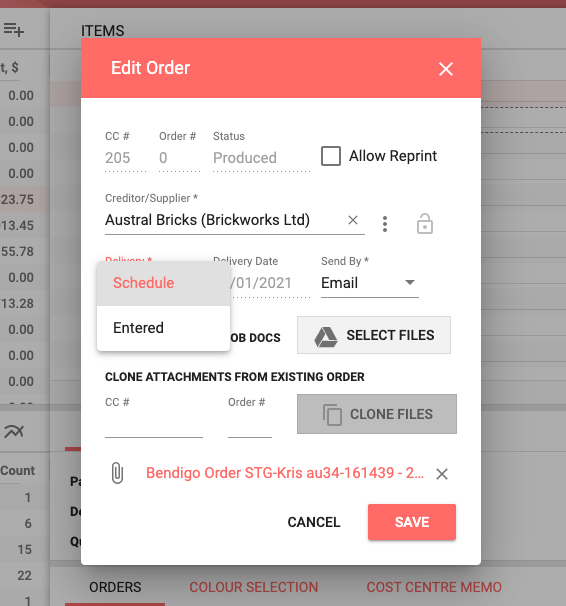
- Select required Send By option from dropdown list Email or Printer,
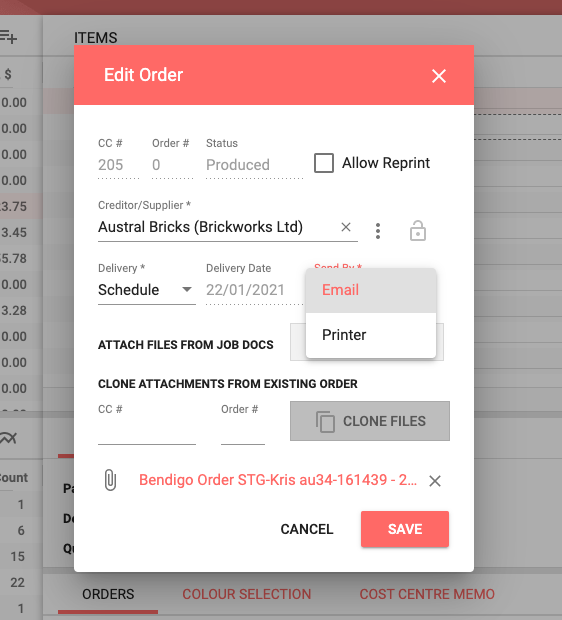
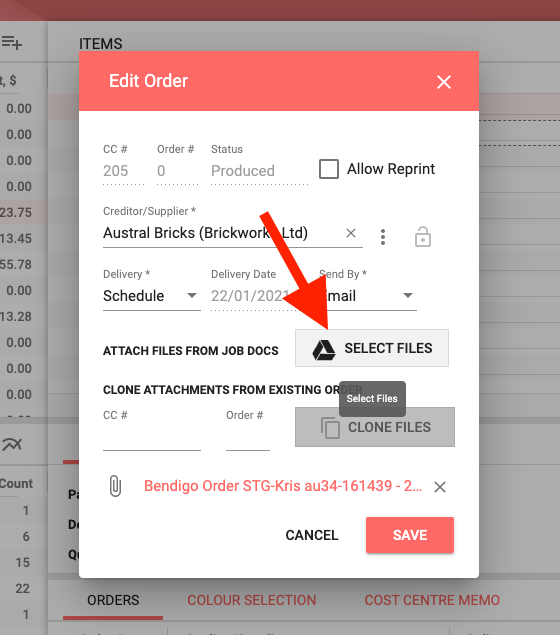
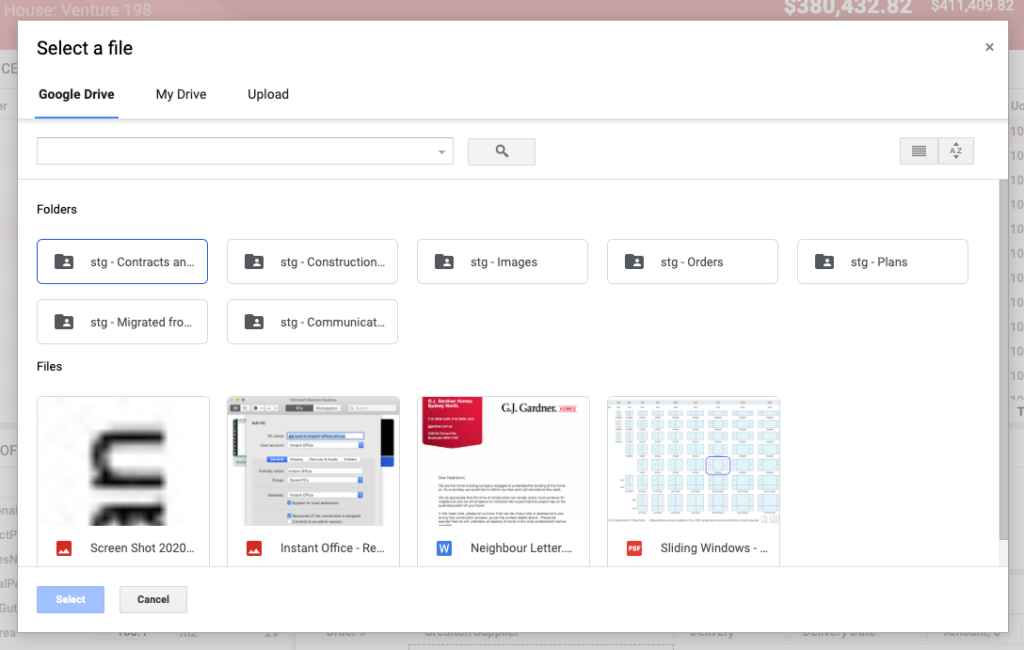
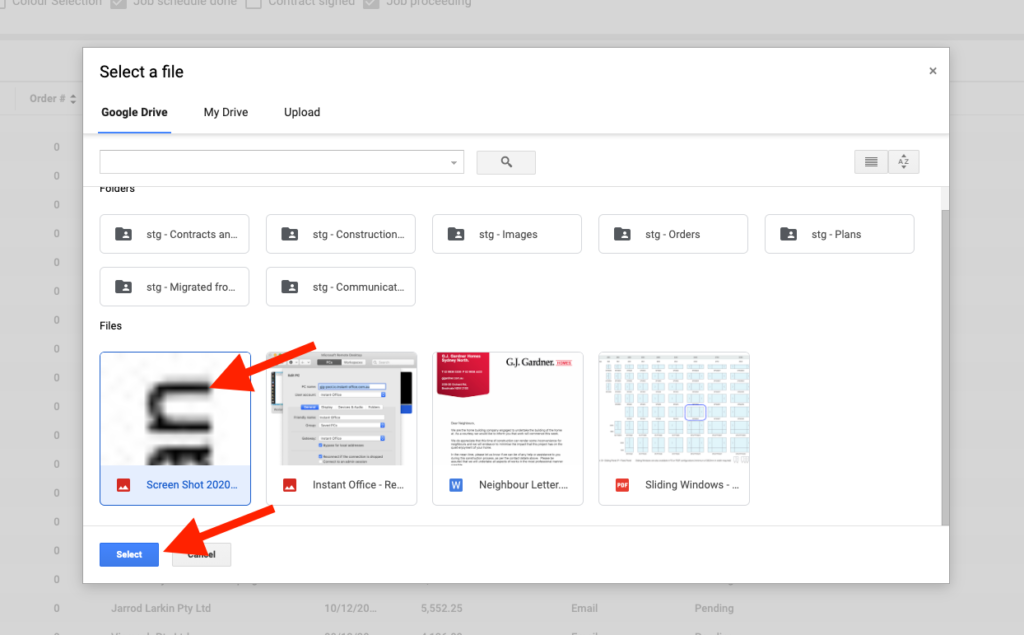
- Attach any Cost Center specific files from Job Docs in Google Drive;
- Click Select Files,
- Select the required files,
- Click Select,
- Click Save.
Create a Construction Schedule
- Choose Jobs > Job List, search for the Job and click on the Row of the selected Job, click Dates and check the Authority to Commence checkbox is selected and the correct date is displaying (if the checkbox is not selected and/or the date is incorrect, bring to the attention of the Franchise Owner / Operations Manager to correct ASAP).
- Choose Schedules > Construction, click Create New Schedule, select Job from dropdown menu (if a Construction Schedule has already been created or the Authority to Commence checkbox not been selected, the Job will NOT appear in the dropdown list), and select a Construction Template from the dropdown list, click Create.
- Click Process, click Gantt Chart (bottom left of the Construction Schedule page).
- Click Start Date on the row of the Task Name “Start”, and click on the dropdown arrow to display the Calendar, select the correct construction start date, and click Process.
- Return back to the Job Estimate and review the delivery dates for accuracy and appropriateness.
The Construction Templates must be established by the Franchise Owner / Operations Manager / Supervisor to provide an accurate starting point for the Estimator, otherwise, the Estimator will be required to rely on the Franchise Owner / Operations Manager / Supervisor to create the Job Schedule on each occasion, which is inefficient.
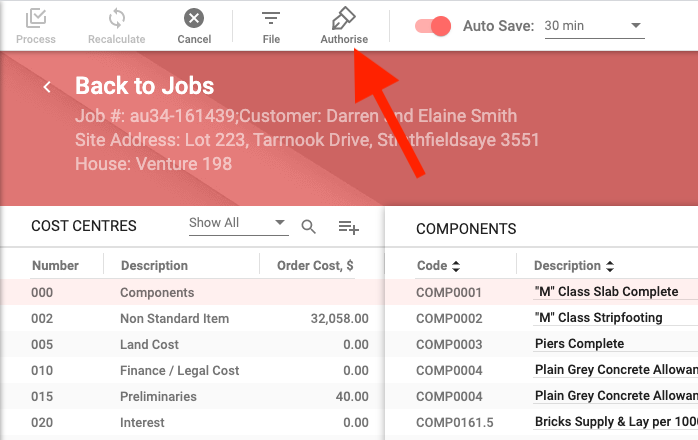
Authorize the Job Estimate
- Choose Jobs > Job List, search for the Job and click the ‘$’ icon to the right on the row of the searched Job to open the Job Estimate.
- Select Authorise.
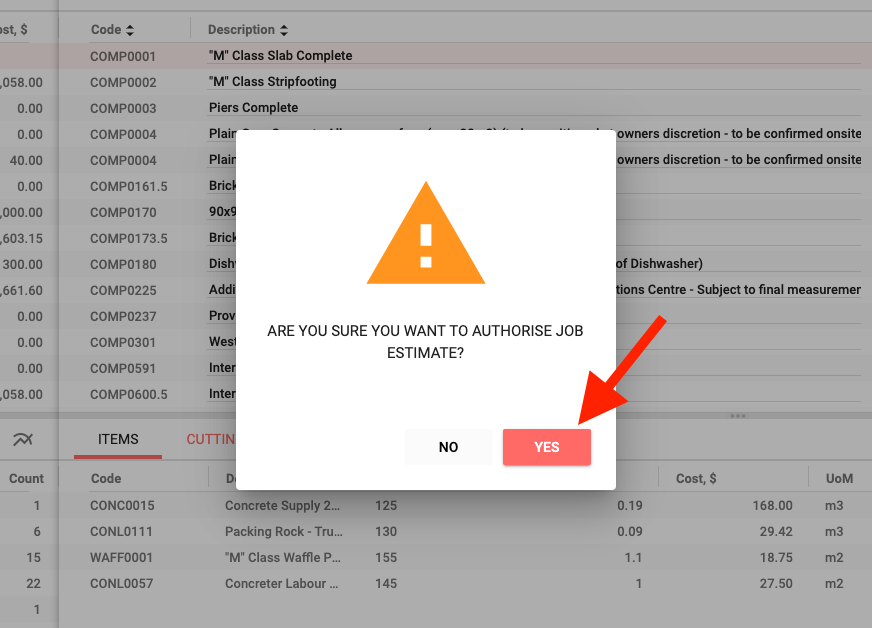
- Click Yes to Authorize the Job Estimate.
Producing Purchase Orders
- Choose Jobs > Job Orders.
- Click the 🔍 icon to open the Job List and type any identifiable part thereof, of the required Jobs’ job number, client name or site address in Look for, press Enter or click the 🔍 icon, this will refine the list of jobs to select from, once located, select the required Job by clicking on the Row of the required Job (the option button will highlight), click Add Selected.
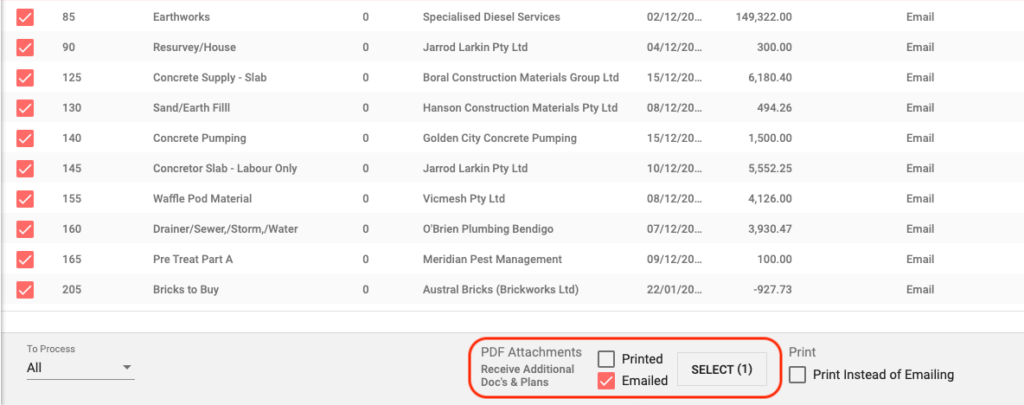
- Select the required To Process option from the dropdown list (bottom left corner of the Job Orders page);
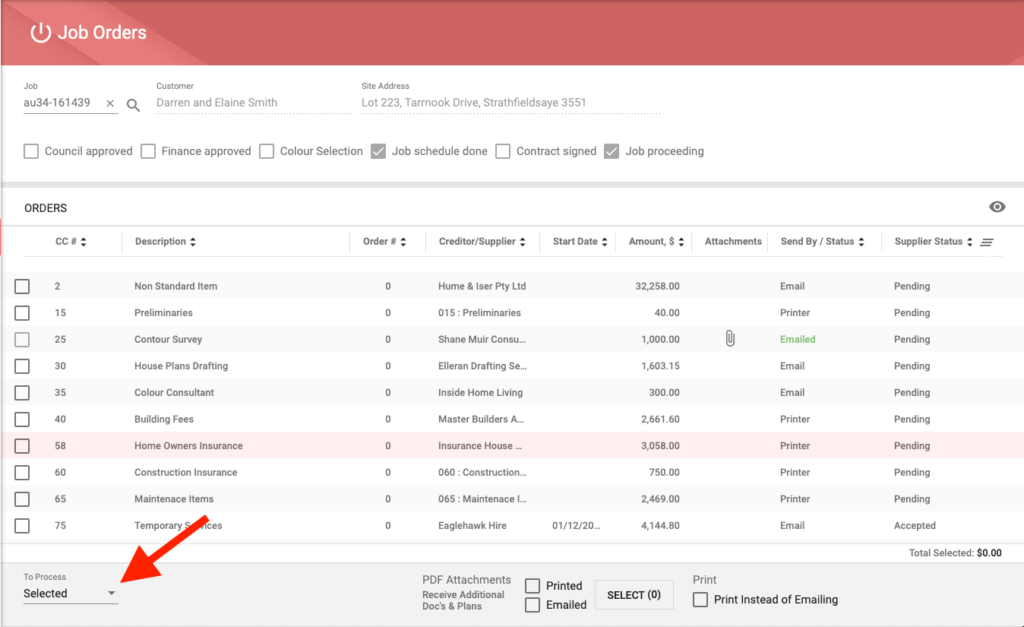
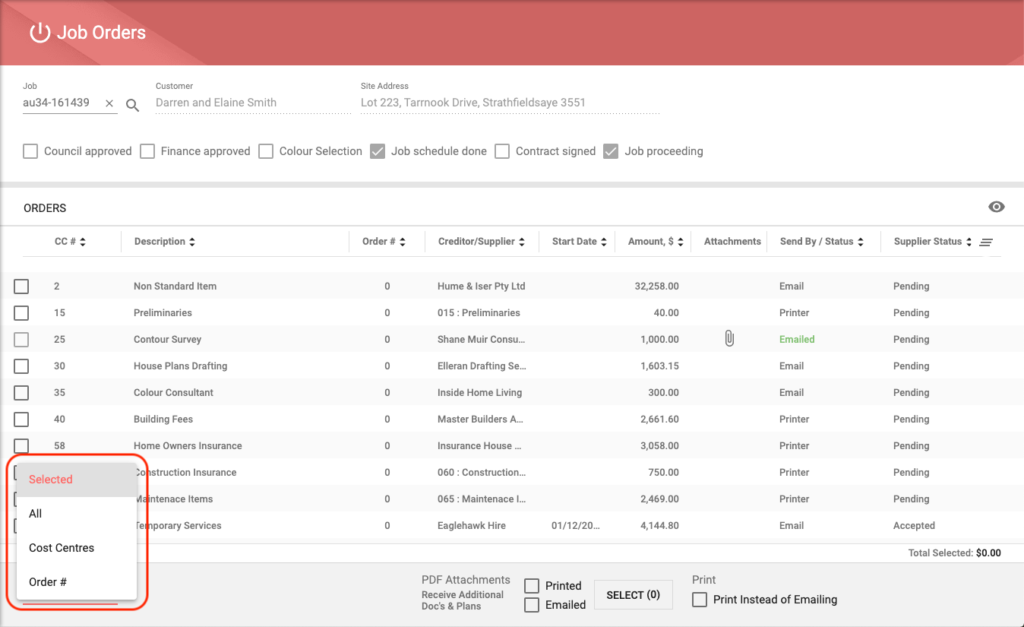
- Selected (the default option), where the user decides which Cost Center Orders are to be produced by selecting the required checkboxes (Order Criteria conditions apply and previously produced purchase orders cannot be selected again),
- All, where all Cost Center Order checkboxes are selected (Order Criteria conditions apply and previously produced purchase orders cannot be selected again),
- Cost Centers, where a range of Cost Center Orders may be nominated, select from the dropdown list under From, and select from the dropdown list under To, click Apply and corresponding checkboxes are selected (Order Criteria conditions apply and previously produced purchase orders cannot be selected again),
- Order #, where a user requires specific order numbers to be selected (“0” is the default, however, subsequent order numbers may have been created, “1”, “2”, “3” etc. and produced from individual cost centers for either successive purchase orders from already produced Cost Center Orders, or different suppliers from the same Cost Center) a specific Cost Center Order may be nominated, select from the dropdown list, click Apply and corresponding checkboxes are selected (Order Criteria conditions apply and previously produced purchase orders cannot be selected again).

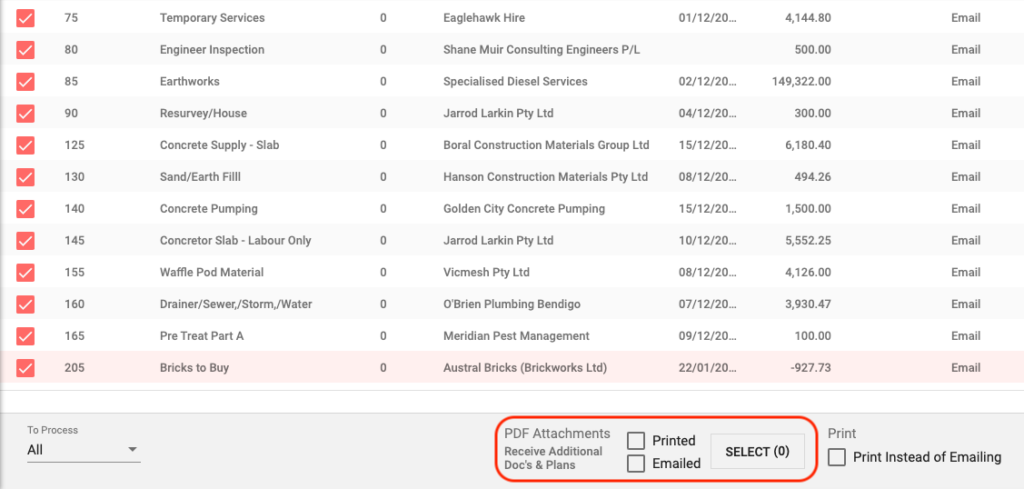
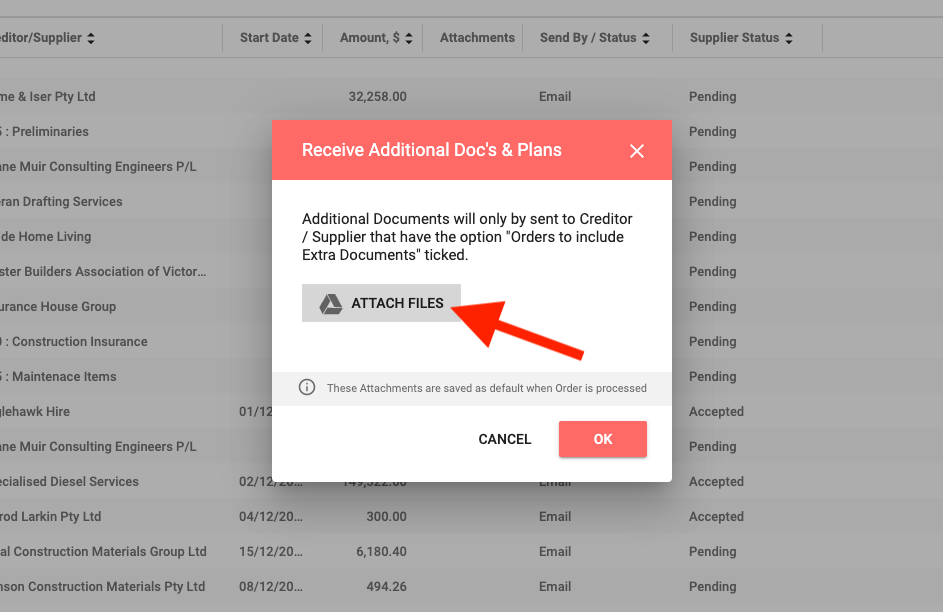
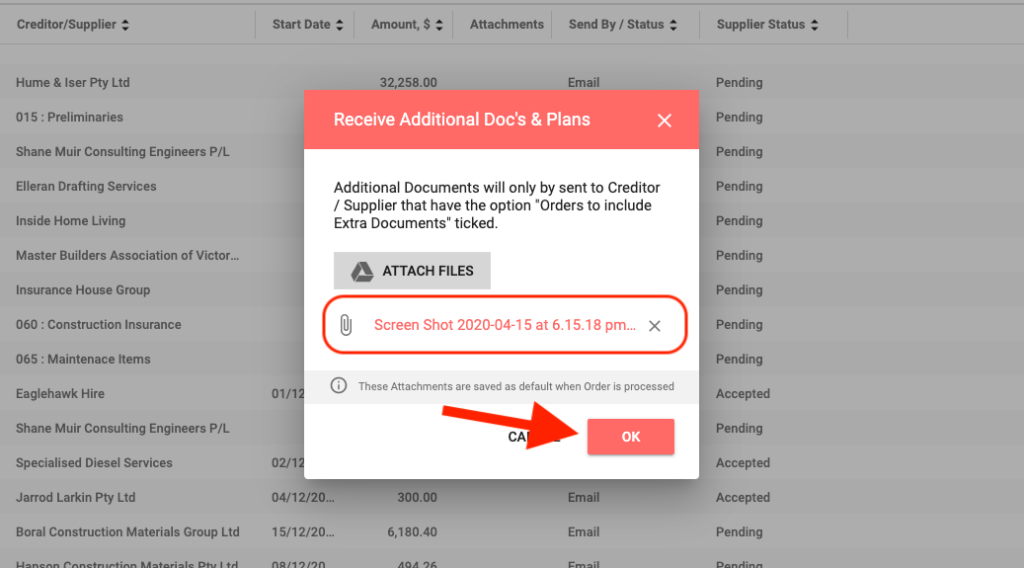
- Add any Attachments to be produced with each selected Cost Center Order, select the Printed and/or Emailed checkboxes at the bottom on the Job Orders page, click Select (0), click Attach Files, search and select the required files from Google Drive, My Drive or Upload from local device, click Select, check files for accuracy and appropriateness (remove and re-add, if required), once confirmed click Ok.
- Finally, once all Cost Center Orders have been checked, amended if required, and are ready to officially produce, click Process, which will create and send a task to the Bulk Update Tasks Log, where the Builder Portal will validate the task, and;
- If successful will execute the task (email or print cost center order and any attachments) and will display Completed in the Status column of the Bulk Update Tasks Log,
- If unsuccessful will display either Error or Completed with Issues in the Status column of the Bulk Update Tasks Log and a message detailing the error or issue will be displayed in the Last Message column, which will help and direct in the rectification of the offending error or issue (click once in the Last Message column on the applicable row to expand message).

Very helpful