The work-in-progress schedule (or WIP report) essentially shows users whether active jobs are Over invoiced or Under invoiced at a point in time.
In short, the WIP report works by looking at whether you’ve invoiced over or under the percentage of completion based on job invoices received. For example, if your project is 50% complete (based on actual costs) but only 30% invoiced via claims, it will be adjusted on the WIP report to balance up the value of the works you have paid for but not invoiced. Underclaimed Jobs can have the negative effect of drawing cash from other projects to cover costs. If a contractor were to over claim the Job, on the other hand, that could overinflate its cash picture in the short term giving a false view of cash available without considering the costs still to come in.
WIP reports calculate how companies should adjust their financials to create an accurate picture while jobs are still in progress. .
Preparing to Run WIP
WIP is only going to be as good as the information entered into the system so you should check everything is ready to go before you go ahead and run WIP.
- Check all data entry of bills/job costs for the month you are intending to run WIP for is done.
- Confirm that there are no invoices for the WIP month you are running are in the draft or awaiting approval section of Xero. If they are unable to be marked as approved and moved to awaiting payment, you will need to change the date to the current open month. (Not the month you are running WIP for) ie If you are running March WIP, you would move the invoices to an April date whilst keeping them in the draft/awaiting approval tab.
- Go to Reports>Job Admin>Job Cost Summary for current jobs and review, change the cost centre if errors are identified and chase up all job cost invoices with suppliers where these have not been provided and work has been completed.
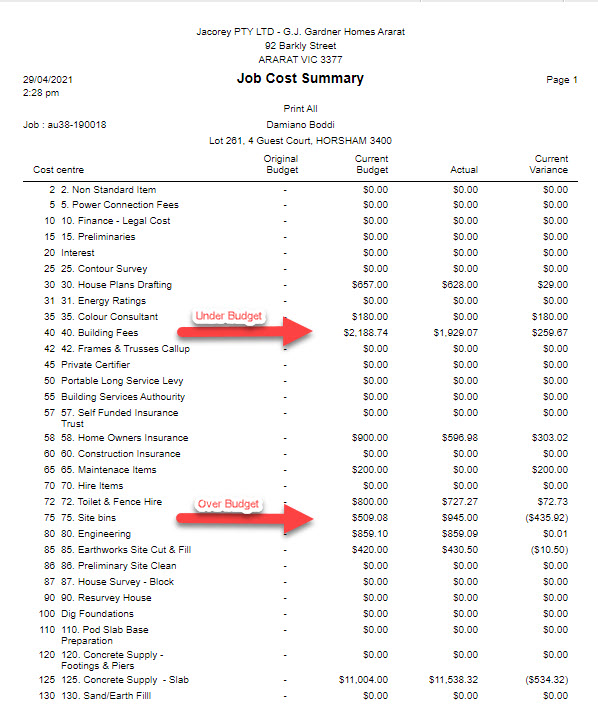
- Adjust Overruns for any jobs that have 100% or more in the Claimed Column and 100% and more in the invoices to date Column and you do not expect any more claims or supplier invoices. The WIP AASB15 Column should be NIL in this case as no WIP adjustment is relevant to these jobs. If you do expect more costs to come in – you can use the overrun column to adjust the AASB15 Column for that amount as a negative. Use the recalculate button once you have made this adjustment.
- Check jobs where Invoices to date % column is over 100% but Claimed column is not yet 100%. You may not be able to recoup invoices that take the invoices to date over 100% so allowing for the amount you will be able to invoice the client is the best option here. In this instance you need your WIP adjustment column AASB15 to show the Total Price less what has been claimed to date. Use the recalculate button once you have made this adjustment.
- Construction overruns – if any. The first type of overrun adjustment are those that can be identified by major changes in the budget estimate due to perhaps a miscalculation or costs coming in significantly higher for any number of reasons. These are known changes to costs outside of the original estimate, so they can be identified as overruns so as not to distort WIP calculations based on the original estimate. Use the recalculate button once you have entered the overrun.
- Finalise any jobs that have been handed over and the maintenance period has expired. This removes them from the WIP and locks financials in for that particular job. All job costs for finalised jobs must then be coded to maintenance of finalised job overhead account. Refer Finalise Job Knowledge Article.
- Not Proceed any DPP’s that will not be going ahead. Refer to How to make a DPP not proceeding.
Producing WIP Profit Adjustment
- On the navigational sidebar, select Manager.
- Once the navigational menu expands, select WIP – Profit Adjustment. The WIP – Profit Adjustment page opens, as follows:
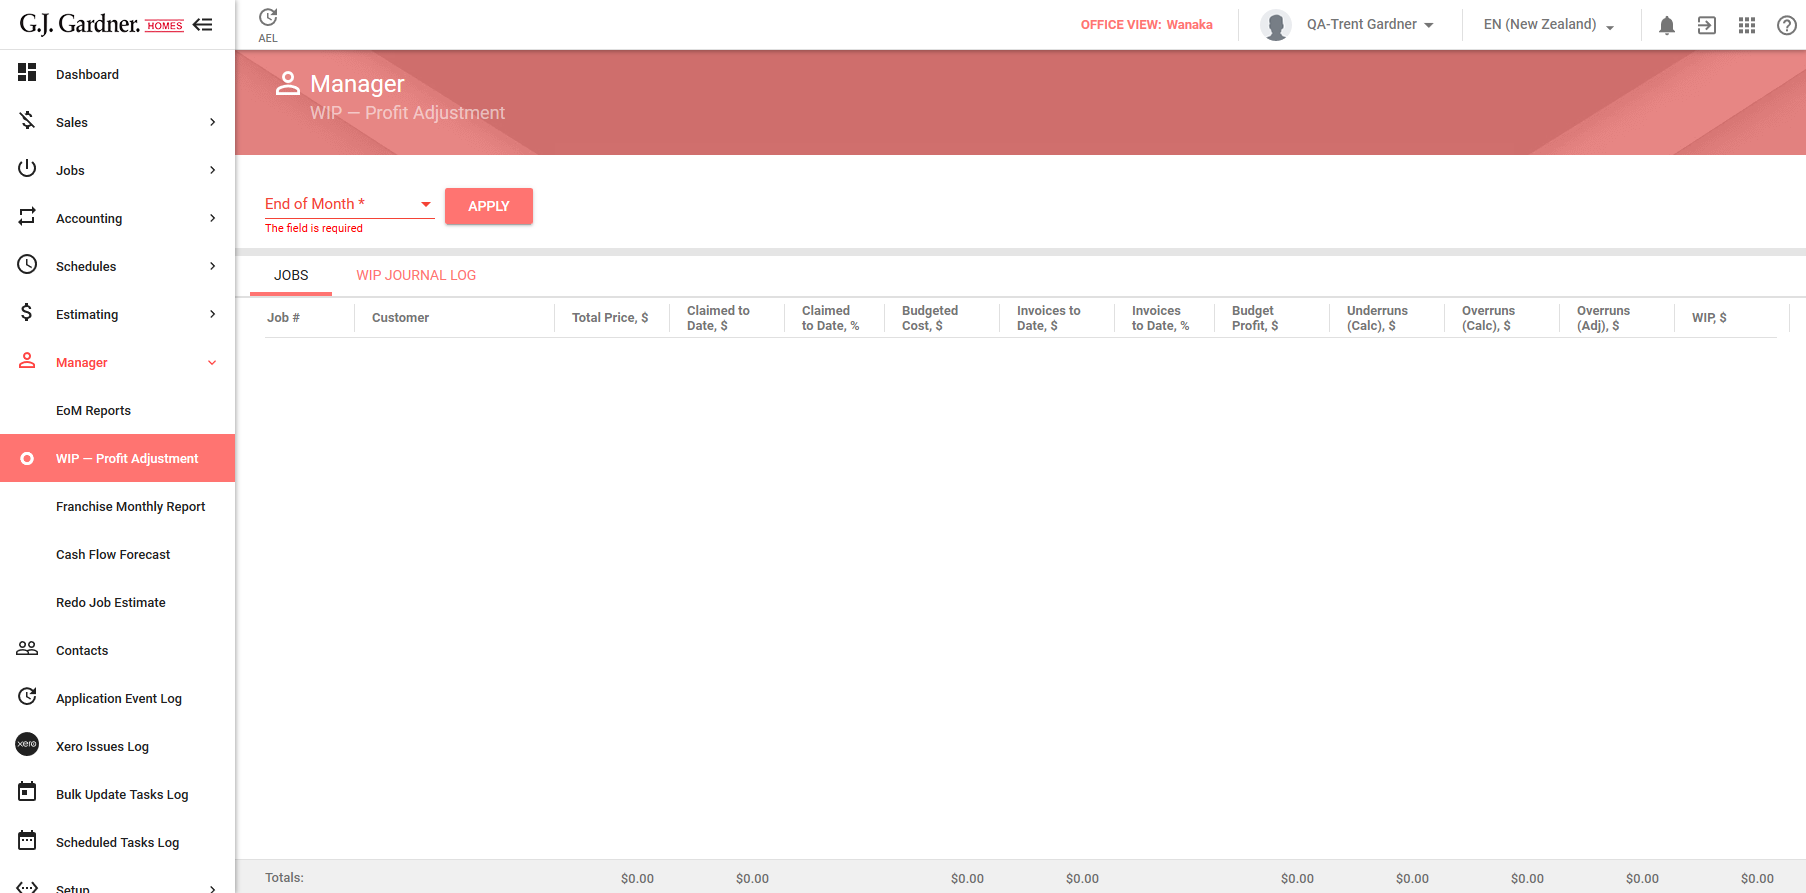
- Select the month which the WIP Profit Adjustment you want to produce for.
- Click Apply. This will populate the WIP report with all open jobs and calculate the total WIP excluding DPP’s unless unticked. As a result, the system will generate the table, as follows:
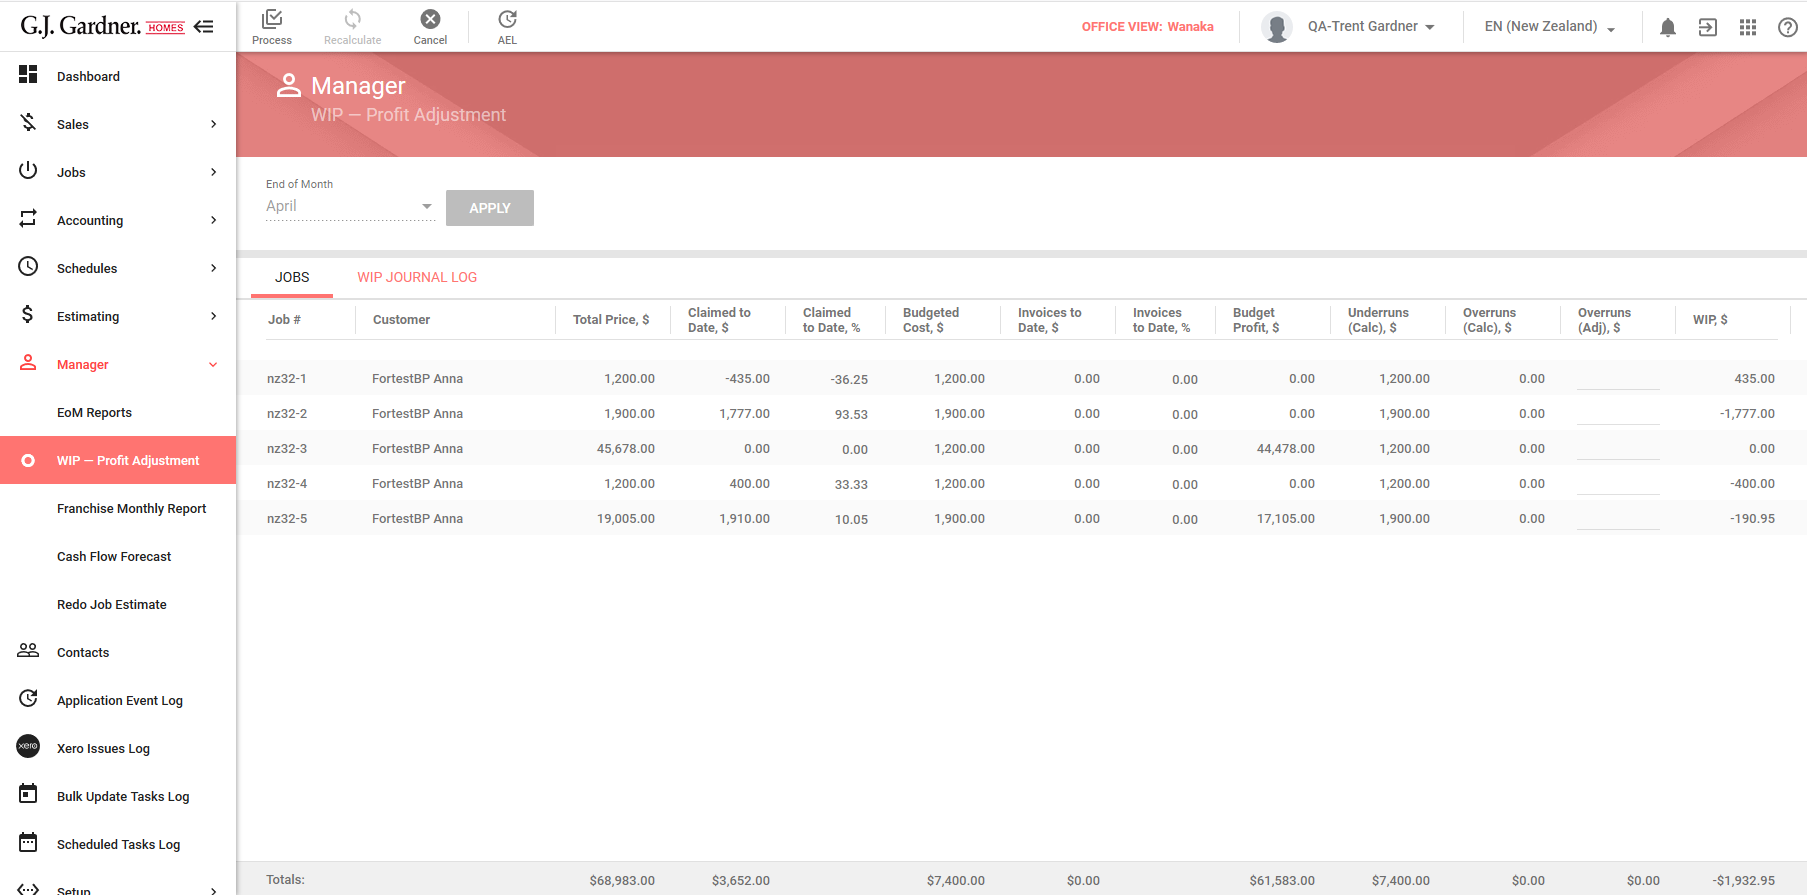
| Job # | Job number including the office number as prefix.. |
| Customer | Name of the Customer who the Job attributes to, |
| Total Price, $ | Sum of the contract amount and all approved Variations of the Job. |
| Claimed to Date, $ | Sum of authorised or paid Claim amounts/Invoices or Credits as of the last day of the selected month. It includes both original contract Claims and Variations. |
| Claimed to Date, % | Ratio of Claim to Date amount to the Contract Price. |
| Budgeted Cost, $ | The current Job Estimate cost. |
| Invoices to Date, $ | The total amount of all Invoices marked as approved or paid for the Job. |
| Invoices to Date, % | Ratio of Invoices to Date to Budgeted Cost. |
| Budget Profit, $ | Subtraction of Budgeted Costs from the Contract Price. |
| Underruns (Calc), $ | Sum of subtraction values (Cost Centre Budgets – Cost Centre Invoices) of Cost Centres that are under budget (for example, Cost Centre Budget > Cost Centre Invoices).
Cost Centres are selected as of the last day of the selected month. |
| Overruns (Calc), $ | Sum of subtraction values (Cost Centre Budgets – Cost Centre Invoices) of Cost Centres that are overbudgeted (for example, Cost Centre Budget < Cost Centre Invoices).
Cost Centres are selected as of the last day of the selected month. |
| Overruns (Adj), $ | Enter the amount to calculate the Revised Profit and the WIP Adjusted Profit figures. By default, it equals Overruns (Calc), $ figures. Double click the box for a specific Job and enter the appropriate adjustment figure. |
| WIP, $ | Calculated WIP value according to the following formula: US & NZ ONLY Invoices to Date – (Budgeted Costs * Claim %) – Overruns (Calc). |
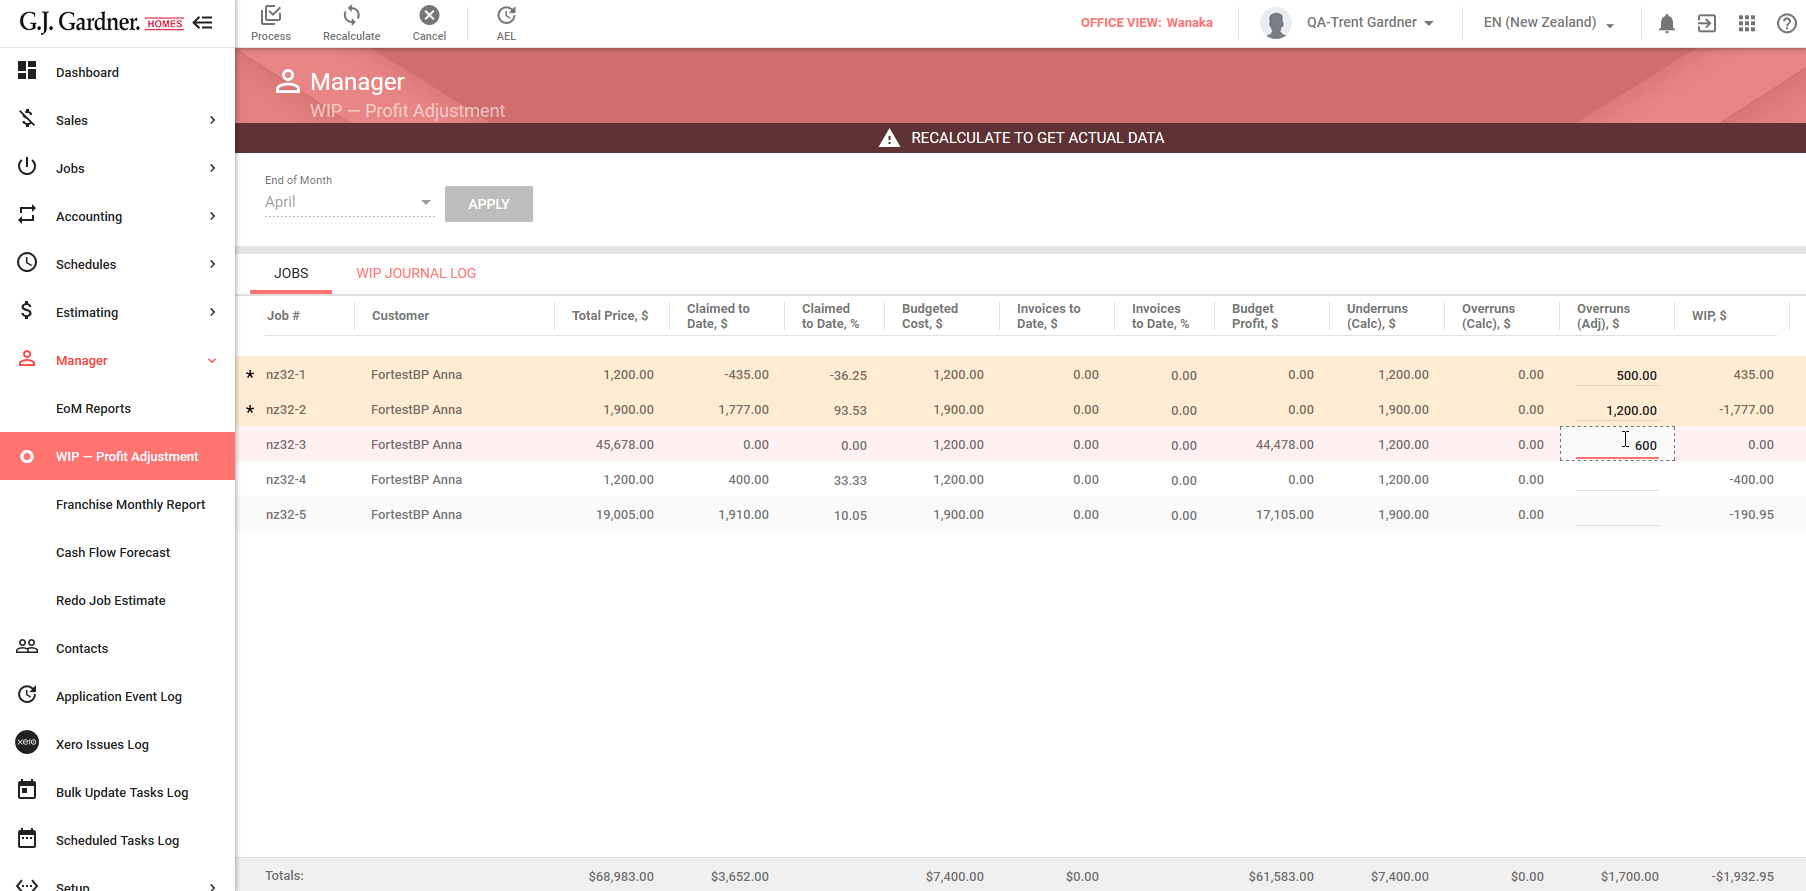
Below each column with figures, you can see the total value for all Jobs.
Once you have modified the Overruns (Adj) figures, click Recalculate. The system will recalculate figures for the Jobs.
Once complete, click Process. The system will create two general journals and will open the Journals form, as follows:
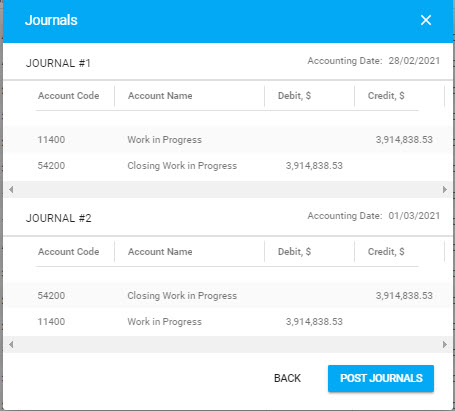
These journals will not be posted until you click Post Journals. If you need to modify your prior adjustments, click Back. This will return you to the table with Jobs.
The journals are produced and indicate the WIP at the given point in time requested. ie August.
- The first journal is the closing WIP for the period. It uses the accounting month which you selected.
- The second journal is to reversing/opposite entry of the first journal. It uses an accounting date of the 1st of the next month (after selected month).
When complete, click Post Journals.
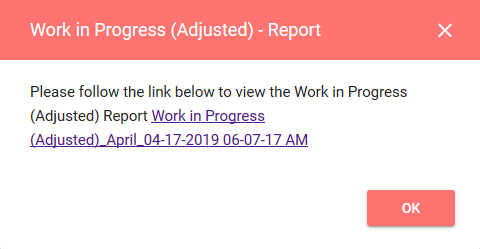
The system will post data and will generate the Work in Progress (Adjusted) – Report. The system will open the dialog form with the link to the report.
Click the link to open the report, as follows:
When complete, click OK.
Printing WIP Report
You can initiate the printing of the WIP report.
In the top part of the screen, locate and click the Print WIP ![]() button.
button.
The system will initiate the WIP report printing on the registered Cloud Printer. If no printers are registered in the system, you will see the corresponding message.
Viewing WIP Journal Log
You can view the WIP Journal Log to see the history of WIP adjustments for Jobs as of the end of the specific month.
- On the navigational sidebar, select Manager.
- Once the navigational menu expands, select WIP – Profit Adjustment.
- On the opened page, select WIP Journal Log. The page opens, as follows:
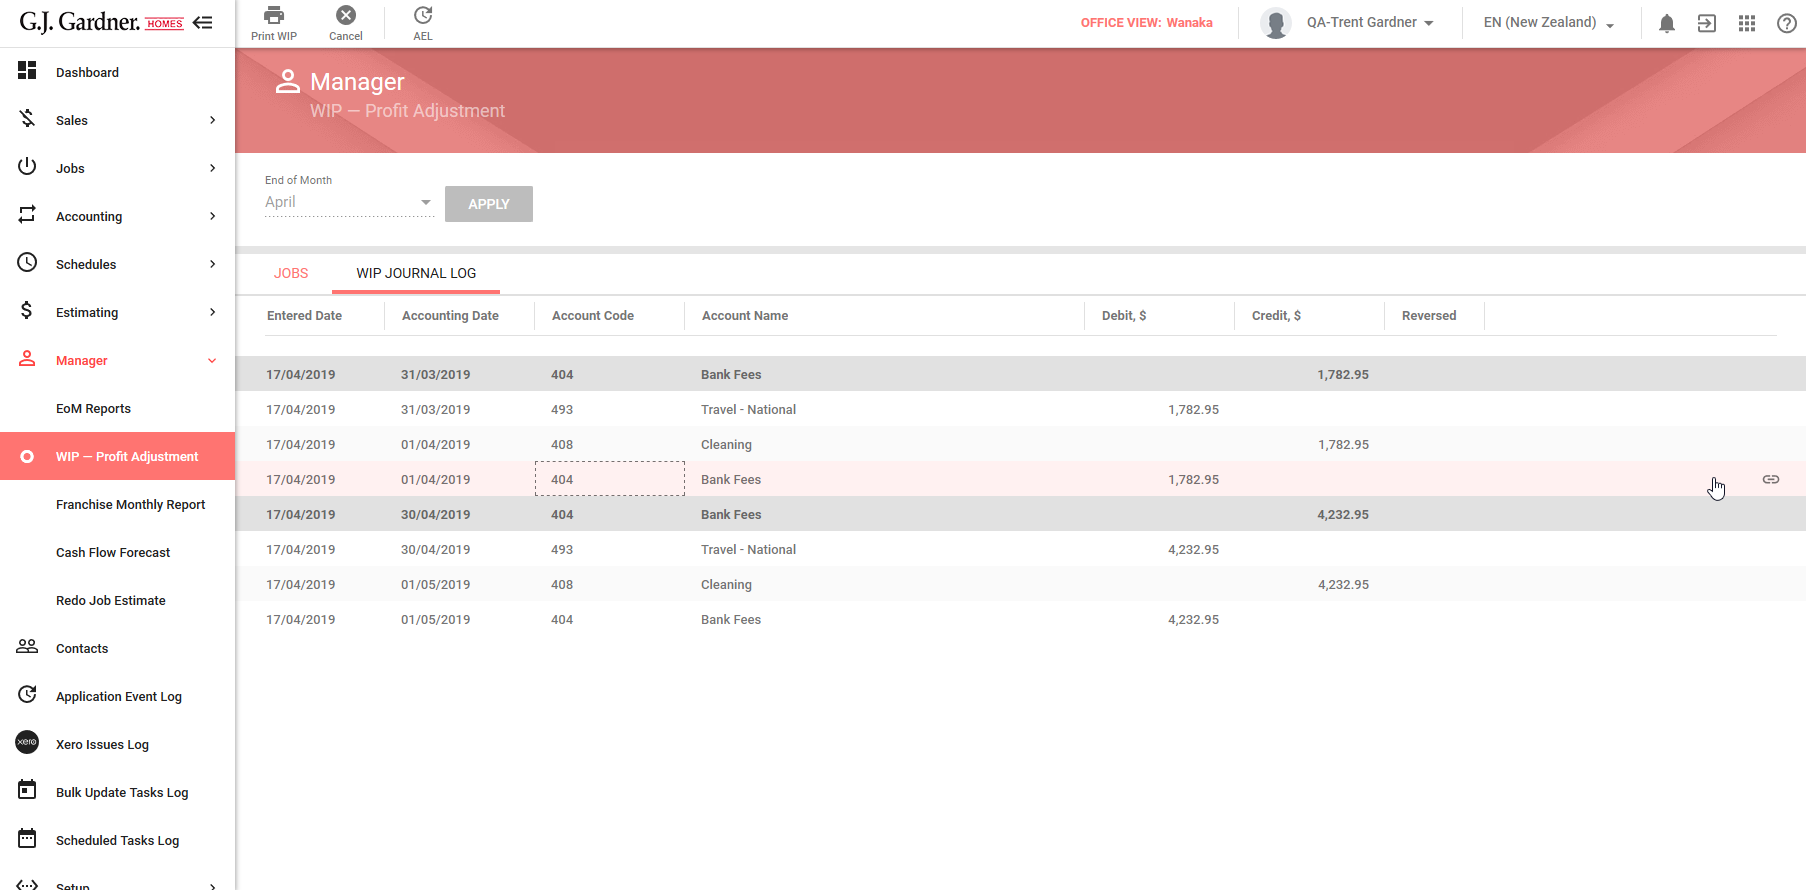
The page shows the table with the following log details:
| Entered Date | Date when WIP Profit Adjustments were entered. |
| Accounting Date | Day of the last month which was selected for making WIP Profit Adjustments. |
| Account Code | Xero account code. |
| Account Name | Xero account name. |
| Debit, $ | Debit amount. |
| Credit, $ | Credit amount. |
| Reversed | Flag the General Journal was reversed. |
To view the log entry in Xero, click the Open in Xero ![]() icon. You will transition to Xero to view details.
icon. You will transition to Xero to view details.
End of Financial Year WIP
Running your WIP for the End of Financial Year WIP is the same as your monthly WIP with one exception. The journal entries are different and the system closes off the year.
- Click Manager>WIP>Profit Adjustment
- Select Month.
- When the month chosen is the end of the financial year for your Region, a new button appears. It is very important that your franchisee’s processing the EOFY WIP do not choose the button Close Year (with Zero), they need to be processing the journal. This button was only for use for those offices that have been newly migrated from Greenhouse to G.J. 5.0 and have already done their WIP in Greenhouse or are a new franchisee with a NIL WIP and need to roll year over.
If you choose Close Year with Xero a modify button will appear which will require an Authorisation code request.
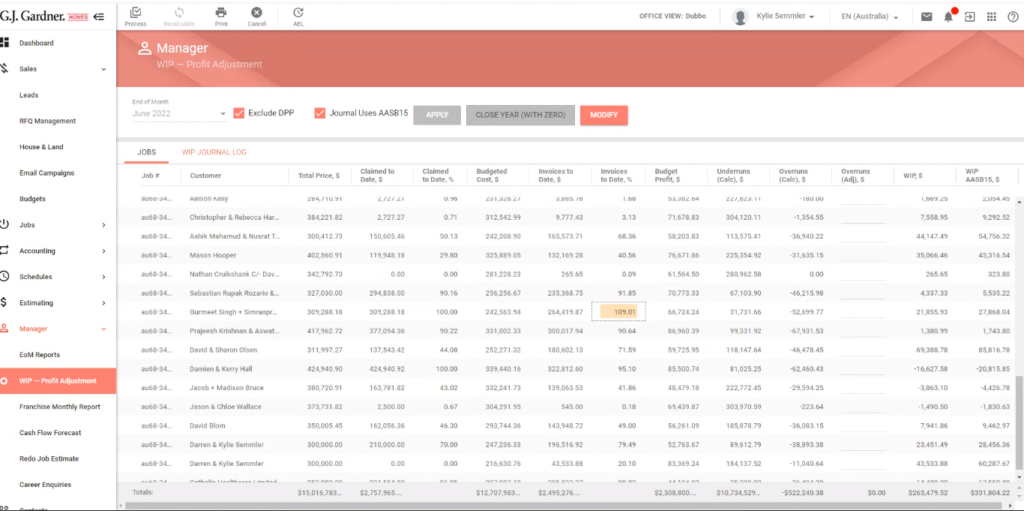
Ongoing Franchisee’s should go ahead and process the WIP as they would other months, that is by using the Process button to generate the journals for end of year WIP. Ensure you have a copy of the WIP profit adjustment report. Attach it to the journal in Xero.
You will notice that the journal generates the journal to Closing WIP adjustment and the reversal entry moves this amount to Opening WIP Adjustment for the start of a new financial year.
Reversing WIP entry (Xero Advisor User Access Required)
- Should you need to reverse the WIP, you should first ensure that any changes will not affect any reporting that has been done ie BAS, End of Year Financials. If you are unsure about the impact on reporting please contact your Accountant to discuss.
- Go to Xero, choose Accounting>Advanced>Manual Journals.
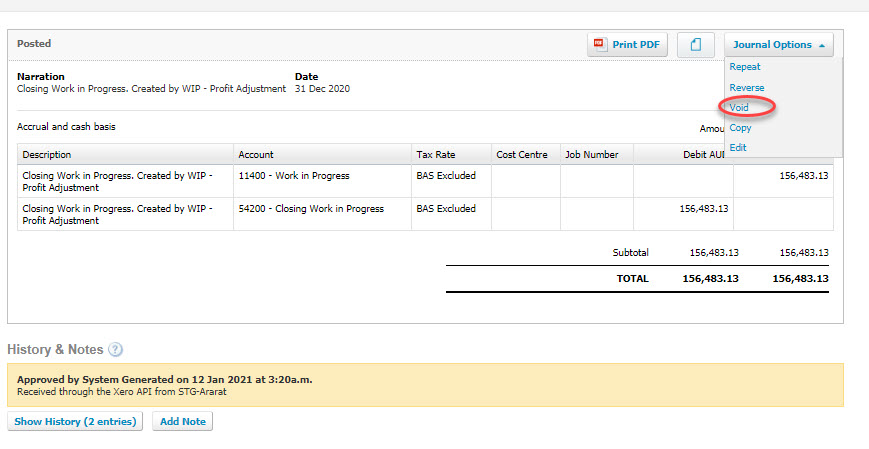
You will see the list of entries, one for the WIP adjustment on the last day of the month and one for the first day of the following month i.e. WIP entries for July would be 31st July & 1st of August. BOTH will need to be voided Journal Options>Void, this will reverse the entries in GJ Software and reopen the period to rerun WIP.
