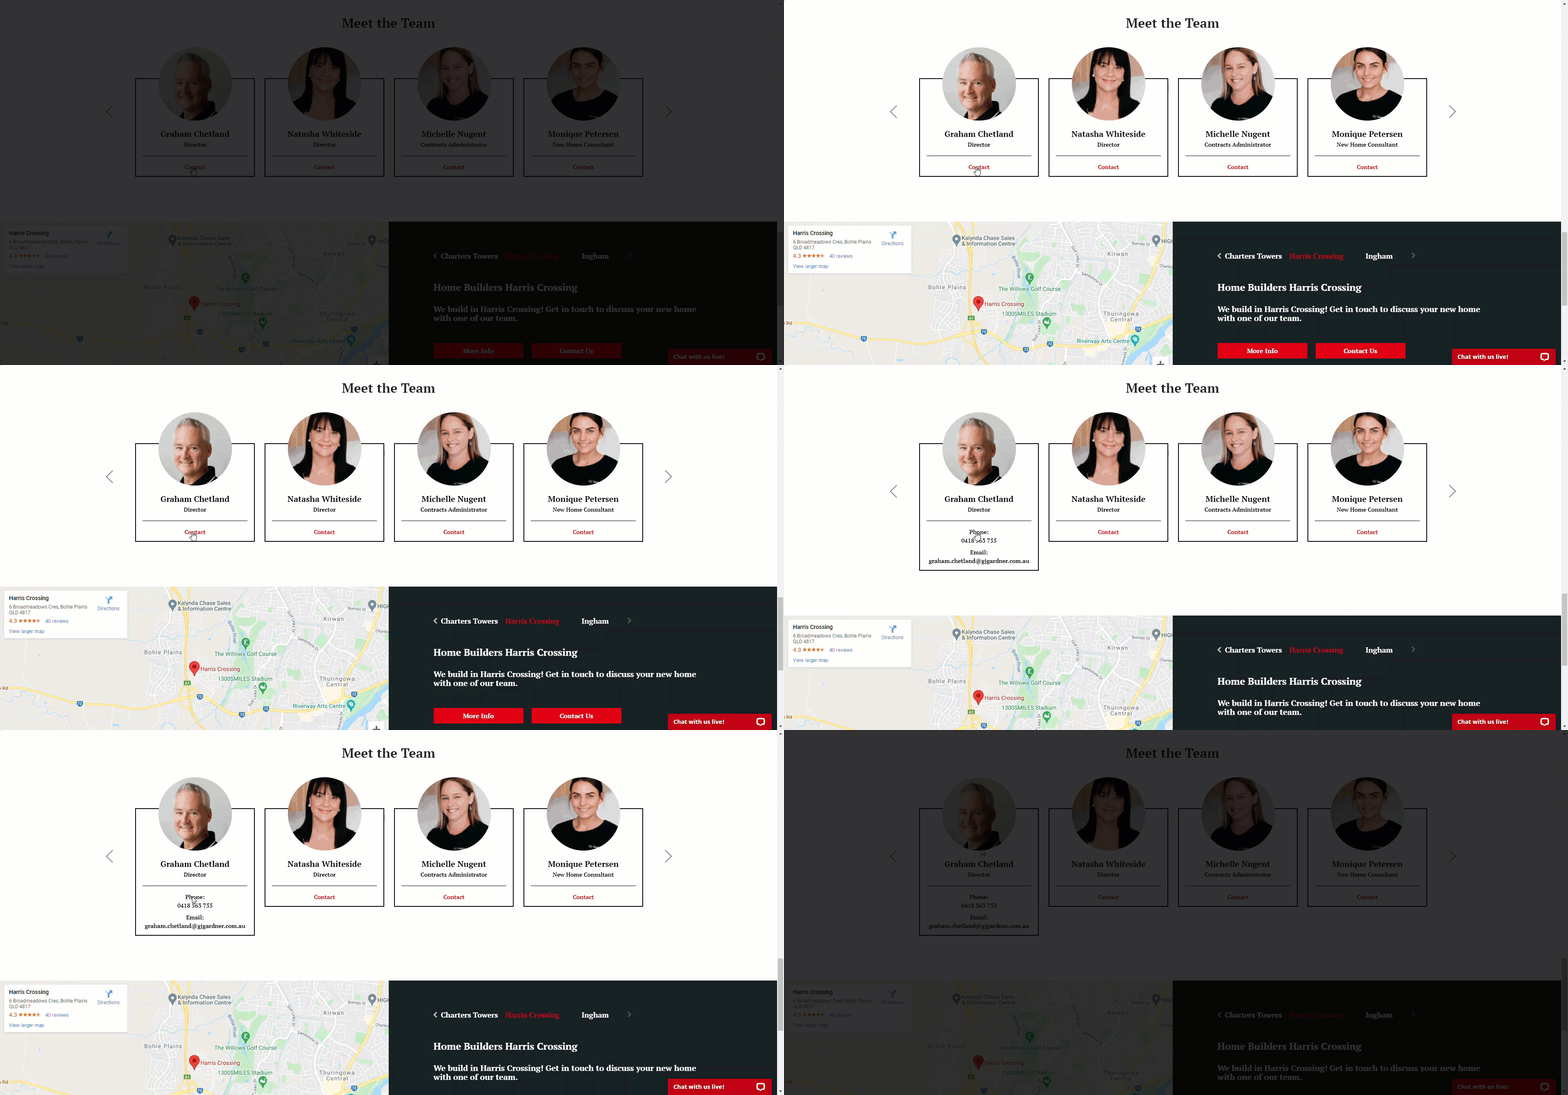
Each office landing page contains a Meet the Team section, which displays contact information for staff members in their respective offices. Click on the Contact button to display their phone number and email address. Staff member details come from Phone 1field in their Employee Details and their email address comes from their User Settings.
Display staff on the website
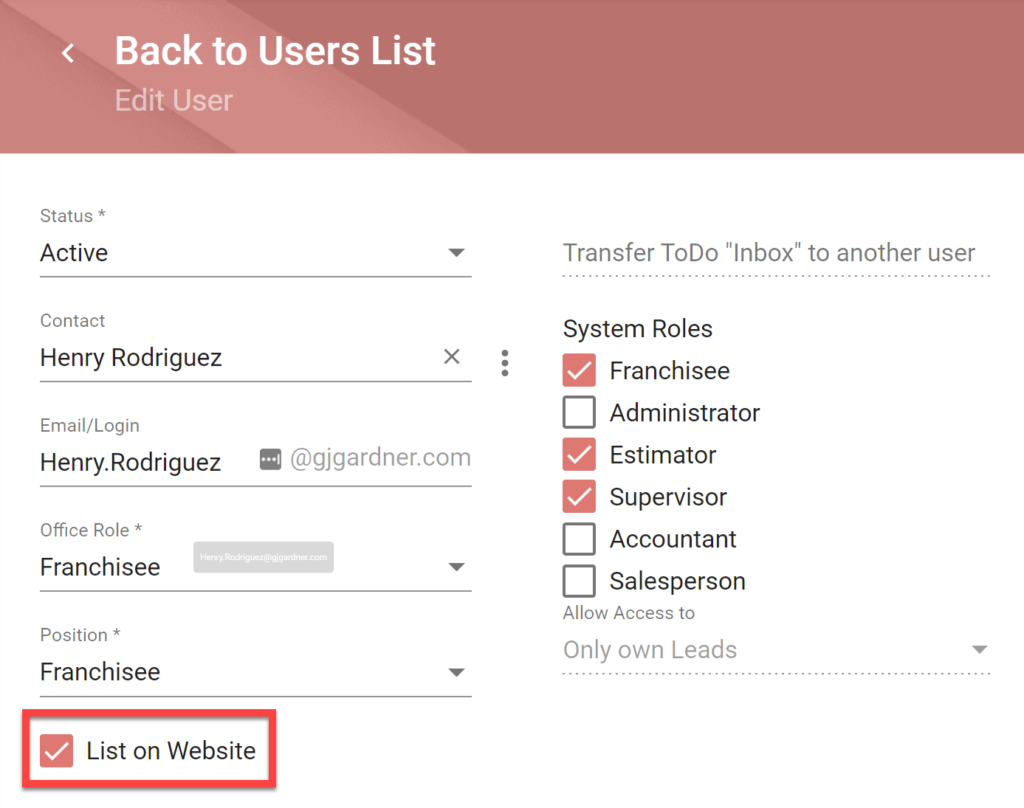
Displaying users on the website is optional, but only active users in G.J. Software can be listed on the website. This can be configured in each staff member’s user settings.
- Navigate to Setup > Manager
- Click the Users tab
- Select a user to display on the website
- Tick the List on Website checkbox
- Process to save changes
Configuring staff details
Changing the name and phone number for staff displayed on the website is managed in the employee contact details. The email is managed in their user settings.
Name
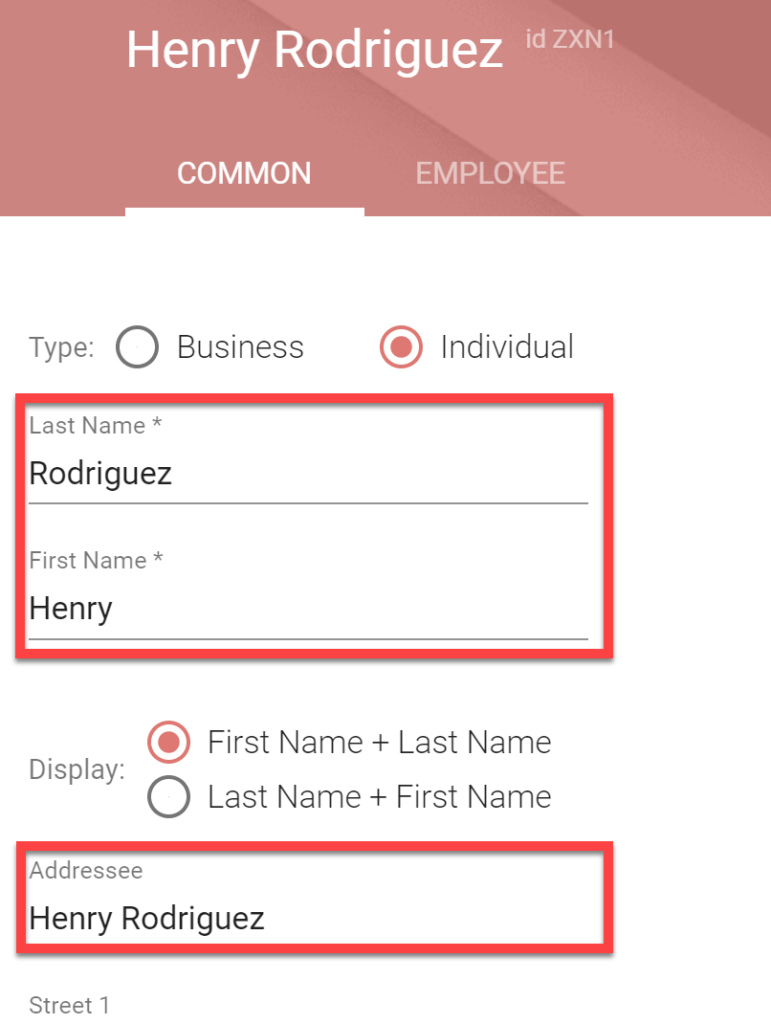
The name displayed on the website is mapped to the employee contact record’s Addressee field.
- In the navigational menu select Contacts
- Search for and select the employee contact
- Modify the First and Last Name fields or edit the Addressee field
- Process to save changes
Phone number
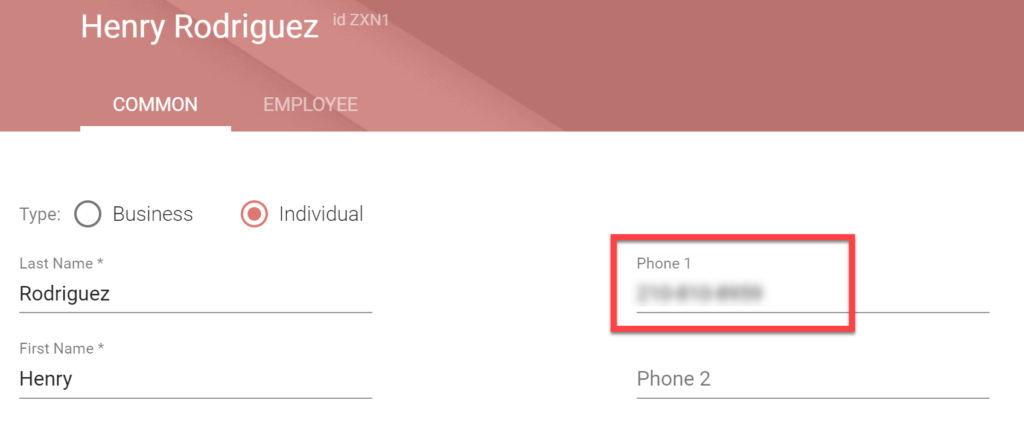
The phone number displayed on the website is mapped to the employee contact record’s Phone 1 field.
- In the navigational menu select Contacts
- Search for and select the employee contact
- Modify the Phone 1 field
- Process to save changes
Australian phone numbers should contain only spaces and no special characters.
United States phone numbers should contain only dashed and no spaces.
Email address
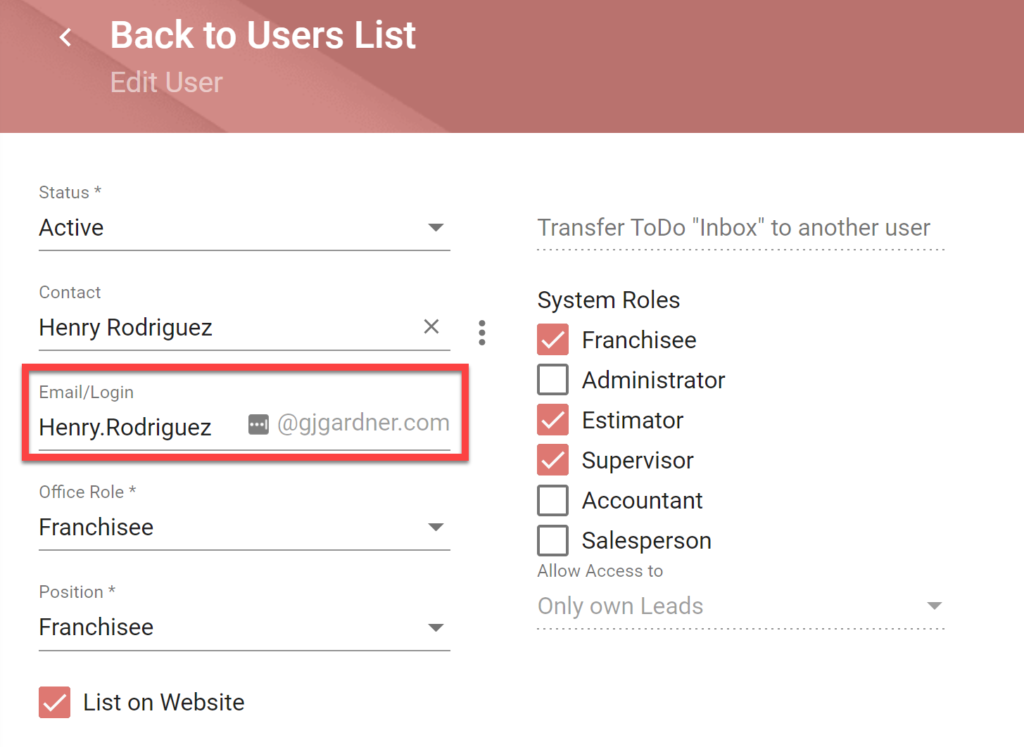
The email address displayed on the website is mapped to the employee’s user settings under Setup > Manager. Only the Franchisor can modify this field.
Job position
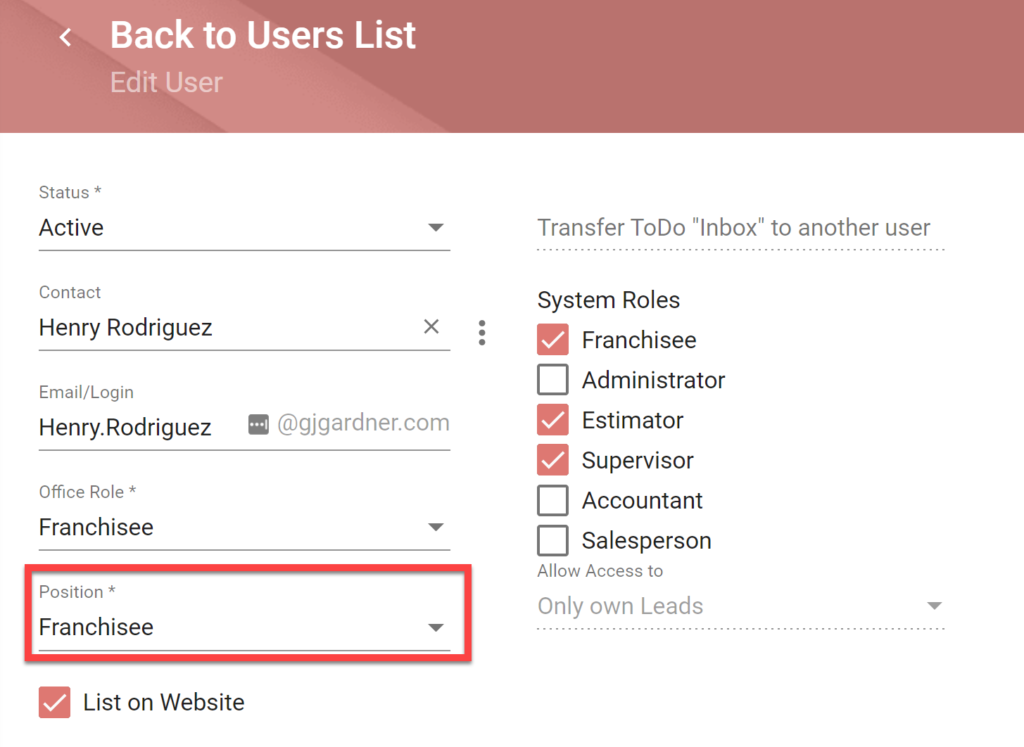
The job title displayed on the website is mapped to the employee’s user settings under Setup > Manager.
- Navigate to Setup > Manager
- Click the Users tab
- Select a user to display on the website
- Select the option from the Position dropdown that best matches their job description
- Process to save changes
Profile photo
The profile photo is set up under each person’s User Profile settings. See Profile photo standards and requirements for more information.
- On the toolbar, click your name.
- In the opened drop-down list, select User Signature.
- In the User Signature form, click the Browse file icon. You can also drag and drop the image onto the form.
- Click Save.
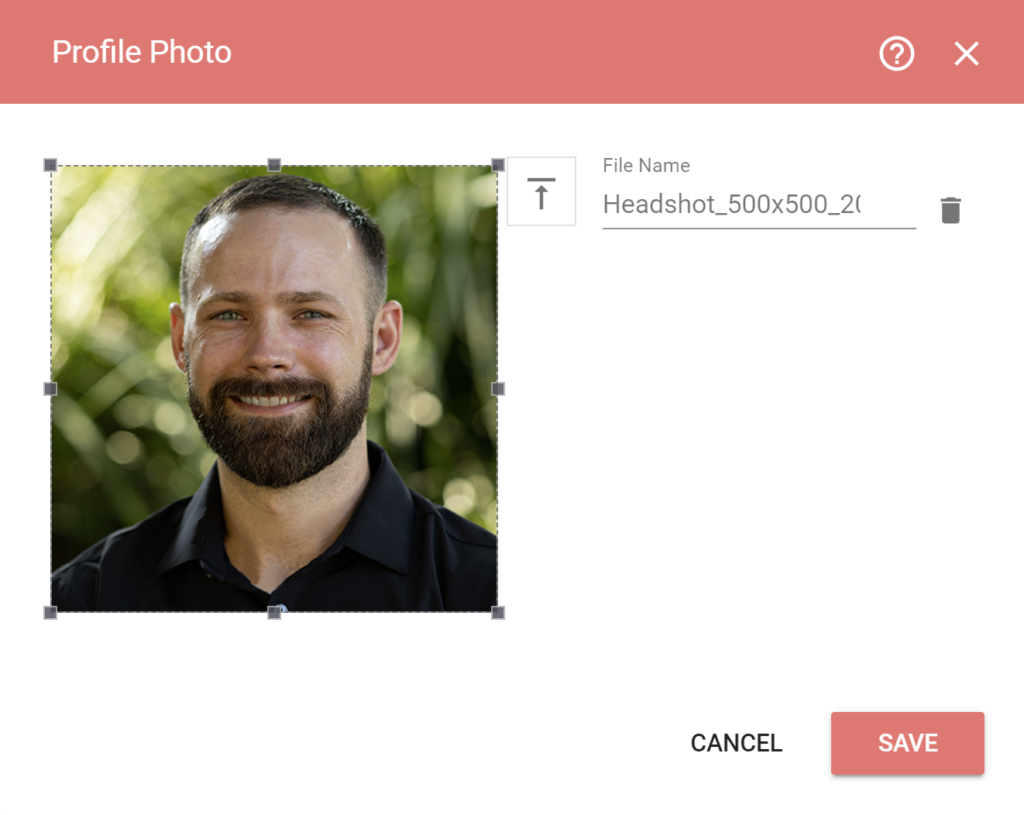
You can reset the current user signature by clicking the Delete icon.

