
A Job Change Order shows the summary of variations for all Active jobs. You can manage these variations in the specific Job by creating one or multiple Job Change Orders that are further approved or rejected by the Customer.
List of Job Variations
There are two ways to open the list of Job Variations.
Way #1
- To view the list of Job change Orders, on the navigational sidebar select Jobs.
- In the expanded Sales section, select Job Variations.
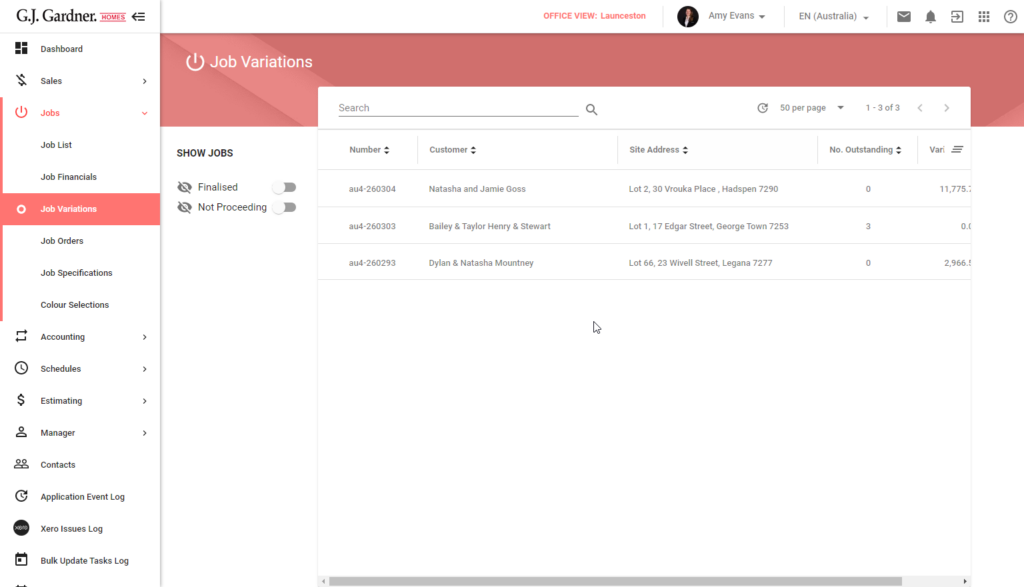
3. Search for a specific job. To do that, click the search ![]() icon.
icon.
4. Toggles can be used to show more/less projects in the list. Toggles are available for:
a. Finalised Jobs
b. Not Proceeding Jobs
5. Click the job to open the list.
Way #2
- To view the list of Job Variations, on the navigational sidebar select Jobs.
- In the expanded Sales section, select Jobs List.
- On the opened page search for a needed job.
- Hover over the job and click the Job Variations
 icon.
icon.
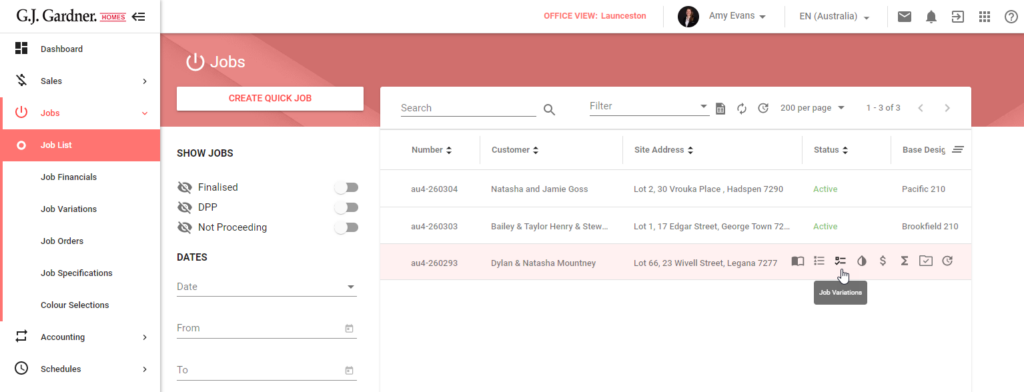
In both cases the system opens the Job Variations page:
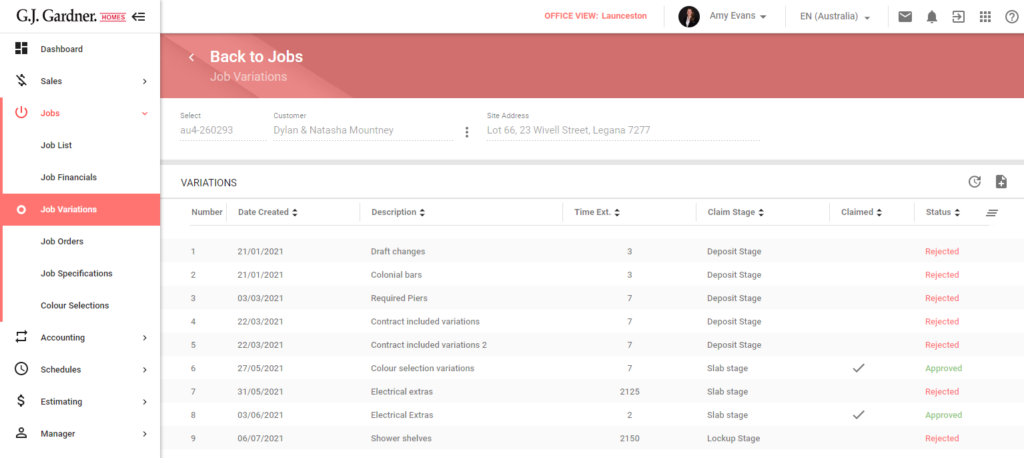
On the opened page the following information is available:
| Job | The predefined job number. |
| Customer | Customer name. |
| Site Address | Customer address. |
| Change Orders table | The grid with all Change Orders created for a particular Job. |
| Number | Number of Job Variation. |
| Date Created | Job Variation creation date. |
| Description | Job Variation description. |
| Time Extension | Number of days for which Job construction will be increased. |
| Draw Stage | Draw stage name selected for the Job Variation. |
| Claimed | The column shows whether an invoice was issued. If it was, there is the Check icon. |
| Status | Job Variation status. It could be:
|
Create / Edit Job Change Order
- Navigate to the Job Variation list.
- To add a new Job Variations click the Add
 icon. The page opens, as follows:
3. Specify information about the Job Change Order, as follows:
| Description | Enter the Job Variation description. |
| Memo | Enter the optional memo for the Job Variation. |
| Time Extension, days | Enter the number of days which changes in the order can last for. |
| Stage | Click the field and the stage from the dropdown list. |
| Price Book | Click the field and the price book from the dropdown list. |
| Invoice Date | By default the current date is selected. To change it, click the field and select a past date from the date picker. |
4. When Job Variation details are specified, the Add ![]() icon becomes available. Click it to add Items and Components to the Job Change Order.
icon becomes available. Click it to add Items and Components to the Job Change Order.
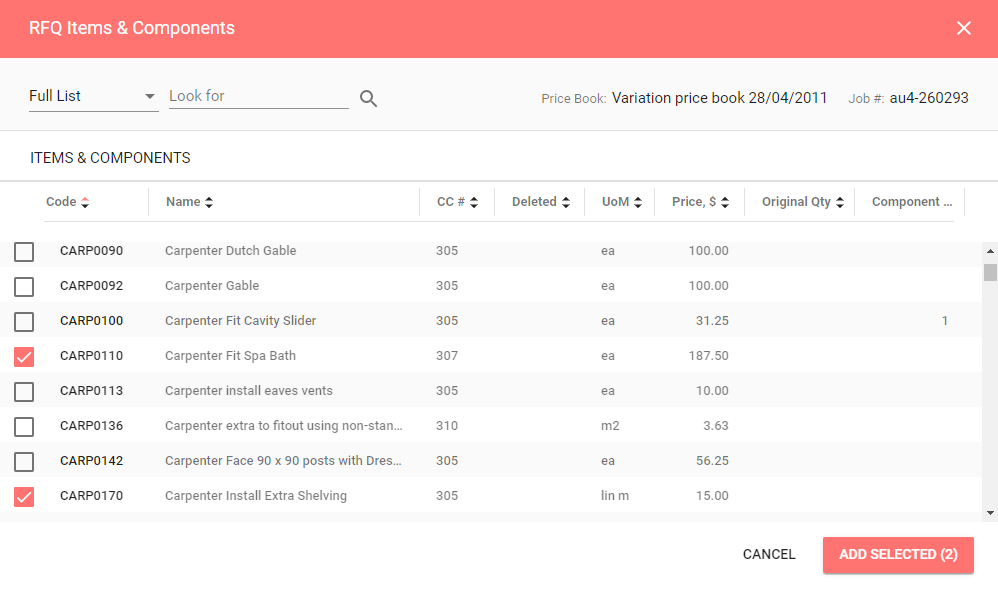
5. Once clicked, the RFQ Items & Components form opens. You can view the full list of Items or Components or browse them in breakdown by Cost Center.
6.
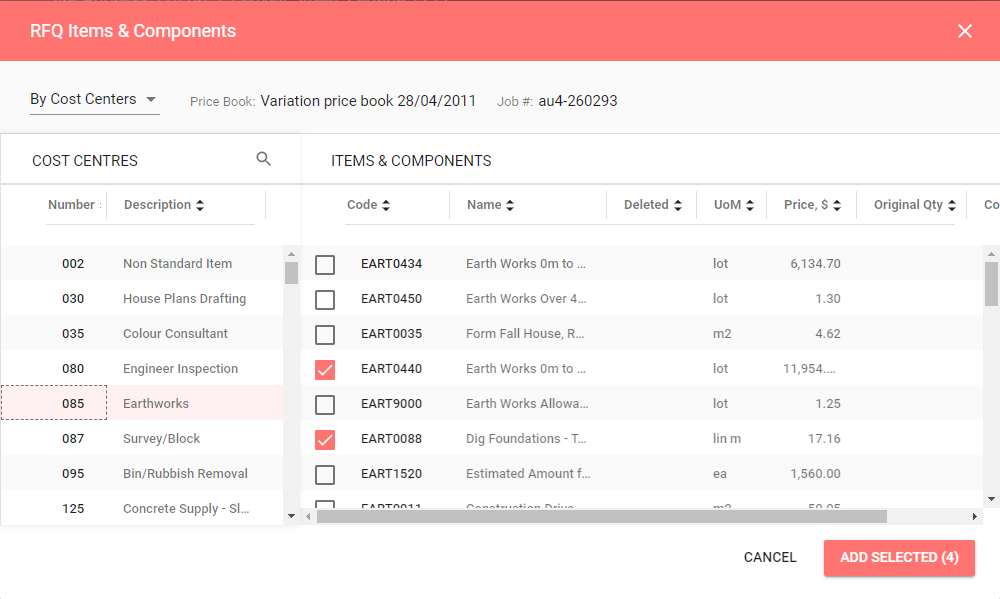
7. Tick checkboxes next to Items or Components that you want to add to the Job Variation.
8. When complete, click Add Selected.
9. All newly added Items and Components are added to the Job Variation list. They are highlighted in light-orange color.
10. To recalculate the Job Variation, click Recalculate at the top of the page.
11. To save all changes, click Process.
12. Once clicked, the Job Variation Quote Filter forms opens. From here you will be able to send or save the Job Variation.
Save/Send Job Variation
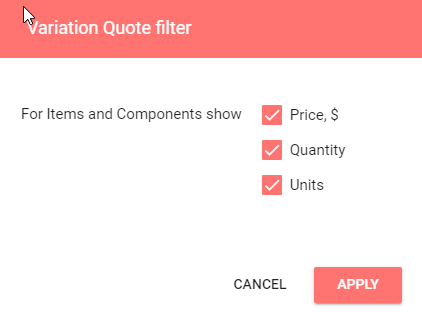
13. The variation Quote Filter form opens once Process is clicked in the Job Variation Creation page.
14. Check the filters that apply for the quote for change order display and then click Apply
15. Link to preview Quotation for Job Variation form will appear once a preview is generated. Click the link to preview Quotation for Job Variation file. When satisfied with the preview, click the Confirm button.
This will lock the Job Variation for any changes, and will generate the final document. To make changes to the Change order click the Cancel button.
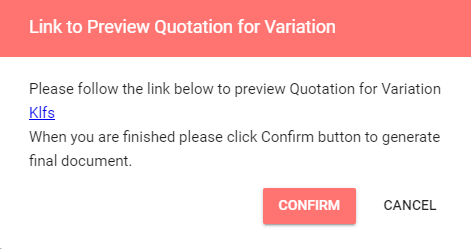
The Quotation for Job Variation preview file opens in a new tab.
16. Once Confirm is clicked “Link to Preview Documents form opens. Click the link to preview Job Change Orders file. The Job Variation file opens in a new tab.
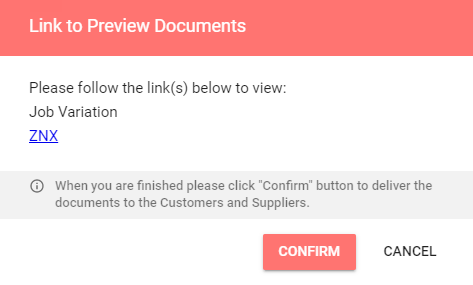
17. When finished, click Confirm to deliver the documents to the Customers and Suppliers.
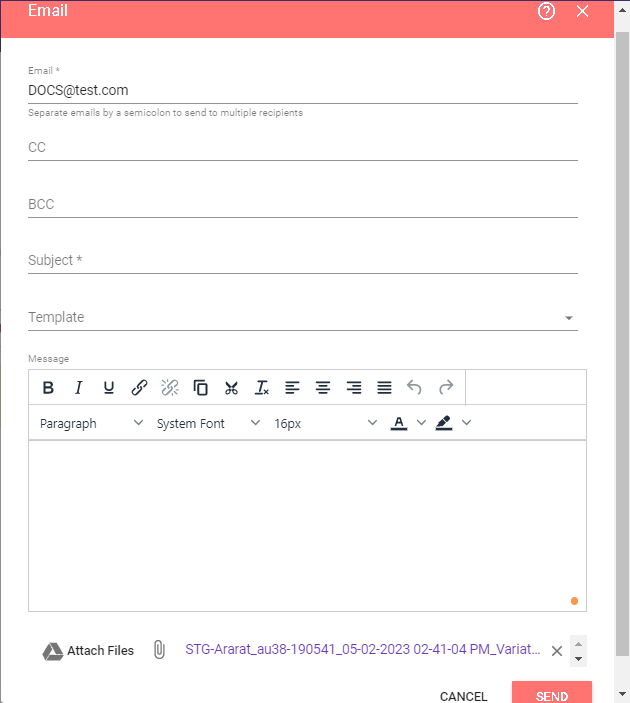
18. The Email form will appear with the Job Variation attachment ready to be sent along with the information you fill into the form. When satisfied with the email template click Send.
19. The Quotation for Job Variation document final has been saved automatically in “Contracts and Claims” folder in the drive’s job docs.
Approve / Reject Job Variation
Approve or Reject buttons will be available once the Job Variation final document has been generated. See Save/Send Job Variation above for more details on generating the final document.
To Approve the Job Variation
- In the Job Variation list select which Job Variation to approve / reject
- Open the Job Variation and click the Approve button.

3. Click Process
4. A warning will appear to alert you of Quantity of Cost Centres that are affected and to alert that purchase orders may be required.

5. Click Yes to Print the affected Cost Centre purchase orders, or no to manually make amendments to Purchase Orders.
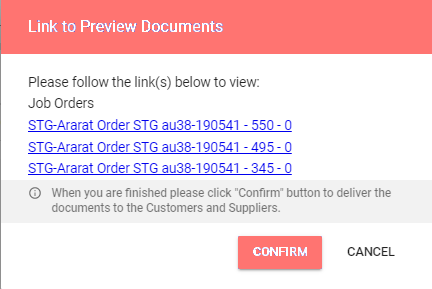
6. Link to Preview Documents will appear if Yes was clicked in the warning window. Each Purchase order affected will be linked for preview. Click Confirm if satisfied these Purchase Order changes can be sent to the suppliers.
7.
8. Click Confirm to automatically Email the updated Purchase Order/s to the suppliers.
9. Each Preview of Purchase order will open in a new tab. Newly generated Purchase Orders are saved in the Orders Folder in Job Docs.
To Reject the Job Variation:
- In the Job Variation list select which Change Order to approve/reject.
- Open the Job Variation and click the Reject button
- Click Process.
- Once Processed the Status in the Job Variation list will appear highlighted as Rejected in Red text.