
You can manage custom fields for specific contact types. This way you can track additional information about contacts within their profiles.
- To manage custom fields, on the navigational sidebar, select Setup.
- Once the Setup section expands, select Contacts.
- On the tabbed menu, select Custom Fields.
The Custom Fields page opens, as follows:
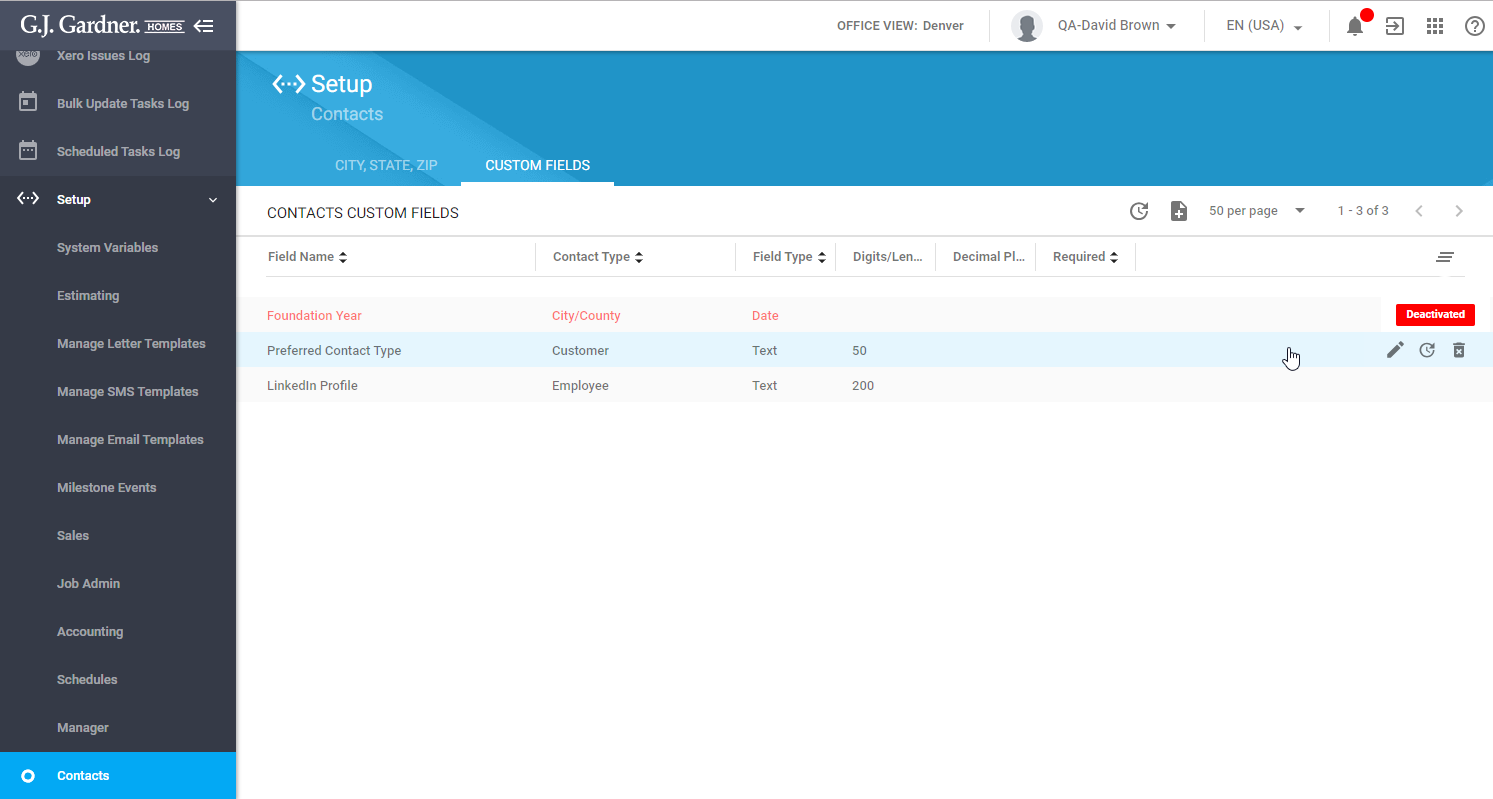
Here you can see the list of custom fields registered in the system. For each custom field, the following information is available:
| Field Name | Name of the custom field. |
| Contact Type | Type of the contact which the custom fields attributes to. |
| Field type | Type of the custom field. |
| Digits/Length | Maximal number of digits/characters which the field can store. This information varies depending on the field type. |
| Decimal Places | Number of decimal places. This information is available for the number field only. |
| Required | Flag that the field is required. If no flag is shown, the custom field is optional. |
| Status | A red label indicating that the custom field is deactivated. No label is shown for active custom fields. |
You can perform the following operations on custom fields:
- create new custom fields
- edit the existing custom fields
- deactivate the no longer needed custom fields
- activate the deactivated custom fields
Creating a Custom Text Field
- On the Custom Fields tab, above the list of custom fields, click the Add
 icon.
icon. - In the Create new custom field form, specify the following information:
Contact Type Select the contact type which the custom field attributes to. Field name Enter the name of the custom field. Field type Select ‘Text’ from the list of options. Length Specify the maximal length of the custom field. Required Check the box to make the custom field as required. 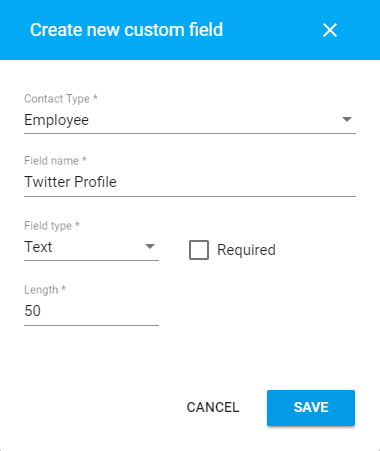
- When complete, click Save.
Creating a Custom Date Field
- On the Custom Fields tab, above the list of custom fields, click the Add icon.
- In the Create new custom field form, specify the following information:
Contact Type Select the contact type which the custom field attributes to. Field name Enter the name of the custom field. Field type Select ‘Date’ from the list of options. Required Check the box to make the custom field as required. 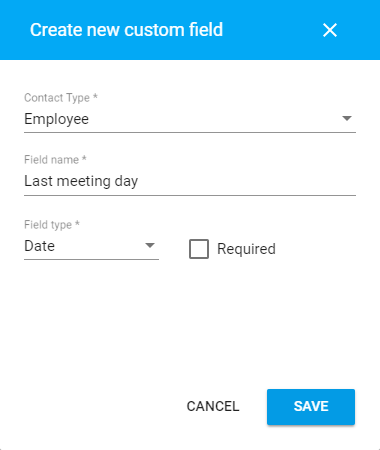
- When complete, click Save.
Creating a Custom Number Field
- On the Custom Fields tab, above the list of custom fields, click the Add icon.
- In the Create new custom field form, specify the following information:
Contact Type Select the contact type which the custom field attributes to. Field name Enter the name of the custom field. Field type Select ‘Number’ from the list of options. Digits Specify the number of allowed digits in the custom field. The decimal places are counted towards the number of digits in the custom field. Decimal places Specify the number of decimal places. Required Check the box to make the custom field as required. 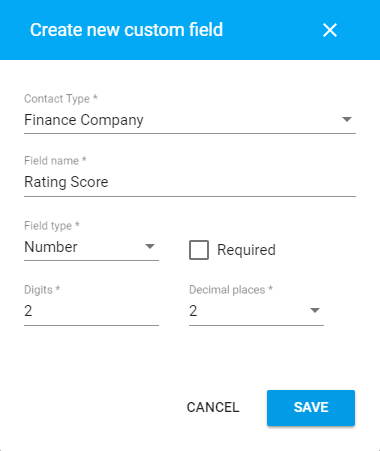
- When complete, click Save.
Editing the Custom Field
You can edit the existing custom fields, but you can update the field name and set the field as required or optional. The rest of modifications (such as change of the field type or its length) are not allowed.
- On the list with custom fields, locate the one you want to edit.
- Hover over the custom field until the action icons appear.
- Click the Edit
 icon.
icon. - In the Edit custom field form, make the appropriate modifications.
- When complete, click Save.
Deactivating the Custom Field
You can temporarily deactivate custom fields, so they will no longer appear on the Custom Fields tab in contacts of a specific type. Values of the deactivated custom field will be retained after its activation.
- On the list with custom fields, locate the one you want to deactivate.
- Hover over the custom field until the action icons appear.
- Click the Deactivate
 icon.
icon.
Activating the Custom Field
You can activate the temporarily deactivated custom fields, so they will again appear on the Custom Fields tab in contacts of a specific type.
- On the list with custom fields, locate the one you want to activate.
- Hover over the custom field until the action icons appear.
- Click the Activate
 icon.
icon.