Sub Offices (commonly referred to as “Sales Offices”) allow for a unique office to be displayed on the website, but create all web leads in the primary office. Typically sub offices are created when a franchise agreement exists for that location, but the franchisee wants to simplify the management of that location in the Builder Portal. Sub offices only display general information about the office on the website such as the legal name, DBA, address, phone number, etc. Sub offices do not have the ability to create jobs and all functions are to be carried out in the primary offices.
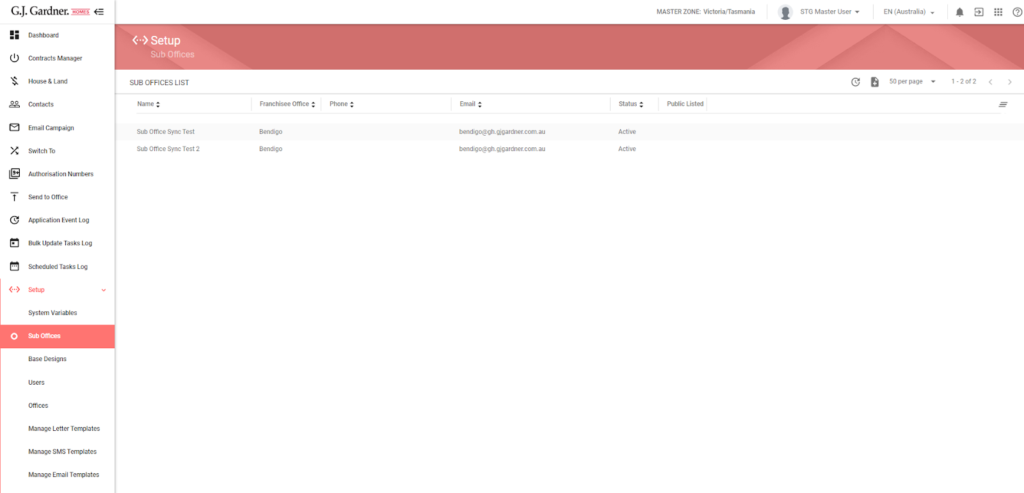
View the List of Sub Offices
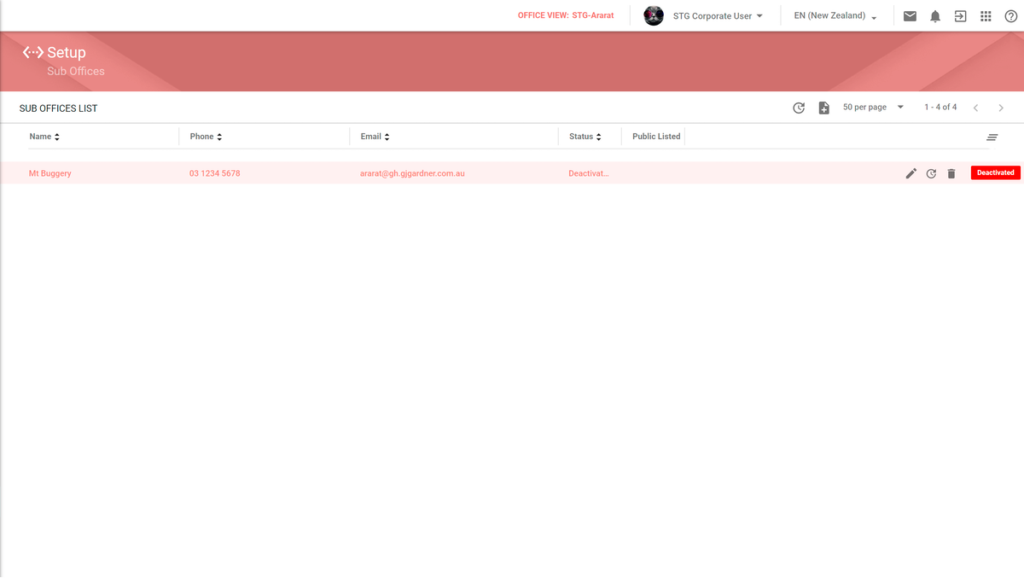
Sub Offices can be viewed in the Office, Master, and Corporate levels under Setup > Sub Offices. When viewing the list at from the Master level the list displays all sub offices in that state. When viewing the list from the Corporate level the list displays all sub offices in the country. The table displays the following information:
| Name | The display name of the office on the website. This may be overwritten via the Marketing Hub for SEO purposes. |
| Franchise Office | The primary office the sub office is created under. All website inquiries and leads will be sent to this office. |
| Phone | The phone number for the sub office that displays on the website. This may be different than the primary office. |
| The system-generated email address for the sub office that displays on the website. This is the same email for the primary office and is not editable. | |
| Status | Activate or Deactivated. Deactivated Sub Offices are not displayed on the website. |
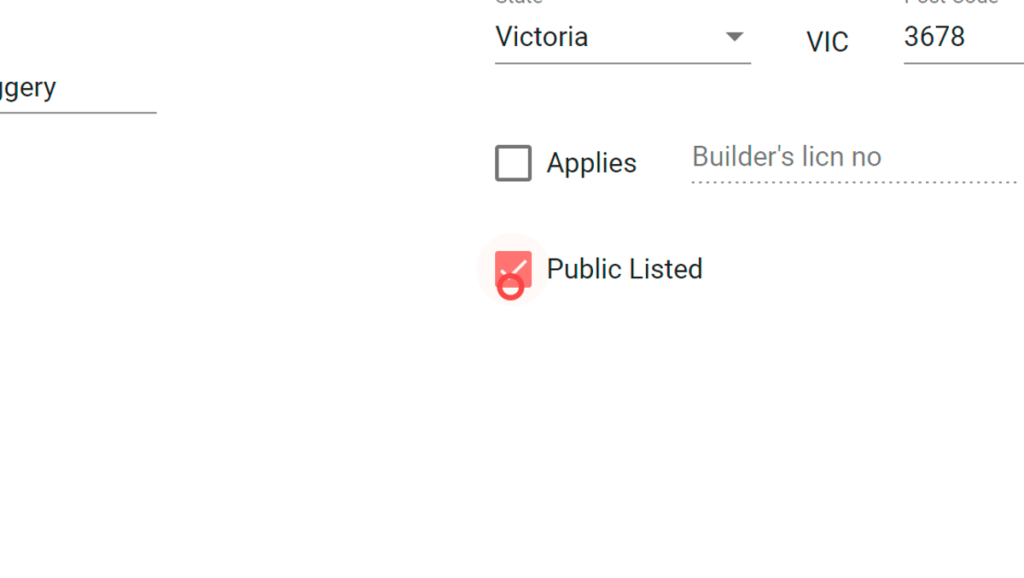
| Public Listed | When the Public Listed checkbox is selected the details for the sub office are being sent to the Marketing Hub, where it must be enabled for the website. When this option deselected the sub office is removed from the website. |
Creating Sub Offices
Only Corporate and Master users with access to the Builder Portal and Marketing Hub can create sub offices.
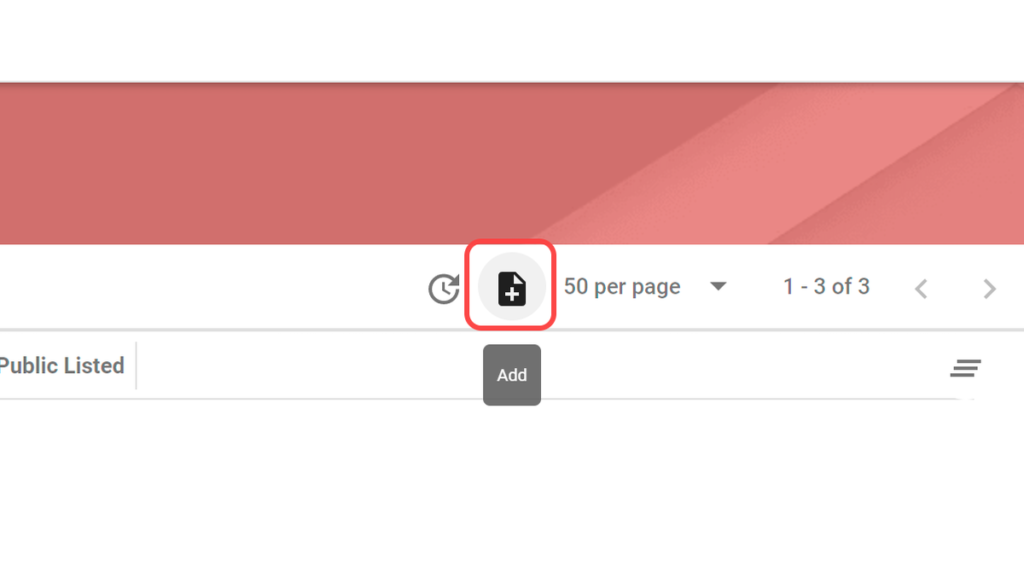
1. In the navigational sidebar click Setup > Sub Offices.
2. Click on Add icon on the right side of the screen.
3. Complete all of the required information similar to the Franchisee System Variables.
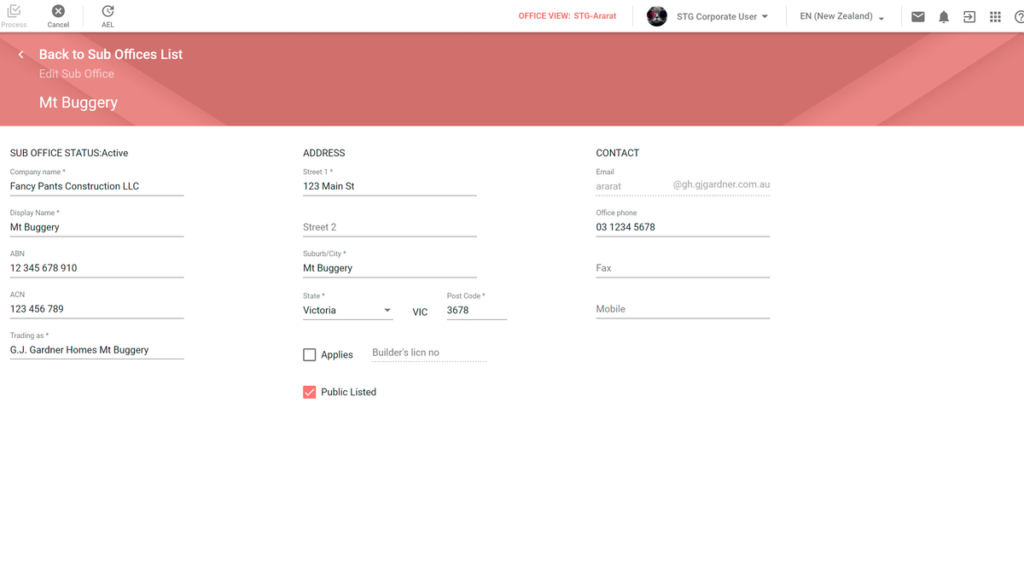
4. If the office is ready to be published on the website, select the Public Listed checkbox.

5. When completed click Process to save all changes.

6. Navigate to the Marketing Hub to add required details and enable the listing on the Marketing Hub. New sub offices are typically visible on the website within five minutes.
Editing and Removing Sub Offices
Only Corporate and Master users with access to the Builder Portal and Marketing Hub can edit sub offices.
1. In the navigational sidebar click Setup > Sub Offices.
2. Find and select the sub office that needs to be edited.

3. When completed click Process to save all changes. All changes to sub office details are typically reflected on the website within five minutes.
4. If the Public Listed checkbox for a sub office was not previously published on the website and the checkbox is now selected, navigate to the Marketing Hub to add required details and enable the listing on the Marketing Hub.
Removing Sub Offices
Only Corporate and Master users with access to the Builder Portal and Marketing Hub can remove sub offices.
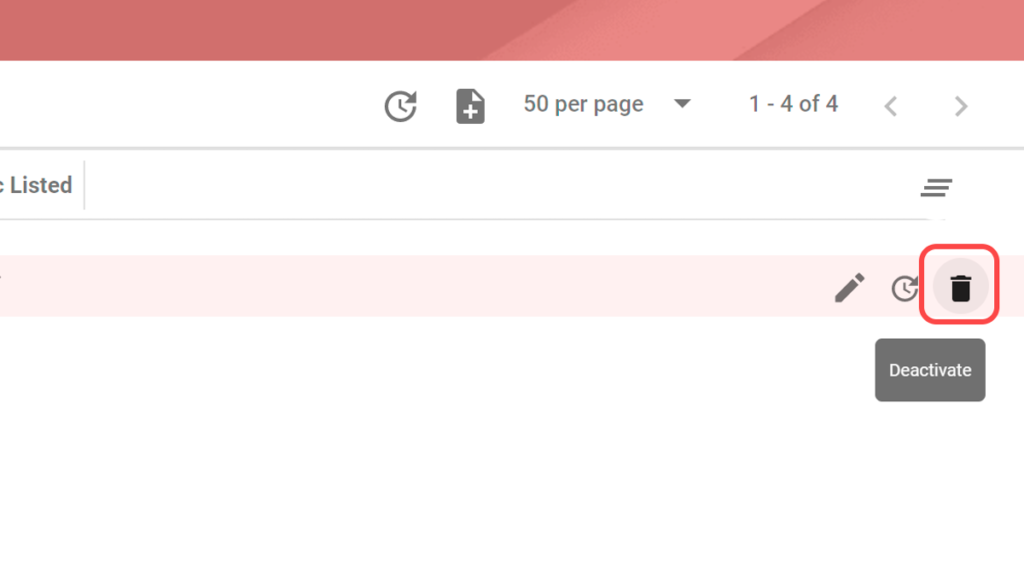
1. In the navigational sidebar click Setup > Sub Offices.

2. Find and select the sub office that needs to be removed.
3. To temporarily remove a sub office from the website, deselect the Public Listed checkbox.

4. To permanently disable the sub office and remove it from the website, return to the list of Sub Offices and click the Deactivate icon on the right.
5. Click Yes in the confirmation window.
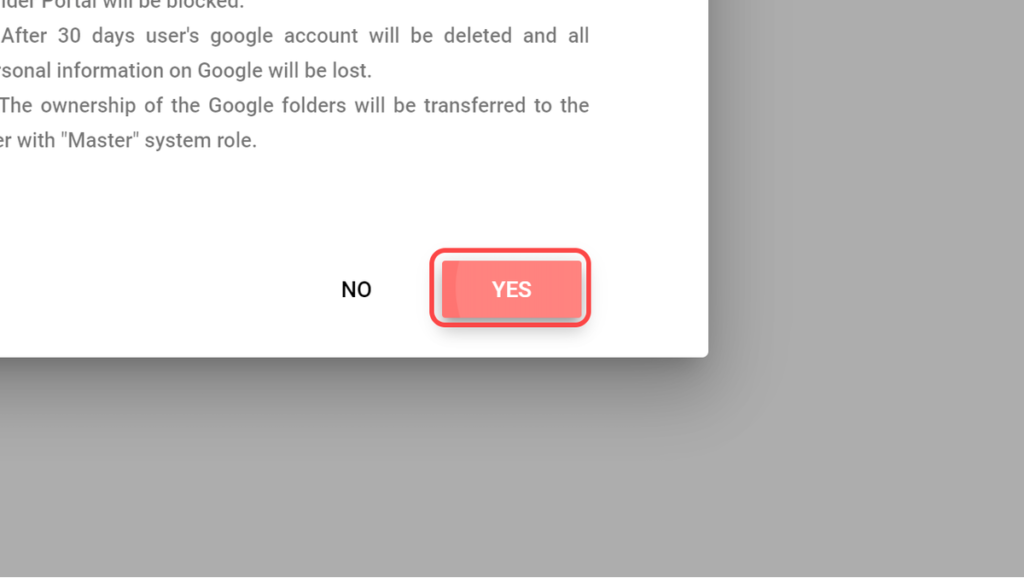
6. The Deactivated Sub Office is highlighted in red.